Preserving White in Watercolor Painting
Article by Vladimir London, Watercolor Academy tutor
If you want to improve your watercolor painting skills, then preserving white is the most important skill to master
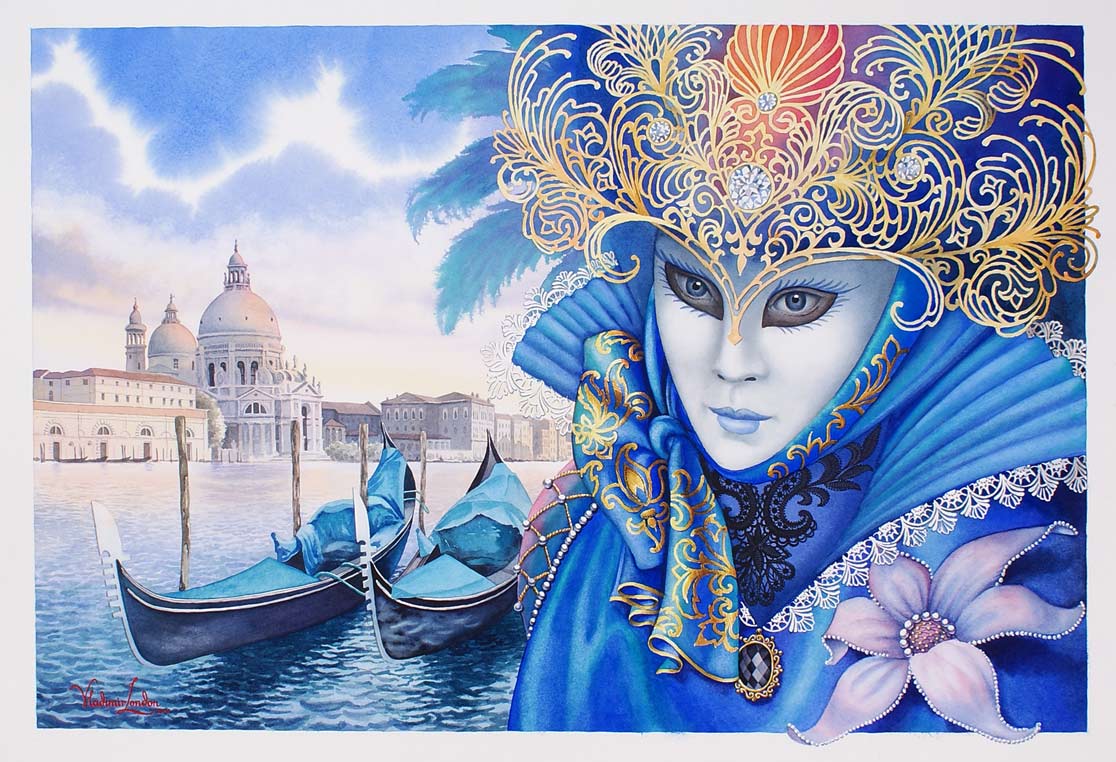
Illustration by Vladimir London, Watercolor Academy tutor
The greatest advance in watercolor painting was in the 18th-19th centuries when artists stop using white pigments. Even though "Chinese White" is still produced and available, you don't need to use it. Even a small area painted with this pigment can make a watercolor masterpiece look less professional or even ruin its appearance.
In professional watercolor, there is only one way to achieve whites and light tones: preserving the original whiteness of paper. When you fully master preserving white, your creative abilities will reach a new level.
There are many methods of preserving white and for simplicity I will separate them into three groups in order of preference:
- Painting around white areas, leaving the paper untouched.
- Removing paint from the surface by absorbing, wiping, washing or scraping.
- Preserving whites by masking in various ways.
Some methods are better than others and I will describe in more detail the pros and cons of each one.
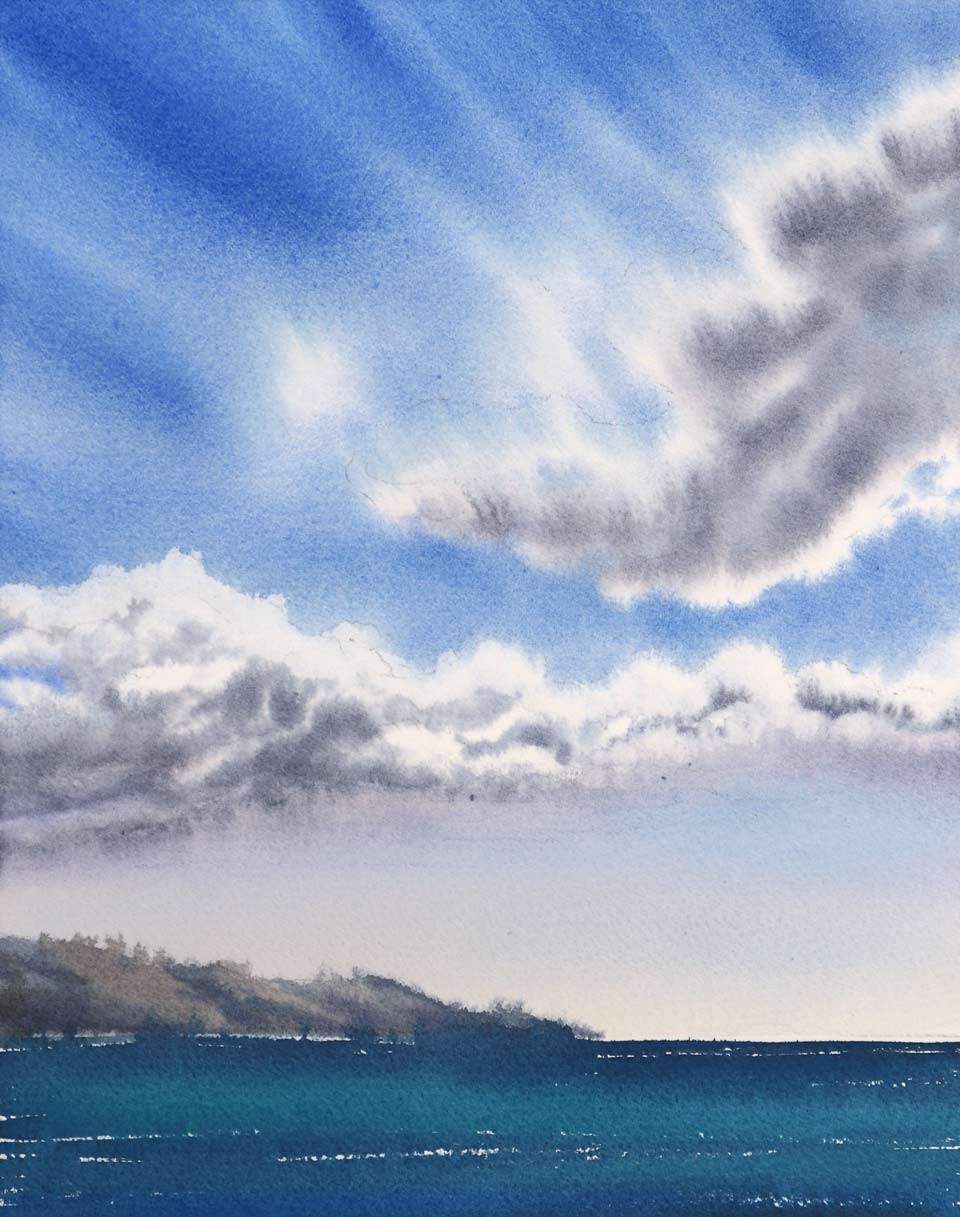
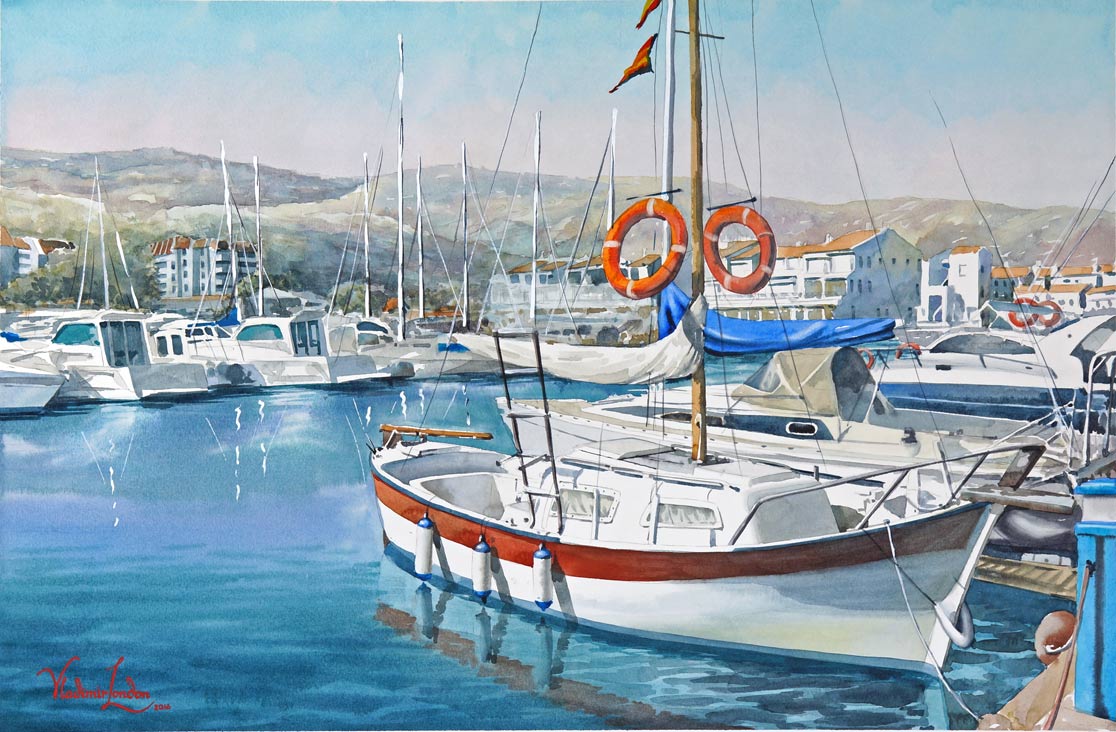
Painting by Vladimir London, Watercolor Academy tutor
The best way to get whites is to leave lightest areas in an artwork untouched. The skillfulness of how this is done separates professionals from amateurs.
In watercolor, paint can be applied onto wet, semi-wet and dry surfaces. In each case, painting around white areas presents different challenges.
Painting on wet paper gives soft edges between the color and the white area. Depending on how wet the paper is, how much water is loaded on the brush and the angle of the board, the paint will behave differently. It can run outward and downward, spread over a bigger area, and sometimes give unexpected boarders between white and color. Your skill level is determined by how well you can predict and control this flow.
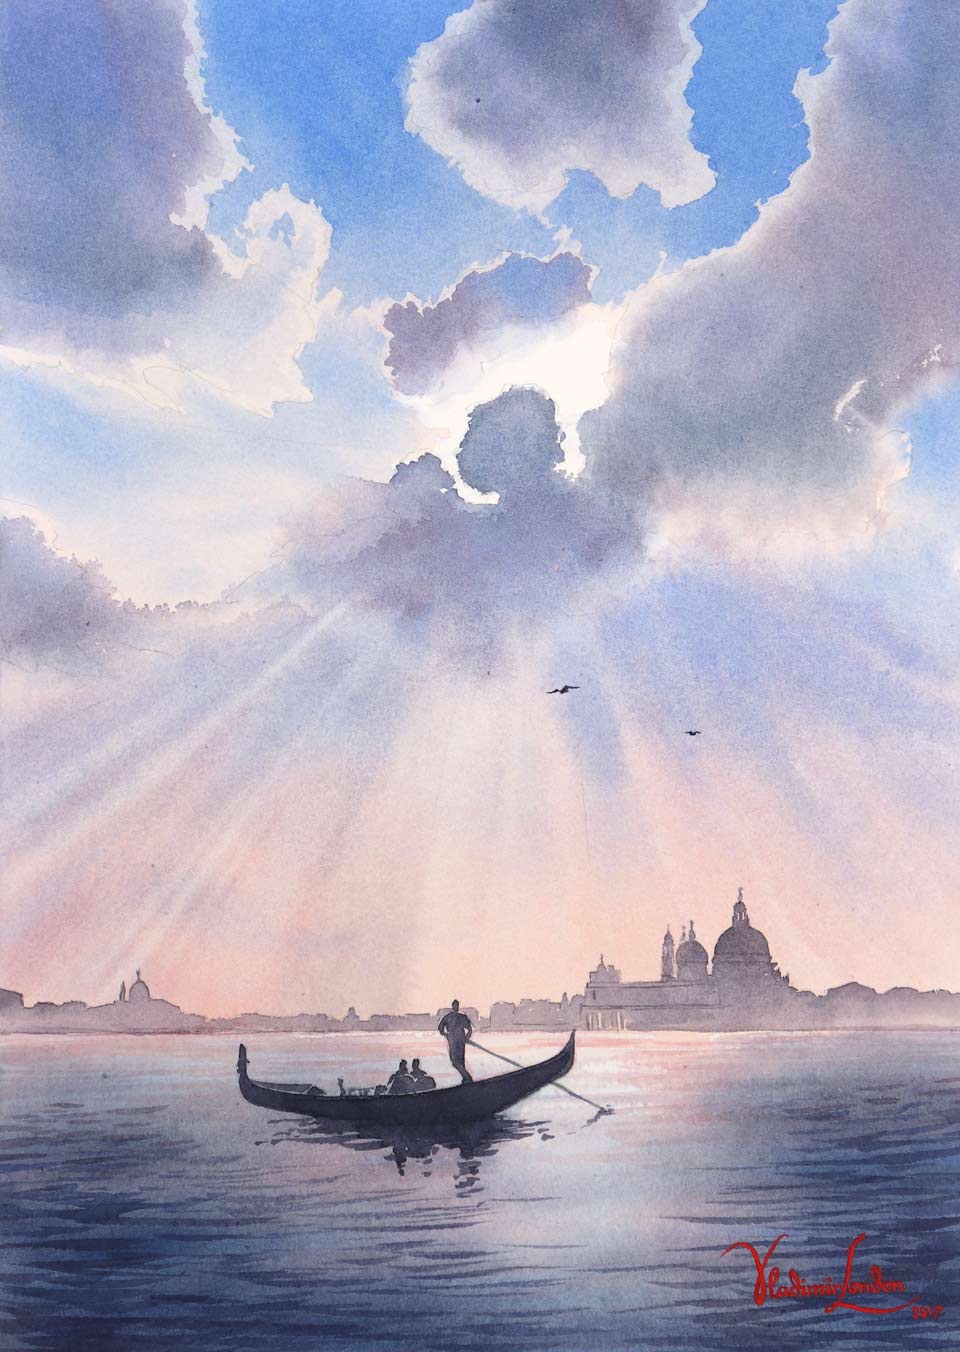
Painting by Vladimir London, Watercolor Academy tutor
Here's one of the most important rules in controlling the wetness of a watercolor surface when painting: keep the surface no more wet than is necessary to apply paint in your chosen style. The wetter the surface is, the less water needs to be on the brush and vice versa, a brush which is more loaded with paint can be used for drier paper surface.
When painting wet onto wet, the paint will spread wider than the original brushstroke. So, you need to leave a margin (1-2 centimeters) around intended white area. To control the paint spread, excess water can be absorbed with a sponge, paper tissue or with an almost-dry soft brush that takes water well. Very nice artistic effects can be achieved by this method. Water and gravity are your co-authors in painting on a wet surface. Unpredictability is an integral part of the process, which gives you additional drive and demands your concentration.
A semi-wet surface of paper performs similarly, although the spread of paint will be smaller and the gradation from color to white sharper. In this case, you can apply brushstrokes closer to the white area.
The challenge here is not so much in predicting and controlling the paint flow but in working quickly before the paper dries. To keep the paper moist, you can spray clean water over the part of the artwork you are working on with an atomizer or wet the reverse side of the paper with a wide flat brush if it is not fixed to the board. Alternatively, you can continue working on a dry surface, which brings us to preserving white using the wet-on-dry method.
If your intention is to achieve sharp edges between the white and the color, this is the best way to do so. It gives the full control over how the paint lays on the paper. With this method, intricate borders can be painted on a small or big scale.
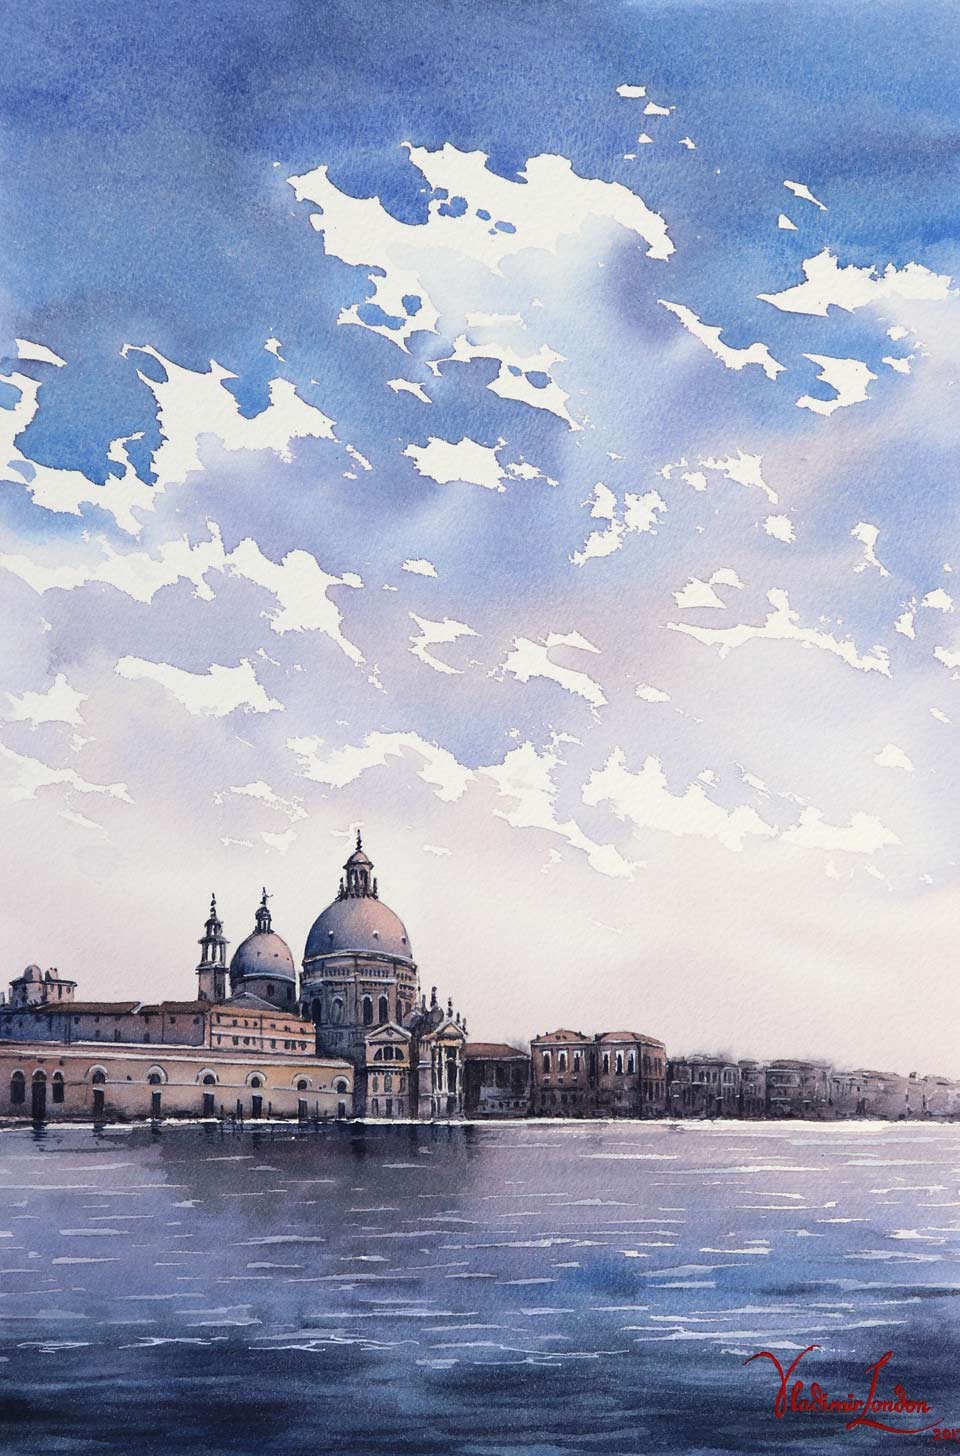
Painting by Vladimir London, Watercolor Academy tutor
However, it is harder to achieve softer edges with a fluid gradation from color to white when painting wet-on-dry. These gradations can be done using a gradated wash.
The other ways of preserving white are based on removing paint from the surface. This is less ideal if your goal is to preserve the pure whiteness of the paper. Some paints have more staining power and sometimes it is very difficult, if not impossible, to remove their tint completely without damaging the surface of the paper. With various success, pain can be removed from both wet and dry surfaces. Of course, it is much easier while the paint is still wet. This can be achieved by absorbing, wiping out, or washing out the paint.
You can absorb wet paint with a variety of tools like a sponge, paper towel, blotting paper, cotton buds, etc. A professional watercolor artist can replace all the above items with a clean semi-dry brush.
There is another way to replace paint pigment – by adding drops of water or applying clean-water brushstrokes. This is as if you are painting wet onto wet with water instead of paint. You need to remember, though, that adding too much water will present another challenge: uncontrollable paint run. Clean water can be also replaced with a light color, especially when a dark pigment is being replaced.
Painting by Vladimir London, Watercolor Academy tutor
Here are some good tips for you. If you use a natural sea sponge, wet it first with clean water and squeeze it out until semi-moist. In this condition, it will accept wet paint more readily. A paper towel or blotting paper can be slightly moistened with an atomizer before absorbing paint from a paper surface. This way, the edges between the white and the color will be softer. If you prefer to use a brush to wipe and absorb paint, keep one clean brush just for that purpose. In many cases, this method can play an integral part in the creative approach.
Wiping out wet paint can also be done using non-absorbent tools, like the handle of a brush or a paint knife. This way, thin, long lines of a lighter tint are produced on a wet surface. Although it is a fast and effective method, using it extensively is not recommended. The appearance of an artwork might become more "mechanical". The hard tools can also damage the surface of the paper, and that damage is un-repairable.
If the paint is already dry, removing it is more challenging. You can use a stiffer hog brush to wet the surface and work out the paint layer so the gum arabic dilutes to a degree when it is possible to remove the paint by the absorbing methods described above.
Sometimes, if an artwork is totally wrong, there is no other way but to wash out a certain area or even the whole watercolor. You can then wash it with a natural sponge and clean water.
If the whole artwork needs washing out, you can do so under running water or in a bath. You can also add a little bit of soap that dilutes the binder better than just clean water. The result is not guaranteed because some traces of dyes and strong paints can remain visible. Also, by washing paper, you remove more of the glue and the paper might take paint differently.
Scraping is another method of paint removal. In small areas, the paint can be scraped from paper with a sharp pencil knife or a scalpel. This is destructive because the sharp blade is physically taking off the pigmented fibers of paper. I would not recommend it, especially if you are planning on continuing to paint on top of the scraped area. Damaged paper does not look good and when it is painted over it takes liquid paint more readily, resulting in dull marks.
Fixing mistakes through absorbing, wiping, scraping and washing out will produce different results depending on the quality of the paper. Some thinner, softer papers of inferior quality will not take any "abuse" and the surface might even disintegrate, making further painting impossible.
Now it is time to say a few words about preserving white by masking. There are various ways to mask the paper surface to protect it from being painted over. They include the application of masking fluid, adhesive tapes, wax chalks and candles, and other similar materials.
I have to say from the very beginning that masking is not the best technique and I would encourage you to learn and practice preserving white through the methods described above. Many readers might passionately disagree with this view. I know artists who use masking extensively. Some of them consider masking fluid indispensable because their painting process depends on it. I do not object and only seek to give good advice to my Watercolor Academy students. With this in mind, I will describe the masking methods below.
Masking fluid works better than other masking materials. It protects the surface well and can be removed easily. In certain small and complicated details of an artwork, where sharp borders are essential, it can serve its purpose and speed up the workflow.
The biggest disadvantage of this method is the sharp edges. These borders do not always look good in watercolor. The masking fluid approach goes against what watercolor is famous for: its soft gradations and fluid edges. Masking fluid brushstrokes often look more like woodcut prints.
Masking fluid must be applied on a dry surface. It is better to use an old, inexpensive brush for it, because the fluid is not water-soluble and will ruin the brush. Before dipping a brush into the resin, you can wet it with diluted soap. This will make removing the resin from the brush easier. If you have to use some masking fluid, go for one that looks white when liquid; it will dry into a transparent film. I would not recommend any tinted fluids. They are easier to see when applying but their color will conflict with the colors of the artwork and bring an additional challenge to painting. It is important to double check that the film is completely dry before painting over it. You do not want to damage your expensive sable brush by painting over wet resin.
There are certain cases when masking with fluid is effective. For example, depicting intricate pattern designs where hard edges are needed and painting around the whites would be too time consuming. However, there are cases when masking will look amateur and it is better to avoid it. For example, white clouds in the sky, white waves in water, the texture of the ground, the foliage of trees and bushed, a portrait in a figure painting, etc.
The protective film has to be removed when the surface is completely dry. It is not recommended to leave the film on for a long time because it may become harder and perhaps impossible to remove. Also, avoid drying a masked artwork under direct sunlight because it bakes the resin into the paper fibers.
When removing the protective film, you may use a masking paper tape to collect small particles of the mask from the surface. Make sure your hands are washed with soap. Fingers always have grease and transferring this onto the paper is not in your best interest. In addition, even a clean finger might smudge dry paint, especially if it is not a dye but a pigment.
Protecting white with a self-adhesive masking tape is not widely used because of its limitations. Paint might flow under the tape but a tape with strong glue can damage paper surface when removed. It works best for straight lines because masking along curved lines is more challenging.
There is one case when masking tape does the job as required: fixing dry paper to the board and masking a white frame around the artwork. When wet, the tape might unstick from the paper surface. To avoid this issue, I sometimes add masking fluid at the very edge of the tape, applying it with a flat brush or a ruling pen. A thin line of masking fluid prevents water getting under the tape, even after multiple washes.
Masking white with waxy crayons or candles is called the "resist" method. It is a permanent solution. Paint will glide over the waxy marks, leaving unpleasant drops. Removing such protection is only possible by scraping, which is described above. For many reasons, this is one of the least attractive methods.
All the ways of preserving white listed above are also fully applicable in cases when not white but light areas of an artwork need to be protected.
So far, we have covered the important topic of protecting white and light areas in watercolor. It is time to describe the different ways of applying colors.
To learn how to paint in watercolor, enroll now
Watercolor Academy Online Course
A self-study, self-paced course where you can learn how to paint in watercolor by watching video lessons and doing assignments
- Unlimited access to 80 watercolor painting video lessons
- Lifetime membership without deadlines
- Unlimited support from the Academy tutors
- Constructive critique of your artworks
- Member access to the Academy's Art community
- Place in the Academy's Students Gallery
- Exclusive members-only newsletter and bonuses
- Watercolor Academy Diploma of Excellence in your name
One-time payment - Lifetime membership
$297 USD
ENROLL NOW
Personal Tutoring online + Online Course
One-to-one, unlimited and custom-tailored to your skills and needs Personal Tutoring by the Watercolor Academy teachers
- Everything in Online Course, plus:
- Dedicated team of art tutors
- Assessment of your current level of art skills
- Personalized curriculum tailored to your skills and goals
- Up to 100 art tasks with by-task assessment
- Unlimited one-to-one personal coaching with detailed per-task instructions and feedback
- Artwork critiques and results-oriented guidance
One-time payment - Lifetime membership
$997 USD
ENROLL NOW


