Watercolor Academy Online Course
A self-study, self-paced course where you can learn how to paint in watercolor by watching video lessons and doing assignments
$297 USD
ENROLL NOWA self-study, self-paced course where you can learn how to paint in watercolor by watching video lessons and doing assignments
$297 USD
ENROLL NOWOne-to-one, unlimited and custom-tailored to your skills and needs Personal Tutoring by the Watercolor Academy teachers
$997 USD
ENROLL NOWVideo lesson by Vladimir London
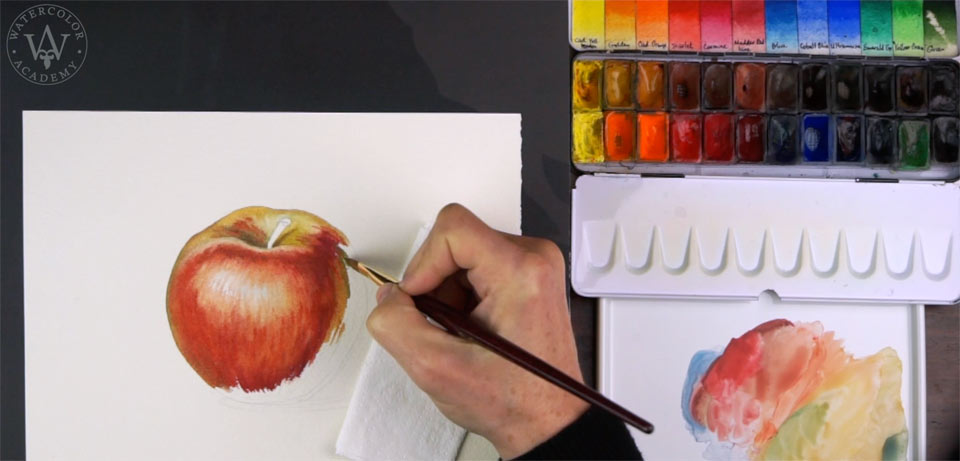
In this lesson, you will discover how to paint in watercolor using the 'dry brush on moist alla prima' technique.To demonstrate the 'dry brush on moist alla prima' watercolor painting technique, I will use the same object as in previous videos – an apple. After making a quick sketch in graphite pencil on watercolor paper, I will start by wetting the paper surface with a flat, synthetic brush. First, I will apply clean water on the reverse side of the watercolor sheet. This is high quality, 100% cotton watercolor paper. Its weight is 300gsm and its surface is 'cold-pressed'. I will now pick up the paper sheet and add water onto the plastic board.
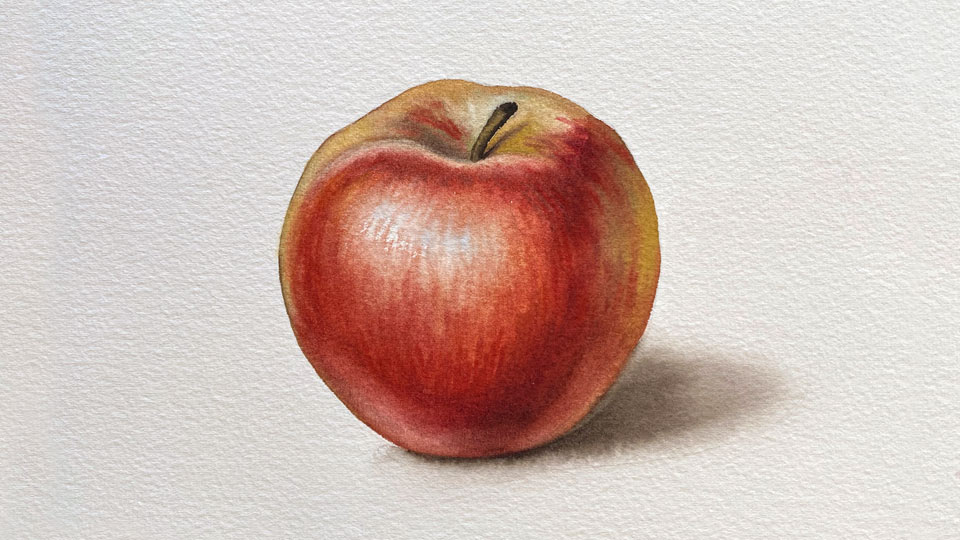
I place the watercolor paper onto the board face-up, so that the layer of water is trapped between the plastic board and the reverse side of the paper sheet that has already been moistened. I then wet the front side as well. This has to be done thoroughly and without missing any dry spots. After a few minutes, the watercolor paper will expand in size and absorb surface water deeper into the fibers. I then remove excess water from the board and leave the paper to dry for 10 or 15 minutes, waiting until its glossy surface first becomes satin and then moist. When the paper becomes moist, I can start painting. For this, I use a small flat natural-hair brush from Escoda. Such a brush takes less water than the equal-width round one, which is important for this particular watercolor painting technique, because I am making a dry brush painting. The term 'dry brush' does not literally mean that the brush is totally dry; it is actually moist because I absorbed water from its belly with a paper napkin.
The name of this watercolor painting technique, 'dry brush on moist alla prima', fully describes what this technique is about. Both paper and brush should be moist, and the artwork has to be done in one attempt. Because this degree of wetness is so important for this watercolor painting technique, I need to say a few words about the meaning of 'moist paper' in this demonstration. To prepare a watercolor paper sheet for this technique, it has to be soaked in water – you can do this with a flat, soft brush or a sponge. This involves first applying water onto the reverse side of the paper sheet, and then wetting the front side as well. If you need an underdrawing, don't forget to make it beforehand, because drawing on moist or wet paper using a graphite pencil is not a good idea.
After wetting the paper sheet on both sides, and placing the paper onto the plastic board (or any non-water absorbent support), you need to wait for the paper to go through different degrees of wetness. The surface that is soaked in water will first become glossy, because water reflects light; but as the water evaporates, the front side of the sheet will become satin. This is when it is no longer highly reflective but feels wet on touch. After several more minutes of drying, the paper will become moist. It will look almost dry, but on touch will feel cool, because water is still evaporating. This is the moment when you have to start painting.
By now, there is a very thin layer of water between the watercolor paper sheet and the plastic board. This is because water cannot evaporate through the plastic and the only way is up, through the whole thickness of the paper sheet. Because 300gsm is a fairly thick type of paper, it will take some time for it to dry completely. This means that you have 20-40 minutes of painting time before you need to re-wet the paper surface on its backside. You can do this with a flat brush by lifting half of the sheet from the board, applying clean water and placing paper back onto the board. Then, do the same for the remaining half of the sheet.
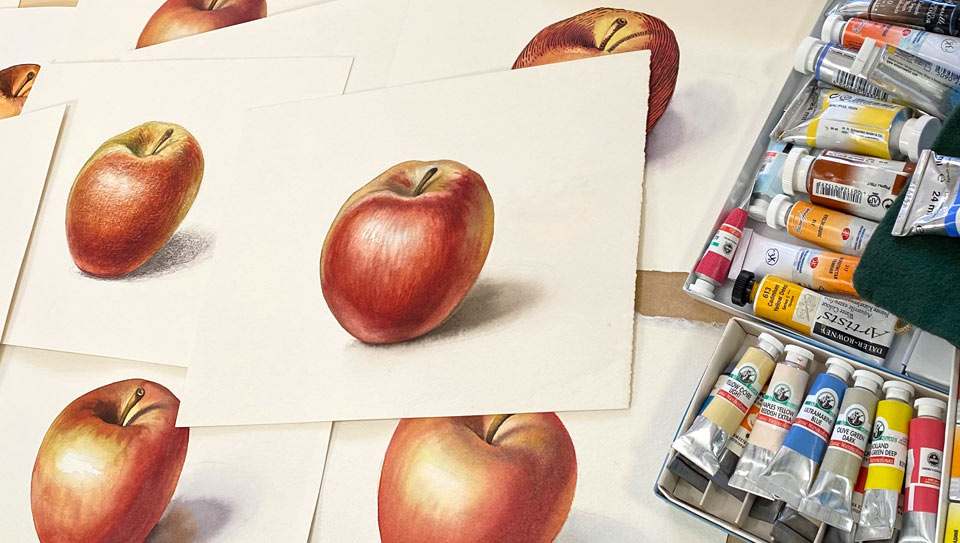
Because this artwork is a very first sketch, I do not have to re-wet the paper because it is still moist. For the bigger artworks, apart from wetting the reverse side, you can also apply water on parts of the front side which have not been painted on yet. I have spent a lot time talking about moist paper for a reason. This is the most important condition for the 'dry brush on moist' painting technique. I don't want to spend time and distract your attention by talking about colors, pigments and tonal values, because they are the same in every video lesson which involves me painting an apple. What is more important for you is to receive the information about the painting technique, how to use it, what to pay attention to and which rules to follow.
The next most important condition for the 'dry brush on moist alla prima' painting technique is how wet the brush is and how much pigment to load. I have already mentioned that dry brush doesn't literally mean dry, but moist. Unlike with juicy washes, when a brush is fully loaded with paint, for this technique the situation is very different. The mixed pigments are picked up from the palette with the tip of the brush. The brush belly is free of pigments. It also has very little water. On a totally dry paper surface, such a brush would make very dry brush strokes. However, because in this technique the paper sheet is moist, it takes pigments from the brush tip regularly. Such brush strokes will stay in place without diffusing, and that is why it is very easy to paint fine details or large areas that will not flow and run away. This is what makes this painting technique so versatile.
When painting dry brush on moist, it is possible to make sharper and softer brush strokes, depending on how much water the brush contains. A drier brush is good for small and hard edge details, and just a bit more moisture on the brush tip will make softer borders of the brush strokes. Of course, you do not have to use the same small brush for the whole artwork. A much larger round brush would also be suitable for the dry brush technique. I will now talk about how much pigment should be loaded on the brush. This would depend very much on how dark or light you would like to go with your artwork. It is obvious that, for darker tonal values, you need to use darker pigments. However, what if you are producing a monochrome artwork in one color? Due to the nature of this technique – 'dry brush on moist' – there is no luxury of diluting watercolor paint with a lot of water to obtain a light tint. The brush has to be damp, not soaked with water, regardless of whether you paint dark or light tones. So, the only way to vary tonal values is to load a larger or smaller quantity of pigment on the brush. You may notice that there is very little water on my palette. Should I pick it up and turn it sideways, the paint will remain where it is and not run. Therefore, it is not about how much water I add to dilute a pigment, but how much pigment I load onto the brush. So far, I have covered in depth the first part of this watercolor technique name – 'dry brush on moist'. Now, I will talk about alla prima.
By definition, an alla prima painting has to be made from the first attempt. For this technique, it means that an artwork has to be finished whilst the paper is moist. If the watercolor dries before it is complete, it would not be possible to soak an entire paper sheet in water without affecting the paint layer. So, I would have to continue this picture by using other watercolor painting techniques, for example wet-on-dry, dry-brush-on-dry, or a multilayer indirect painting method. That is why I have to constantly keep an eye on how wet the paper is. When it becomes drier, I have to add more clean water to keep it moist.
Please do not worry if you did not grasp something from this short introduction to the 'dry brush on moist alla prima' painting technique. In the Watercolor Academy course, you will see many more video lessons where this painting technique is fully explained and demonstrated in front of your eyes.
A self-study, self-paced course where you can learn how to paint in watercolor by watching video lessons and doing assignments
One-time payment - Lifetime membership
$297 USD
One-to-one, unlimited and custom-tailored to your skills and needs Personal Tutoring by the Watercolor Academy teachers
One-time payment - Lifetime membership
$997 USD


