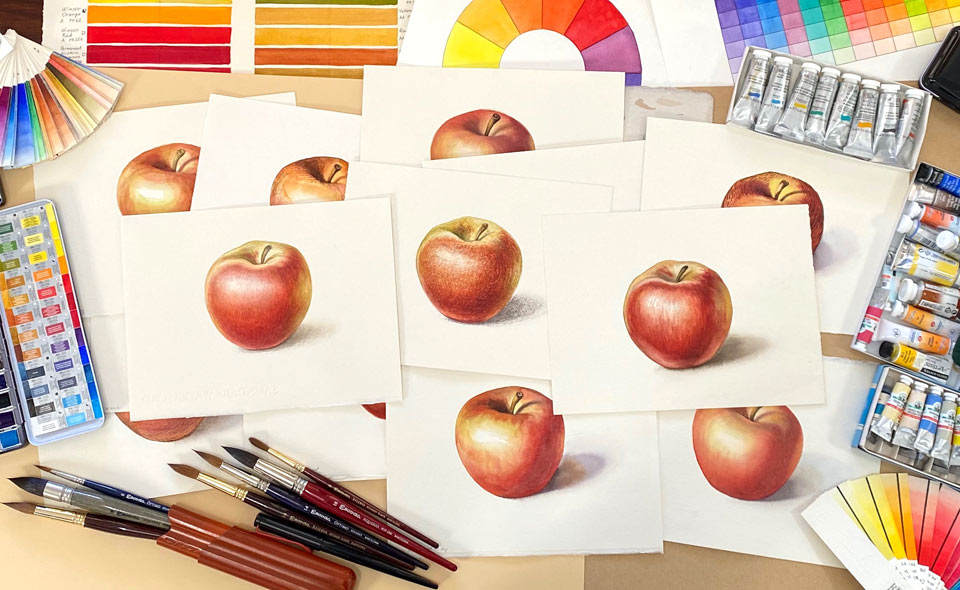
Watercolor Academy Online Course
A self-study, self-paced course where you can learn how to paint in watercolor by watching video lessons and doing assignments
$297 USD
ENROLL NOWA self-study, self-paced course where you can learn how to paint in watercolor by watching video lessons and doing assignments
$297 USD
ENROLL NOWOne-to-one, unlimited and custom-tailored to your skills and needs Personal Tutoring by the Watercolor Academy teachers
$997 USD
ENROLL NOWVideo lesson by Vladimir London
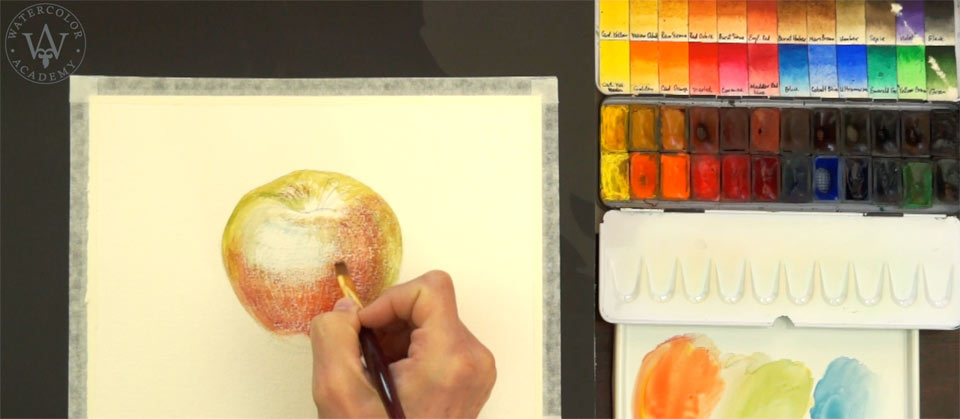
In this video lesson, you will discover how to paint in watercolor using the dry-brush on dry technique. For this lesson, I will use the same object as in previous videos – an apple. To begin with, I will make a quick sketch in graphite pencil on wtarecolor paper. This is high-quality 100% cotton watercolor paper, which has a 300gsm weight and a cold pressed surface. This type of paper surface has a medium tooth, which is important to mention because it will play an important role in this artwork. For painting, I am using two flat natural-hair brushes from Escoda.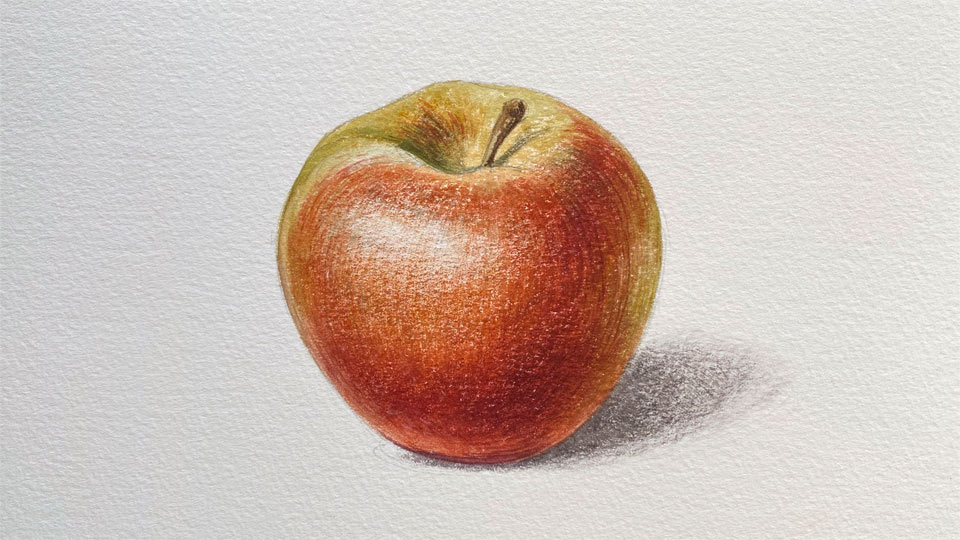
As usual, I begin painting with light colors and progress from light to dark tones. First, I mix pigments on the palette using very little water and then absorb excess water from the brush belly with a paper napkin. The mixed pigments remain on the tip of the brush. I make very light and swift brush strokes with the brush tip. The pressure is so light that paint only grips to the tip of the paper tooth, leaving the dips of the tooth unpainted.
The name of such a technique is 'dry-brush on dry'. The term 'dry-brush' does not literally mean that the brush is totally dry, but that there is very little water on it. With such a brush, it is not possible to make full juicy brush strokes. As you can see, I am purposely absorbing excess water from the brush belly, meaning that the brush is moist. Now, I have to say a few words about paper. Its surface is dry, unlike in the technique explained in the previous video lesson, 'dry-brush on moist'. To keep the paper fully dry, I also use a hairdryer so that it won't become moist, as would usually happen during a normal drying process.
The tooth of the watercolor paper plays an important role in this painting technique. The term 'tooth' refers to the paper texture. There are several kinds of watercolor paper: 'hot pressed', 'cold pressed' or 'not', and 'rough'. 'Hot pressed' paper is the smoothest, with very little texture on its surface, which makes it ideal for pen-and-ink technique and small-detail artworks. Next, we have 'cold pressed', which I am using now; this type of paper is also called 'Not', because it is not hot-pressed. This paper contains more 'tooth', because on its surface, there are many tiny bumps and grooves which create a wonderful paper texture.
The third type of watercolor paper is 'rough' – as the name suggests, the paper surface is very rough. In general, rough paper is less-suited for small-scale artworks due to the irregularities of its texture.
By looking at the artwork in progress, you can guess why the choice of paper tooth is so important. You can see many white, unpainted gaps on the apple skin. They appeared because the damp brush only glides on top of the texture bumps, and does not touch the bottom of the tooth. This creates an interesting textured effect, which is very characteristic to the 'dry-brush on dry' watercolor painting technique. This means that the paper tooth actually becomes visible on the artwork because it is highlighted with paint. The more layers applied on top of each other using this technique, the less white spots remain on the apple in this artwork.
Another important thing is how much pigment should be loaded onto the brush. This depends on the tonal values that you would like to depict. Not to confuse this explanation by light and dark pigments, I will take an example of a monochrome artwork, where only one pigment is used. The 'dry-brush' technique, by definition, cannot have juicy brush strokes of tints well-diluted with water. The same damp wetness of the brush has to be used for both light and dark tones. The only way to achieve lighter and darker values is by loading less or more pigment onto the brush respectively, and by applying the pigment onto the paper in fewer or greater numbers of layers, or quantity of brush strokes. This means that the darker tonal values are built up by applying dry brush strokes layer on layer.
The tint of a color in the dry-brush watercolor painting technique does not depend on how much paint is diluted with water. Instead, unpainted white paper gaps optically create an illusion of light tints. Such white spots, in turn, depend on the paper tooth and the character of brush strokes. You may also notice that the palette which I am using is almost dry. Should I pick the palette up and turn it on its side, not a single drop of water will run down. This is an excellent consistency of paint for the dry-brush technique.
One of the advantages of the 'dry-brush on dry' watercolor painting technique is that it is very easy to have full control over the paint flow because the paint just does not flow – it is almost dry. When you paint it onto paper, it will stay as is; pigment particles will grip to the surface and will not sink into the paper fibers. When the paint fully dries, it will not change its color and tone dramatically. Because the paper is dry, it will not buckle like paper soaked in water. That is why stretching the paper for the dry brush technique is optional; it will keep its flat shape without stretching. It is very easy to keep control over tonal values because they are developed in dry-brush very gradually – layer by layer, brush stroke by brush stroke.
It is perfectly possible to paint in 'dry-brush alla prima' or in multiple sessions. Also, paint wastage, when using this technique, is very minimal. However, all of these advantages come with one big drawback: the dry-brush technique artworks look dry. This is not what watercolor is famous for, even because the name of this medium contains 'water'. You may therefore wonder why I made an artwork of an apple using the 'dry-brush on dry' watercolor painting technique. The answer is to demonstrate to you what this way of painting is all about.
Although it is perfectly possible to make a full artwork from beginning to end in just a 'dry-brush on dry' technique, I would not recommend it as a main way of painting. Instead, you can use the 'dry-brush on dry' as final steps of the multilayer artwork when you need to add a texture in some places. You have to do this with caution though, because overdoing 'dry-brush' may spoil how the artwork looks...
A self-study, self-paced course where you can learn how to paint in watercolor by watching video lessons and doing assignments
One-time payment - Lifetime membership
$297 USD
One-to-one, unlimited and custom-tailored to your skills and needs Personal Tutoring by the Watercolor Academy teachers
One-time payment - Lifetime membership
$997 USD


