Watercolor Academy Online Course
A self-study, self-paced course where you can learn how to paint in watercolor by watching video lessons and doing assignments
$297 USD
ENROLL NOWA self-study, self-paced course where you can learn how to paint in watercolor by watching video lessons and doing assignments
$297 USD
ENROLL NOWOne-to-one, unlimited and custom-tailored to your skills and needs Personal Tutoring by the Watercolor Academy teachers
$997 USD
ENROLL NOWVideo lesson by Vladimir London
In this video lesson, you will discover how to use the gradated wash method when painting a watercolor.
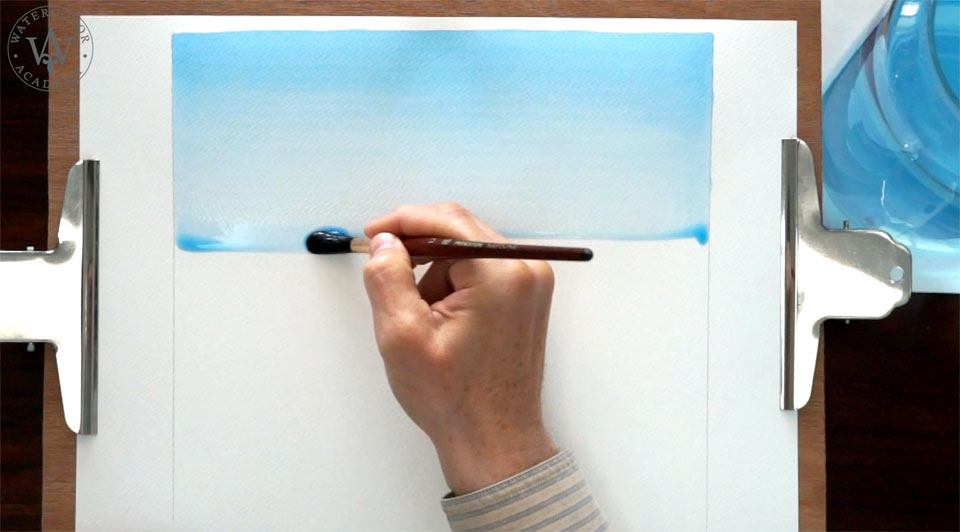
For the purpose of this exercise, watercolor paper is fixed to the board, and the board is titled at about 15 degrees. I will use a middle-sized synthetic hair brush to make the wash, and I am using blue paint which is already pre-mixed in the saucer.
On the watercolor paper, I mark two vertical lines with a graphite pencil; I will make the wash between these borders. You may notice that the amount of the paint mix is not as big as I would have used for the plain wash. In fact, I will probably run out of this paint somewhere in the middle of this paper sheet. This is exactly how much pigment I need for the gradated wash.
The first line of blue paint is applied along the top edge of the paper sheet. I load the first stripe with enough paint so that the bead of liquid collects at the bottom edge. The next brush stroke goes along the bead, overlapping it slightly, so that the paint flows down from the first brush stroke to the next one. To form a nice loaded bead, I apply the third brush stroke in a horizontal manner.
Before continuing, I add a full brush load of clean water into the saucer and stir the mix quickly and thoroughly with the brush. Then, I load the brush with this mix and apply the next horizontal brush stroke. After that, I wash up the brush and apply another brush load of clean water into the paint mix. This dilutes the paint a little bit more and I do another brush stroke with this tint. Once again, I wash the brush and add a bit of water into the saucer. After stirring the mix, I paint more horizontal brush strokes with an even more diluted tint.
By now, I am sure that you understand the sequence being used here. After each brush stroke, I wash the brush, dilute the mix even more, and apply another brush stroke of a slightly lighter tint. I will repeat this sequence until the very end of the wash.
Because I am constantly adding clean water into the saucer, the paint tint becomes progressively lighter, causing the tonal value of this wash to also become lighter with every brush stroke. This results in a smooth gradient from dark to light tones, as I go from the top to the bottom of this paper sheet.
By now, you can see why I didn't mix much paint at the beginning. I only need enough paint to start the process – after this, I add more and more water into the saucer. This means that although I never run out of the mix, it will become lighter and lighter. Should I continue this sequence for a very long time, I will eventually end up with clean water in the saucer.
The understanding of how much paint is required at the beginning comes with experience. But on average, if you mixed enough paint that would cover, let's say, anything between 30 and 50% of the area you are intending to paint using the gradated wash technique, the amount demonstrated here would be enough. The remaining water is then added during the process.
In order to achieve a nice-looking gradient, there are several rules which need to be followed. As well as pre-mixing the correct amount of pigment, you also have to make sure that you load the brush with an equal amount of paint for every brush stroke. Also, the amount of water added into the saucer after each brush stroke must be consistent. Every brush stroke has to be applied at a constant speed with equal time intervals between brush strokes. If you take a break and give more time after some of the brush strokes, the pigment in the bead will sink into the paper fibres deeper than during the previous brush strokes, which may result in a visible border. If you miss any unpainted gaps between brush strokes, do not return to fix them. Instead, continue the wash to the very end. Then, let the paper fully dry – after it is dried, you will be able to accurately fill in the missed white gaps with a thin brush. If you touch the wet area of the wash somewhere above, it will ruin its smooth gradation. Furthermore, it is very important to keep a sufficient and constant bead at the bottom edge of each brush stroke. If there is not enough water in the bead, the paint will not be able to flow from one brush stroke to another. However, an overloaded bead can accidentally run down, which may ruin your wash, because even if you try to remove a running bead with a paper towel, the paper surface will still be damp, and therefore will take paint differently.
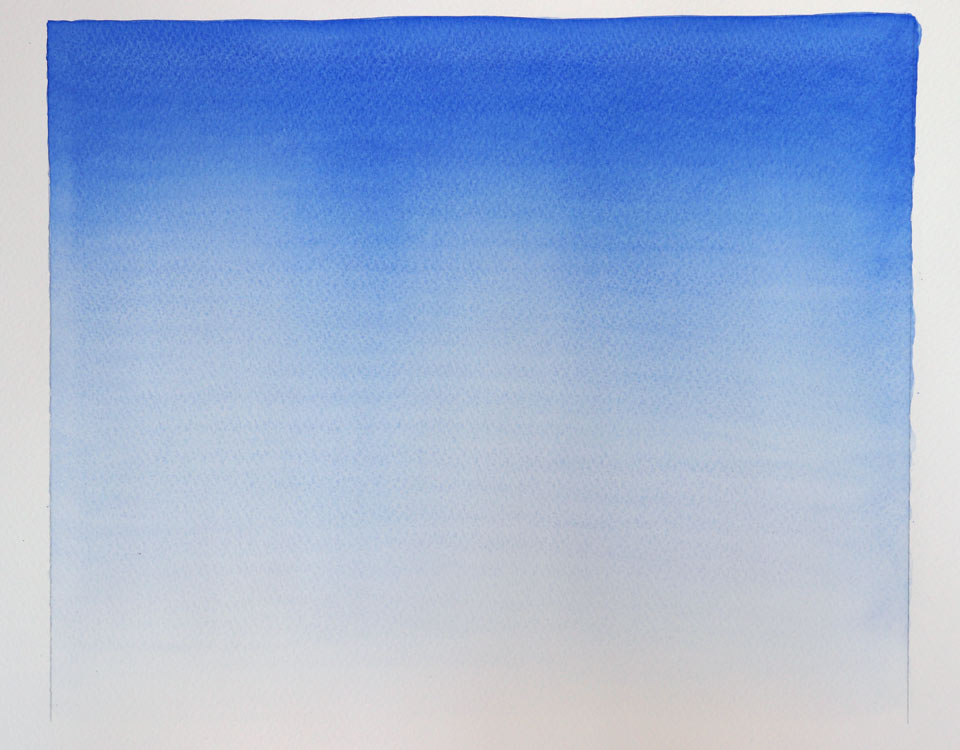
I hope that you already have an idea where the gradated wash can be used in your creative projects. Such a wash produces an appearance like a clear and cloudless blue sky, and is ideal if you need a smooth gradation from dark to light tones. This gradated wash can continue until the very end of this sheet, but I have a better idea for this video lesson. I will finish this wash here, by wiping out excess water with a damp brush, so that it looks like the sky ends alongside the horizon.
Now, I will pre-mix the same blue pigment in another saucer and I will start another gradated wash – this time, working from light to dark.
The first brush stroke for the second wash is done with exactly the same tint that I used for the previous wash. Because it is very light, it nicely blends with the previous brush stroke.
Now, I take a little bit of blue pigment and add it to the light mix. After stirring the mix, I load the brush and make another brush stroke, slightly overlapping the previous one. Once again, I add more blue pigment to the light mix and make another brush stroke, which is a tiny bit darker than the previous one.
I repeat the sequence of adding blue pigment into the mix, stirring it with the brush and painting another stripe onto the paper. I continue to follow the same steps until I reach the end of this wash.
With every new brush stroke, the gradient becomes increasingly darker. The same rules must be applied here: you have to keep a constant speed of painting; add equal amounts of blue pigment into the mix after each brush stroke; load the brush with the same amount of paint for every stripe; keep an eye on the bead so that it doesn't dry out or become overloaded with paint; and do not mix any unpainted gaps between brush strokes. Also, under any circumstances, do not fix or improve an already painted area until it is fully dry. When it comes to washes, there is only one way – forward. You cannot go back and paint something which is still wet. Let the paper fully dry and then fix any mistakes if needed.
The rules are quite simple, but they only come with practice. Don't be discouraged if your gradated wash doesn't end up with a smooth gradient. As well as your skills, there are many things which can influence the quality of a gradated wash. This includes the choice of watercolor paper – using a good quality watercolor paper sheet is recommended. Some watercolor paints are better suited for washes than others – dyes and very finely grinded pigments are the best. The quality of the brush also plays an important role in the wash; it should be able to take a lot of paint, and release the paint nicely onto the paper. The tilt of the board is also important – paint will flow slowly with a very shallow tilt, whereas the bead might run down uncontrollably if the angle of the board is too high.
A self-study, self-paced course where you can learn how to paint in watercolor by watching video lessons and doing assignments
One-time payment - Lifetime membership
$297 USD
One-to-one, unlimited and custom-tailored to your skills and needs Personal Tutoring by the Watercolor Academy teachers
One-time payment - Lifetime membership
$997 USD


