Watercolor Academy Online Course
A self-study, self-paced course where you can learn how to paint in watercolor by watching video lessons and doing assignments
$297 USD
ENROLL NOWA self-study, self-paced course where you can learn how to paint in watercolor by watching video lessons and doing assignments
$297 USD
ENROLL NOWOne-to-one, unlimited and custom-tailored to your skills and needs Personal Tutoring by the Watercolor Academy teachers
$997 USD
ENROLL NOWBy Anna Ivanova
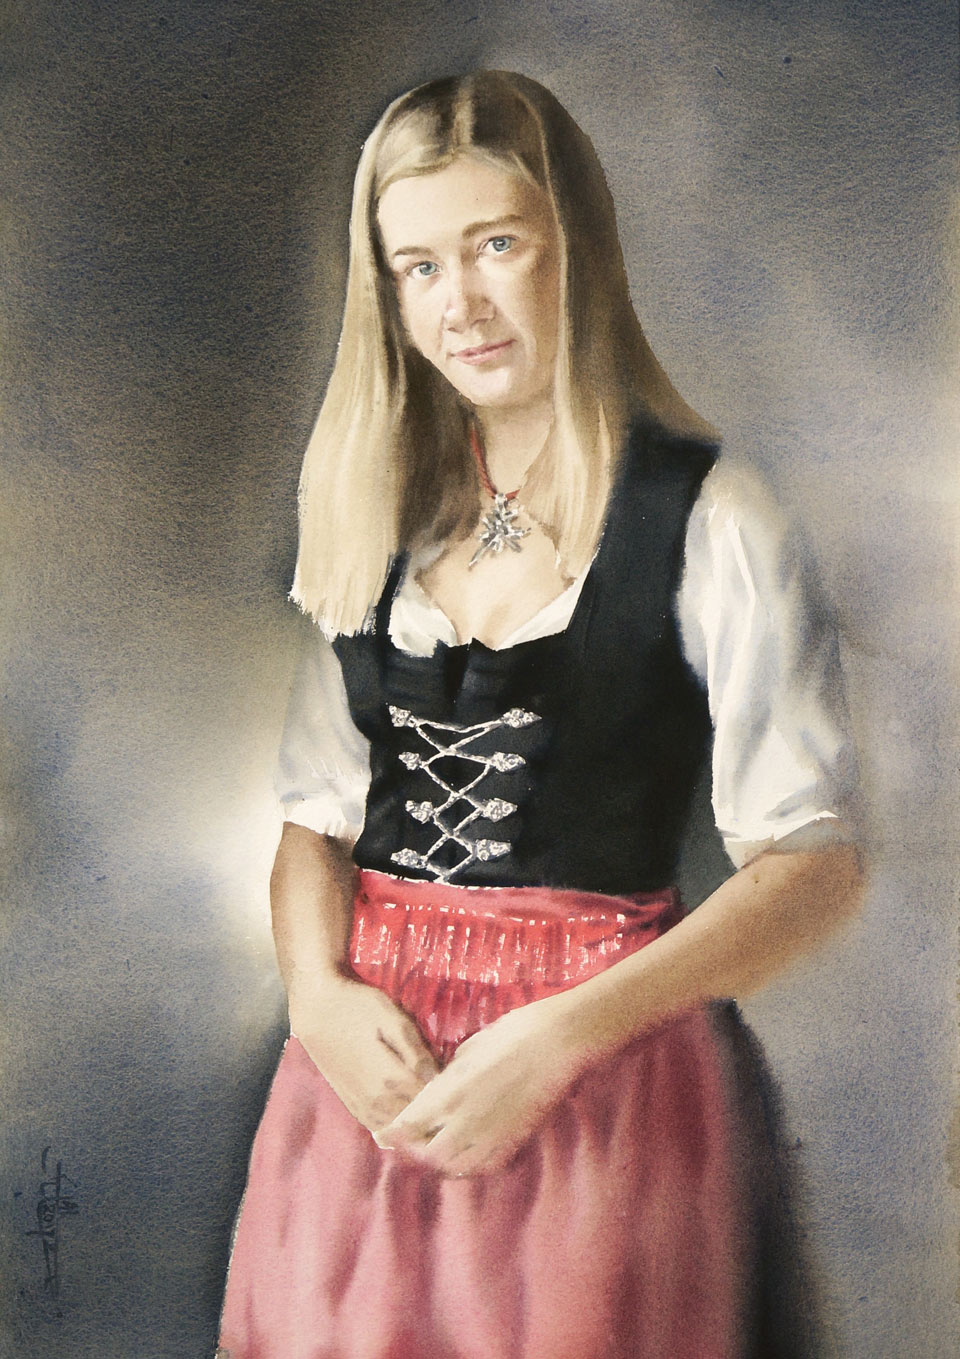
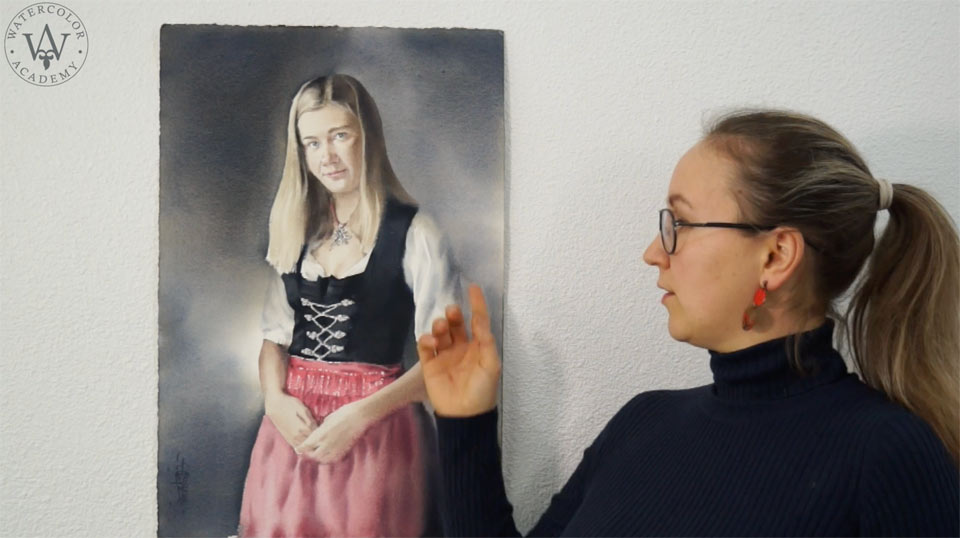
The topic of today's video lesson is a portrait of a girl in an Austrian folk costume, consisting of a black dress, a white blouse, and a red apron. Such German and Austrian costumes have become quite popular lately. Here is the finished portrait I will have by the end of this video lesson.
This painting is done on 300 gsm cold-pressed watercolor paper which I soak with water on both sides, place on a plastic board, and wait for about 15 minutes for the paper to absorb the water and dry enough to become moist. The underpainting for the skin color is mixed from raw sienna, alizarin crimson, burnt umber, and a bit of phthalo blue.
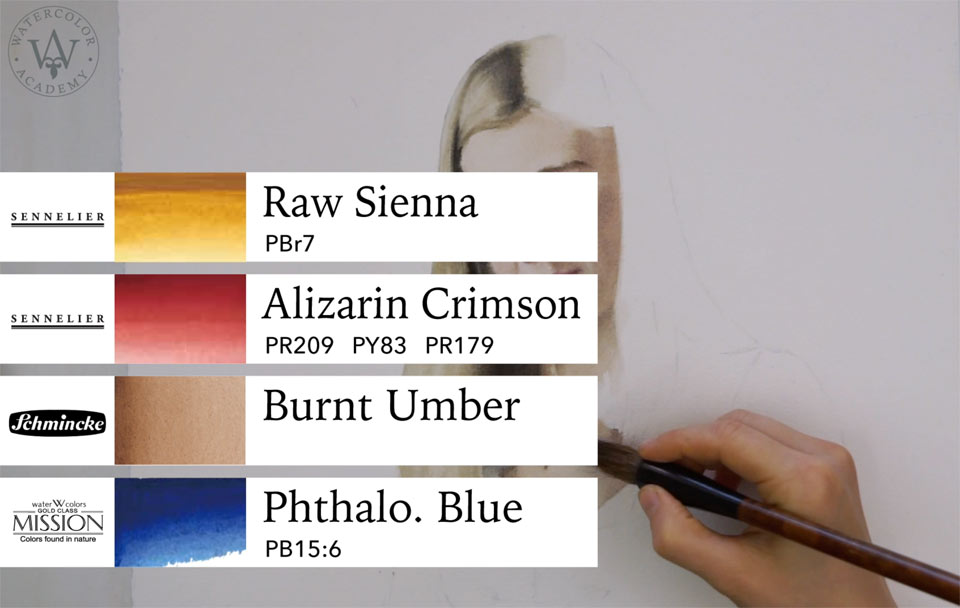
I painted around the highlight on the nose, preserving white space, and also left white highlights of the eyes. The combination of only four pigments can give a wide range of different colors and tones. You may see that for the pinkish nose, I used less phthalo blue and burnt umber, but more alizarin crimson; and for the darker, shadowed area, I go a bit heavier on the burnt umber. A portrait with white eyes and mouth looks a bit strange at the moment. But don't worry; I will take care of the facial features a bit later after painting the main tones and colors of the face.
The most important information you will benefit from is not which paints I used, but rather how to do the painting technique I am using. You may use the paint names I mentioned or substitute them with different pigments and achieve very similar colors and tones. So, the choice of pigments is not so important. What is critical for this painting technique is to get the right balance of paper wetness and amount of water on the brush. I mentioned that the paper should be moist which is almost dry on the surface but cool to the touch.
Because the paper dries quite quickly, I must re-wet its reverse side from time to time, and also add a bit of water on the front side. Another part of the equation for the dry-brush-on-moist watercolor painting technique is the amount of water on the brush. As the name of this technique suggests, the brush should be almost dry. I put the pigment mix only on the tip of the brush. The belly of the brush remains damp and clean. To keep it this way, I may blot excess water using a paper napkin after loading paint on the brush. Such balance of wetness makes it possible for brush strokes to keep hard borders on the moist paper. Because the paper contains some water, it takes pigment from the brush quite well.
The brush strokes do not flow and diffuse on the paper surface, but stay in place and give very nice edges that are not too sharp and not very diffused. These soft but well-defined borders are quite challenging to achieve using any other watercolor painting technique. This is why the dry-brush-on-moist way of painting is very special. Another big advantage of this painting technique is that you're able to paint watercolors faster by painting alla prima, which means in one session. I have to say that this can also be a disadvantage, if you do not have enough time to complete an artwork in one go and have to come back to it the next day or in several days. By that time, the paper will be dry and it won't be possible to re-wet it the same way and continue painting where you left off previously, working dry-brush-on-moist. That is why I tend to complete one area of the piece from the beginning to the end before continuing to paint other parts of the picture. For the darker, shadow areas of this portrait, I'm adding more burnt umber into the mix.
When it comes to painting lips in portraits, students often ask me which colors to use. It really depends on the other colors you've been using for the same portrait because it's not about a particular pigment but how its color looks in combination with the other colors and tones on the portrait. In this case, I'm using Quinacridone magenta mixed with a bit of burnt umber. This magenta, from the Windsor & Newton range of watercolor paints, is very permanent and will not fade over time. However, it doesn't mean every time you paint lips you have to use the same pigment.
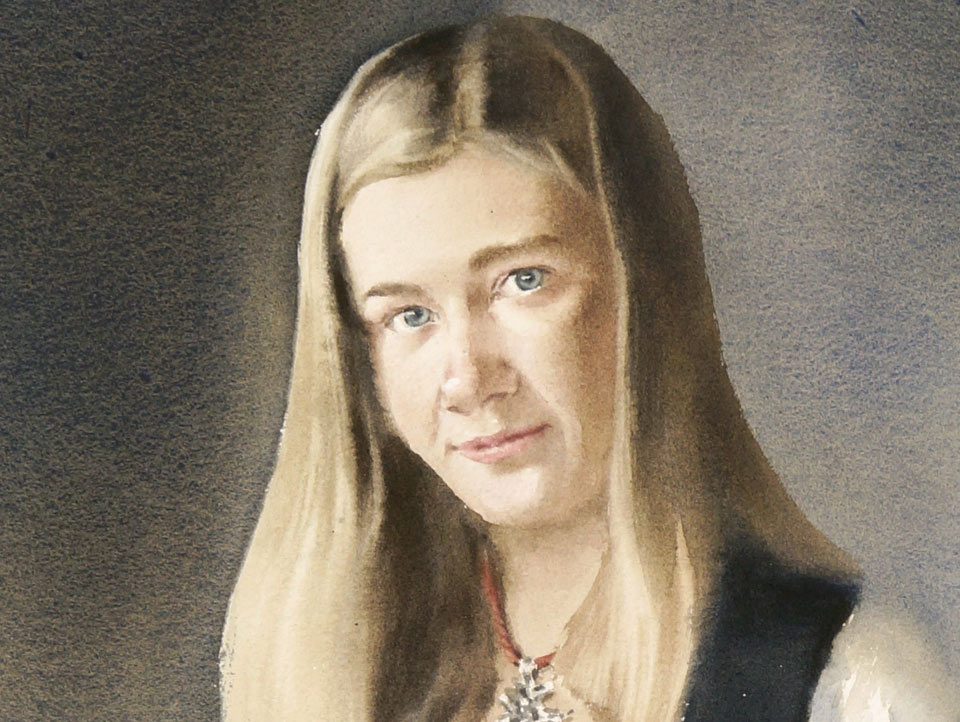
Sometimes I also get questions about how to paint good portraits. I guess the answer is: You do not paint portraits with watercolor but draw them with watercolor paints. What I mean is that drawing skills are much more important than painting skills when it comes to creating portraits in color. Now it's time to take care of the girl's hair. In this example, I will explain to you how to paint in watercolor step-by-step. In watercolor painting, you should begin with the lightest tones. That is what I'm doing right now. For the first light layer, I used raw sienna, burnt umber, and phthalo blue. When the light on the painting is in place, it will serve the purpose of the highlights. Darker tones are applied on top of this layer and the painting sequence continues from light to dark tones. Darker values can also be applied, not on top but next to lighter tones.
When adding dark colors, you have to remember that they will get lighter when the paper dries. How much lighter, depends on the paint, the paper, the amount of water, and drying time. So, you can only make an educated guess based on your experience and knowledge of how much lighter paint will become when dry. You may notice that I'm painting with an almost-dry brush which leaves characteristically dry marks. You may also notice that I'm blotting excess water from the brush with a paper napkin. This is one of the tricks of the dry-brush-on-moist watercolor painting technique. I'm adding more and more pigment to midtones so they become shadow areas. For the shadows, I change the mix of pigments a bit. Now, it contains ultramarine, sepia, and burnt umber. These pigments mixed together can produce very dark and neutral gray colors. By adding more blue ultramarine into this mix, you'll make it cooler and a bit more burnt umber will make it warmer. The colors of the neck and chest can be exactly the same as the colors of the face in a portrait painting. However, you may also find portraits by the old masters where the neck is a bit more yellowish, while the face is rather pink than yellow. I used the same pigments for the neck as for the face, which are raw sienna, alizarin crimson, burnt umber, and phthalo blue. Nevertheless, for the neck, the proportion of pigments is a bit different. That is why the color doesn't look exactly like the color of the face. I will now paint the remaining half of the hair. Because this side of the head is in shadow, the first layer is darker. On top of this underpainting, I apply darker tonal values. You may notice that the neutral mix is almost black, but it will get lighter when it's dry. To balance the light and shadow contrast, I'm also darkening the shadow side of the face.
The light and dark contrast is much more important in watercolor painting than the contrast of hues. In fact, you may use just one color for the portrait and make it monochrome; but with correct tonal values, such a portrait will look realistic. It doesn't work the other way around, when many different colors are used with the very same tonal value. This brings us back to the question: What makes a good portrait painting? If a realistic portrait can be painted in just one color, then it is not about paints but skills, and, above all, drawing skills. With the portrait in place, I can now paint the dress. It is black in real life but it would be not such a good idea to use manufactured black paint to depict this dress. Instead of using some black pigment, it would be much better to mix it, for example, from blue ultramarine, sepia, burnt umber, and burnt sienna. A dark shade would look almost black but not dull because it has some intrinsic color in it. The dry-brush-on-moist painting technique is well-suited for applying dark tonal values in one go. The apron has a deep rose color. Its red-violet color can be obtained by mixing some red and blue pigments, or by using a single pigment paint, Quinacridone magenta. As the first layer, I am applying this paint without any tonal gradations, but preserving white paper for the design. Darker brush strokes are applied on top of this underpainting.
You can see that I'm painting just one area at a time, from the beginning to full completion. This way, it is easier to keep the paint under control because the paper dries fast. It is better to have one part of the painting complete while the paper is moist and, while I'm at it, I can add water to other parts of the paper. So, when I come to paint on those areas, they will be moist as well. For the white blouse, I'm using exactly the same pigments as for the black dress. However, the tints are much lighter. I would like to make a soft border between the white sleeve and the dark background. One of the ways to do it is to add a background now. For this purpose, I wet the paper with a flat, wide brush, and added the very same dark mix that was used for the dress. This way, the border between the sleeve and the background is diffused and attracts less attention to it, leaving the focal point on the girl's face.
The same pigments that were used for the face are now applied for the girl's arm and hand. How to draw hands is a very challenging topic. Full understanding only comes with the knowledge of anatomy. The same can be said about portraits. A skull forms the shape of the head. In some places, it is covered only with a few millimeters of flesh and skin. So, the skull's anatomy greatly influences the appearance of a head.
If you feel you have some gaps in your knowledge of anatomy, you may fill those gaps the fast and easy way by watching video lessons of an Anatomy Master Class. This online course will give you everything you need to know about human anatomy for artists. However, anatomy alone will not give you the know-how for creating portraits. This topic is fully covered in the Life Drawing Academy courses. If your goal as an artist is to create figurative artworks and portraits with the full understanding of drawing steps, proportions, and construction of a human body and head, Life Drawing Academy will greatly help you to achieve your goal. In the Life Drawing Academy, you'll have unlimited access to 52 life drawing video lessons and full, personal support from Academy tutors, which includes artworks critiques and answers to your art questions. However, if you want to get one-on-one personal tutoring by the academy teachers, you will get a dedicated team of art tutors who will assess your current level of drawing skills and create a unique curriculum which will be tailored to your skill level and goals. In this curriculum, you will get up to 100 drawing tasks which come with detailed instructions and feedback on your progress on a by-task basis. Such personal result-oriented guidance is unique. For a one-time payment, nowhere else can you get a lifetime membership and unlimited personal tutoring from talented and professional fine artists who graduated from the top art universities in Russia and now teach many students worldwide. With their help, you will raise your art skills to the next level and will learn all you need to know to draw professional portraits and figurative artworks.
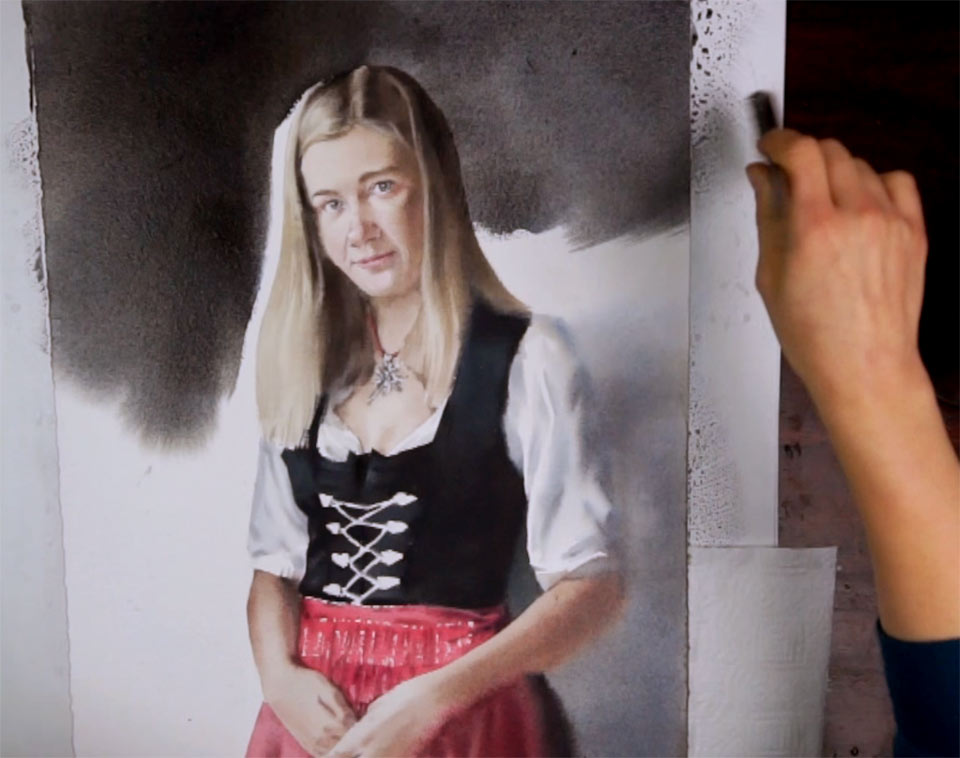
I'm working on the dark background, the color mix of which consists of blue ultramarine, sepia, burnt umber, and burnt sienna - exactly the same pigments that were used for the dress. I'll place a paper towel under the sheet to prevent backruns. Even though the same pigments were used for the background and for the dress, the texture will look different. This is because the dress was painted using the dry-brush-on-moist watercolor technique and the background was applied wet-into-wet. More water results in longer drying time and helps in separation of heavy pigments. That is why you can see the granulated texture on the background and the dress is smoother and more even...
A self-study, self-paced course where you can learn how to paint in watercolor by watching video lessons and doing assignments
One-time payment - Lifetime membership
$297 USD
One-to-one, unlimited and custom-tailored to your skills and needs Personal Tutoring by the Watercolor Academy teachers
One-time payment - Lifetime membership
$997 USD


