Watercolor Academy Online Course
A self-study, self-paced course where you can learn how to paint in watercolor by watching video lessons and doing assignments
$297 USD
ENROLL NOWA self-study, self-paced course where you can learn how to paint in watercolor by watching video lessons and doing assignments
$297 USD
ENROLL NOWOne-to-one, unlimited and custom-tailored to your skills and needs Personal Tutoring by the Watercolor Academy teachers
$997 USD
ENROLL NOWBy Anna Ivanova
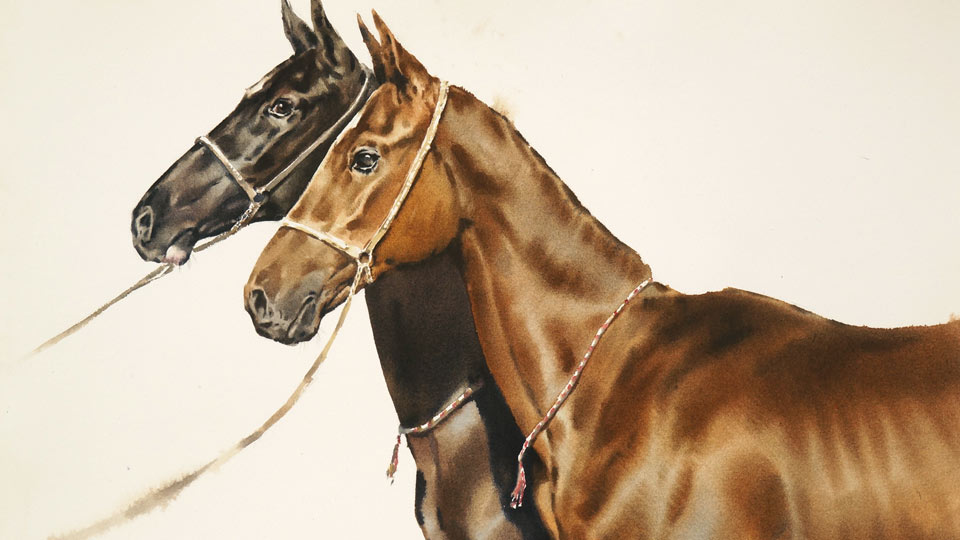
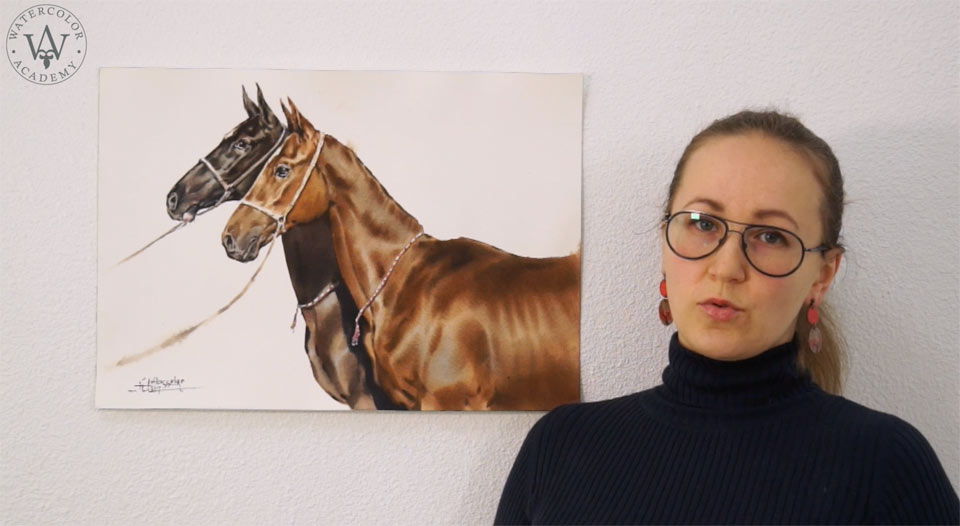
The subject of today's video lesson is horses. I will show you how to paint horses in watercolor with the correct anatomy and texture of the coat. Here is the painting I will have by the end of this lesson.
Before I begin to paint, I wet the watercolor paper on both sides and stick it to the plastic board. I let the paper dry for a few minutes and, when it is moist, I can begin painting.
For the color of the horse's coat, I mixed raw sienna, vermillion, and phthalo blue. I apply this mix on the paper with a round, natural-hair brush, which is dampened with very little water. For the darker color, I mixed ultramarine with sepia. Painting begins from light tonal values. To make the colors more saturated, I also add vermillion and burnt umber. At this step, I avoid using strong, single colors and, instead, mix the necessary hues on the palette.
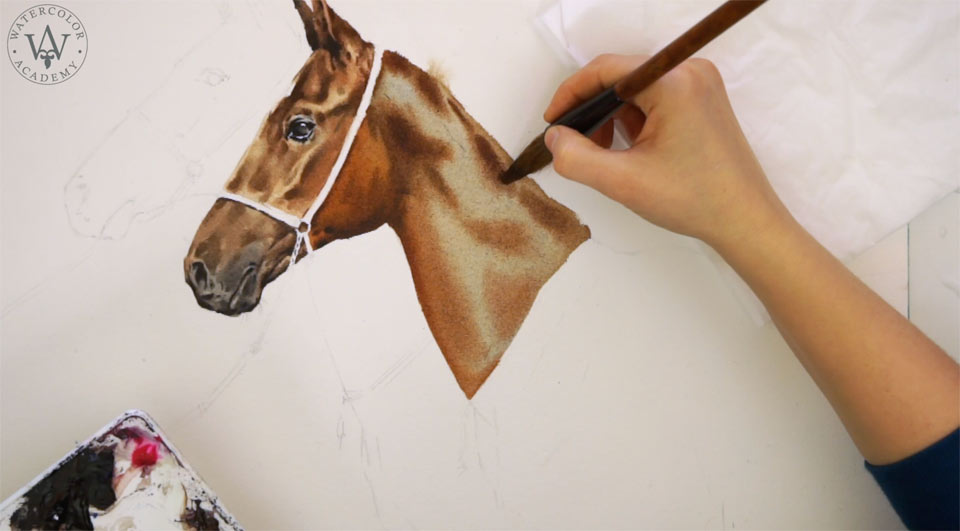
When painting live objects, like horses, for example, I always start with the foreground. So, I will first do the horse, which stands closer to the viewer, and then I will add another horse. At the end, I will decide if I need to add a background or that maybe it won't be required at all and I can leave the horses on white paper. I will work on just one part of the horse's head from start to finish and then will do the other parts. With the underpainting in place, I'm now adding a darker brown color which consists of burnt umber, sepia, vermilion, and phthalo blue.

The white paper is moist; however, the painted part is satin because I already added more paint in this area. That is why I am now using an even drier brush than before. It contains less water but more pigment. This helps to keep the paint flow under control. The brush strokes are staying in place without spreading too much, even though the painted area has more water than before. Because the brush is drier and the pigment is thicker, paint stays in place. The balance of water on the paper, water on the brush, and the amount of pigment is very important for the dry-brush-on-moist watercolor painting technique. You see that I'm using a brush with quite a sizable belly. However, this belly is almost dry and the paint is only put on the tip of the brush. This is what makes this painting tool a "dry brush". Every time I put more paint on the brush, I blot the excess water with a paper towel from the brush's belly. You may also notice that I squeezed the very tip of the brush to make it thin and flat, and I use this thick, round brush as if it is a thin flat one. Also, you may notice that I apply the paint with hatching movements. This method is similar to hatching short strokes with a pencil. This gives a velvety texture of the horse's coat. One part of the horse's head is complete. I will now do another part from the beginning to the end. Once again, I begin by applying the underpainting. Its tone is light and the color will serve as a highlight in light areas; and for the darker areas, I'm adding a tiny amount of blue pigment to make these areas darker, cooler, and less saturated.
The dry brush produces very sharp brush stroke edges. This painting technique allows you to preserve white paper with high precision and without using masking fluid. This is a great advantage of this technique. I completed the underpainting for this area and will now work on the smaller details increasing tonal values and defining the anatomy of the horse head. As with human portraits, a good understanding of proportions and shape of the head comes with a good knowledge of what lies beneath the skin. If you are interested in painting horses, I suggest you have a look at horse anatomy books. You may find it interesting that a horse's main bones and muscles - or any mammals in that respect - are quite similar to those of humans. Of course, proportions and dimensions will be different.
The main reason I'm doing the horse's head one part at a time is because it allows me to paint without smudging the wet paper with my hand. I will now do the horse's neck. It's a bigger area and therefore I will use a flat, wide brush for this purpose. The color for the neck is mixed from burnt umber, burnt sienna, vermillion, and phthalo blue. You may notice that the neck area is more moistened than the paper surface in other places. That is why when adding brush strokes in this area, I have to keep the brush even drier.
Painting wet-into-wet has its advantages. Sharp edges of the brush strokes can be diffused softly and bigger areas can be covered faster, compared to the slow-paced dry-brush technique. Knowing how much water is required only comes with practice. I have to say that after several years of practicing the dry-brush-on-moist watercolor painting technique, I still don't always get the balance right. For example, you might see that at the top of the horse's neck, there is a paint bloom. It is not major so I might leave it as is to have a picturesque effect, or I might decide to absorb it later when the paper dries a little bit more.
To create the texture of the horse's coat, I'm actually drawing with the brush, not painting. When multiple brush strokes are applied in the same direction, it creates the illusion of a velvety texture. Also, I'm trying to keep a sharp contrast between dark brush strokes and the lighter underpainting. This is the secret to making a silky coat. With the neck complete, I can now work on the rest of the horse's body. I hope by now you already know the sequence. First, I will do an underpainting, using a big, flat, soft brush to cover the large area fast; and then, I will work with a smaller brush on the tonal values and texture of the coat. The combination of cooler and warmer shades of the colors make the picture more interesting and realistic. Also, in every watercolor, you need to decide on the temperatures of light and shadows. In this picture, all lights are cool and all shadows are warm. Of course, this division is relative. What I call a cool color here, would be very warm when compared to blue or green colors in another piece.
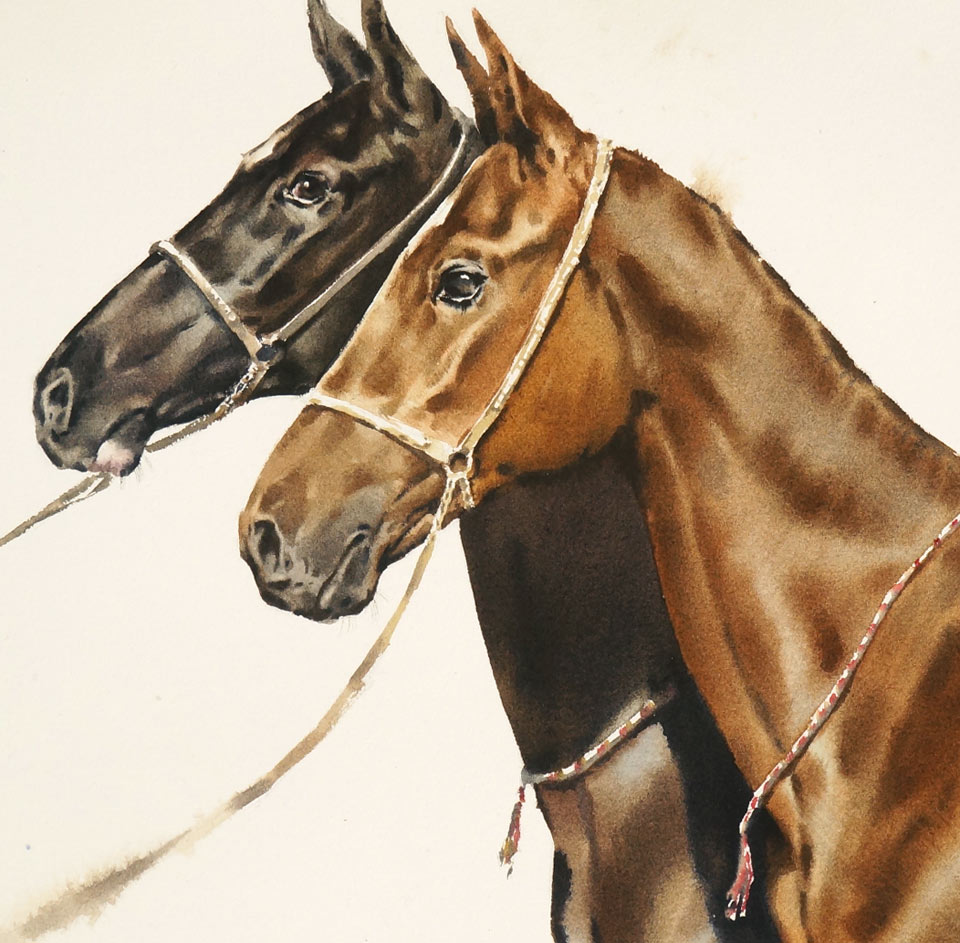
Speaking of colors, I must say they're less important than tonal values. Imagine this horse painted with different brown colors. It will be the same horse, only with a slightly different color. Even if I painted this horse using just one paint - for example, Payne's grey, burnt umber, or maybe sepia - it doesn't matter which color I go for. As long as the tonal values are done right, this picture would look realistic. So, the light and dark contrast is more important than the contrast of hue. This is especially applicable for this piece because this horse, in life, has one color: brown. I have been painting for a while now and it's time to re-wet the paper by applying clean water with a soft, wide brush, both on the backside of the sheet and on the white, unpainted areas on the front. To moisten the paper on the reverse side, I lift half of the sheet and carefully apply water with the brush. The foreground horse is complete. It is time to paint the other one. I have to be very careful not to touch the paper with my hand because the first horse is still wet. There are several solutions to this challenge. I may use a mahlstick for my hand to rest on. Or, put a bridge across the whole piece, as you can see in this video. This bridge stands on two legs and doesn't touch the paper surface, so I have a good support for my hand without worrying about smudging the wet paint. The sequence of painting steps is the same as you have seen for the first horse. I apply the underpainting and add darker tones as I go along. Depending on the humidity and temperature in the studio, the paper may dry faster or slower. So, I have to keep an eye on how wet it is at all times. When needed, I can wet it as you have seen before. Depending on the piece, I might do it several times during one painting session. The key here is to get the balance right: not too wet and not too dry.
The second horse is darker. Nevertheless, I'm using quite a light underpainting because it serves as the color for the highlights of the horse's coat. These highlights are cooler than the shadows. This type of contrast happens when an object is lit by natural daylight without direct sunshine and light areas are reflecting the blue color of the sky. This also happens when an object is lit by artificial cold light; then light values may be cool and dark ones are warm. The horse's head is complete; I can now move to its neck. Once again, I start by underpainting with a cool, light gray color which will be the color of the highlights. For the mid-tones, I add a warmer mix of colors.
You may see that the brush is very dry. It contains more pigment than water but, because the paper is moist, it takes pigment from the brush readily. When working in layers, using the dry-brush-on-moist painting technique, every glazing layer will add more water to the paper. That is why after several layers, you might end up with not moist but a satin, or even shiny, paper surface. This is fine as long as you do not plan to place any well-defined brush strokes in this area. If you do need brush strokes with sharp borders here, you might have to wait until the paper dries and becomes moist.
When painting dark tonal values, there is one very important rule in watercolor: Even the darkest tone has to be transparent. This is what makes this medium watercolor. The shadow I'm painting now might look very dark in this video; however, it is still transparent and I can see the paper through this color...
A self-study, self-paced course where you can learn how to paint in watercolor by watching video lessons and doing assignments
One-time payment - Lifetime membership
$297 USD
One-to-one, unlimited and custom-tailored to your skills and needs Personal Tutoring by the Watercolor Academy teachers
One-time payment - Lifetime membership
$997 USD


