A self-study, self-paced course where you can learn how to paint in watercolor by watching video lessons and doing assignments
$297 USD
ENROLL NOWA self-study, self-paced course where you can learn how to paint in watercolor by watching video lessons and doing assignments
$297 USD
ENROLL NOWOne-to-one, unlimited and custom-tailored to your skills and needs Personal Tutoring by the Watercolor Academy teachers
$997 USD
ENROLL NOWWatercolor by Anna Ivanova
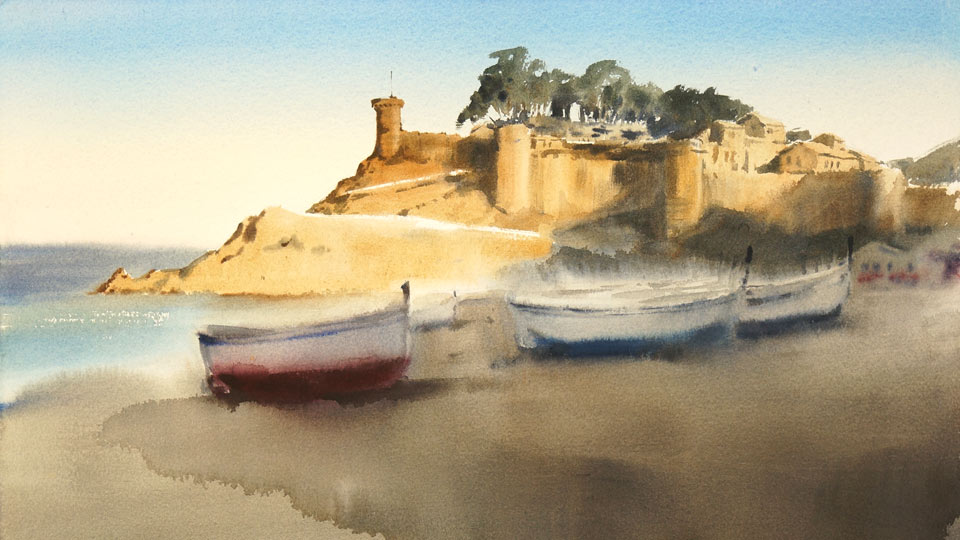
The subject of today's lesson is a seascape. I will paint a castle, Tossa de Mar, which is in Spain and I will show you how to paint the sky, the beach with the boats, and the architecture. Here is the piece I will have painted by the end of this lesson.
I have already wet the paper on both sides and it is moist now. I begin this artwork with the sky. Despite the fact that its color is blue, I start with raw sienna and a bit of cadmium red to achieve the warm color this sky has closer to the horizon. At the top, I'm applying a blue mix consisting of ultramarine and phthalo blue pigments. This mix is applied with a flat, wide brush. I go over the castle with the brush without paying any attention to its outlines. With the first wash in place, I increase the blue color saturation and tone by adding more blue pigment at the top. When the sky is done, I place a paper towel under the sheet to avoid backruns. I will wait for some time for the paper to dry a bit.
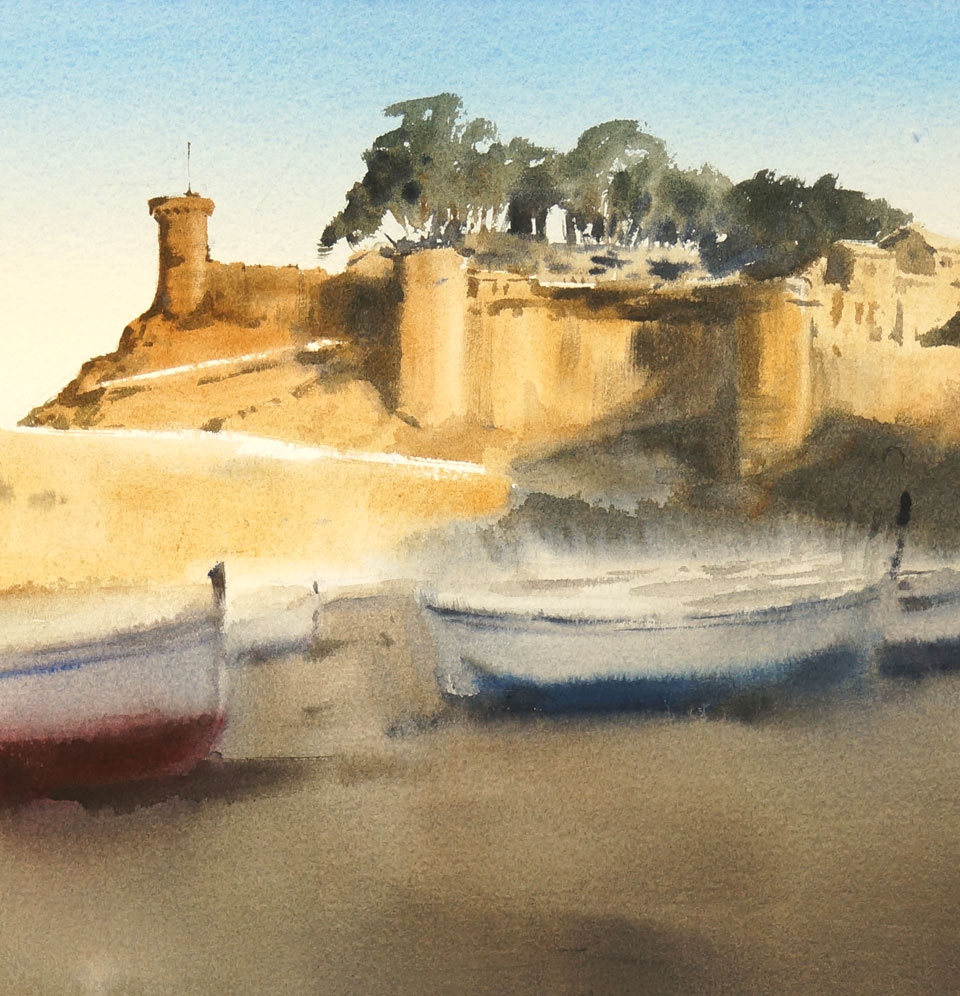
When the paper is no longer wet but moist, I can continue painting using the dry-brush-on-moist watercolor painting technique. The moist paper doesn't have a glossy surface. It is matte but cold because the water evaporates and is cooling it down. For the color of the castle, I'm using burnt umber and, to make this color darker in some places, I'm adding phthalo blue pigment into the mix.
The dry-brush-into-moist painting technique is quite challenging but it has many advantages. What is difficult about this technique is keeping the right balance between the wetness of the paper, the amount of water on the brush, and the amount of pigment.
I paint shadows in dark, cool, gray color, which consists of burnt umber, phthalo blue, and ultramarine. Also, to make this color even darker, I can add sepia into the mix. What I'm doing now is called "underpainting"; I cover large areas with color without paying too much attention to the details, which will be added later. The brush is almost dry; it has very little water. However, because the paper surface is moist, it takes the pigment from the brush with ease. Because I wet the sheet on both sides and placed it on the plastic board in the very beginning, some water is trapped beneath the sheet and prevents the paper from drying too fast. One of the main advantages of the dry-brush-on-moist painting technique is its speed. It is the alla prima method and, therefore, an artwork must be done in one painting session. At the same time, this is also a disadvantage of this technique because a piece must be finished while the paper is moist.
The underpainting for the castle and the ground it stands on is complete. While it is moist, I can add cast shadows and additional tones wet-into-wet. Because the paper is not moist but satin, I have to load even less water on the brush. Small details are added with a very dry brush. The mixed paint is so thick that it doesn't flow off the palette when I turn it on its side. Also, I use a paper towel to absorb any excess water from the brush. You may notice that the brush strokes on the paper have soft edges but the paint doesn't spread out uncontrollably and stays where I put it. This control over the paint flow is one of the main advantages of the dry brush technique. I can paint very tiny details with the tip of the brush and these details remain sharp, even on moist paper.
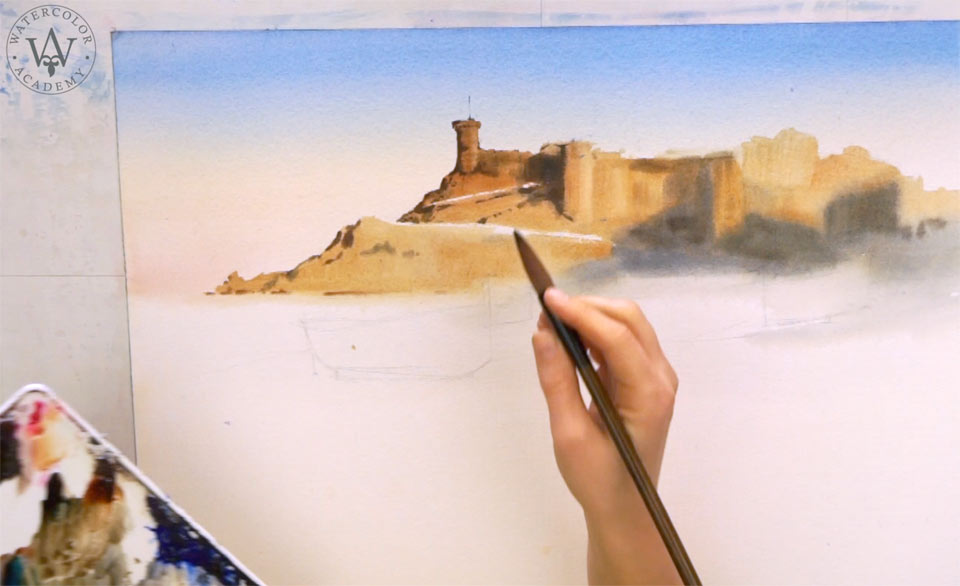
When adding cast shadows, I pay attention to the direction of the light, as well as keeping an eye on how dark these areas are. It's just before sunset and the rays of sun are giving warm colors to this castle. Because light areas are warm, the shadows are cold. This temperature contrast happens because surfaces without direct sunlight are reflecting the blue sky and, therefore, have cooler colors. The biggest disadvantage of the dry-brush-on-wet painting technique is that you can't do a piece in multiple painting sessions. You must do it alla prima before the paper dries. Where the sky is, the paper is still moist inside. It has no water on the surface yet it feels cool to the touch. This is because there is still water inside the paper fibers. When it comes to the green colors of trees and other vegetation, it's better to mix green hues using yellow and blue pigments instead of using ready-made green paints. I can now move to the foreground of this painting.
For the first wash, I'm using a flat, wide brush to cover large areas with soft gradients of colors. There is a bit more water on this brush which allows the paint to spread on the paper easily. Nevertheless, I have to pay attention to how wet the brush is. Otherwise, the paper's surface might get soaked with water and this makes the dry brush technique challenging. The wide brush allows me to cover large areas quickly. Soft gradations of colors and tones, in combination with small and sharp details in one artwork, create an interesting appearance of this picture. For the ground, I'm using a mix of four pigments: ultramarine, burnt umber, sepia, and phthalo blue. This combination contains both cool and warm colors which are complementary and, when mixed, produce chromatic gray colors which can vary from brown to silvery-gray shades.
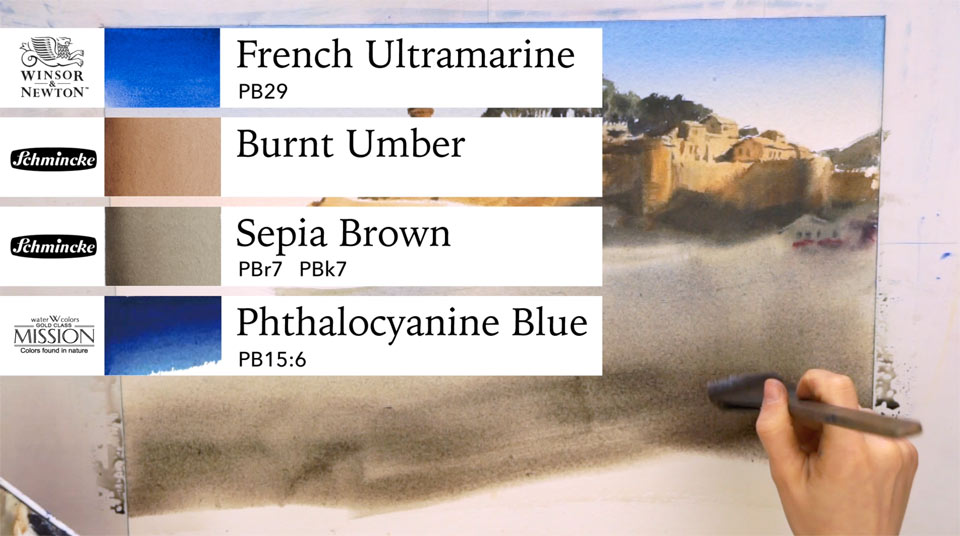
This artwork also includes the sea, which I'm painting last to fill in the remaining white area of the paper. You may notice that I'm using the same round brush, only this time, using faster brush strokes. This helps leave accidental white spots of unpainted paper. These gaps suggest white waves on the sea. The wet sand on the edge of the sea reflects the blue sky and is, therefore, cool and dark.
There are a few boats on the shore. Because the watercolor paper is satin, I have to paint with a very dry brush. Nevertheless, the brush strokes spread out on the paper, producing diffused edges which look quite picturesque. The bottom part of the boat is in shadow. To make the red color even deeper, I have to use darker blue pigments to increase the tonal value. You want to avoid adding black pigments when painting in watercolor. Black paint makes an artwork dull and lifeless. The same goes for gray colors. A neutral gray, which is a tint of black, brings no chroma to the picture and, therefore, is better to avoid. However, chromatic grays, which are mixed from complementary colors, look much better in a picture. So, mastering the Complementary Contrast in painting will greatly help you to make more picturesque and colorful artworks.
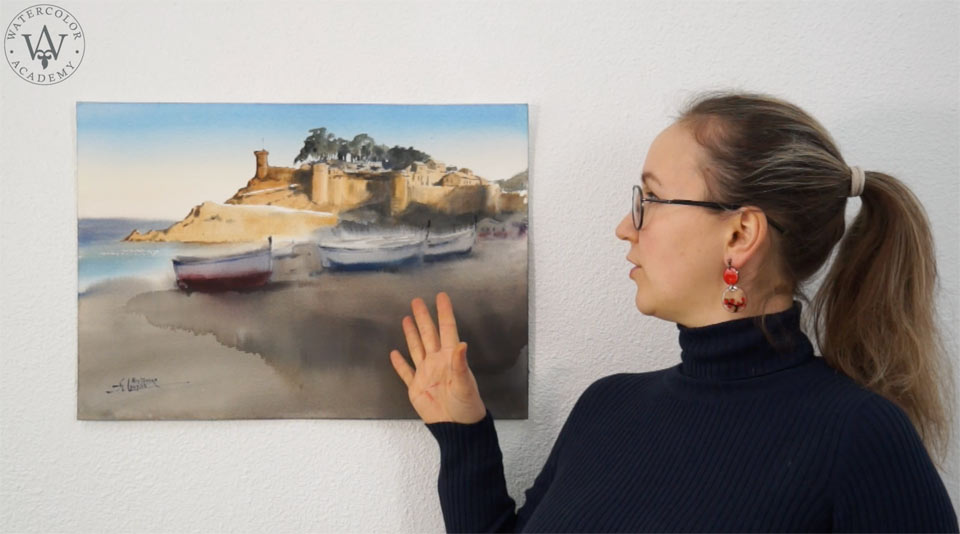
I add more pigment with a flat, wide brush to make the ground's value darker. Because the paper is still moist, it takes the paint readily and it's easy to achieve soft gradations. Hues in watercolor are less important than values. It doesn't really matter which pigment I add to this mix - burnt umber or sienna. Either would look a bit different but both of them would be believable and look realistic on this artwork. Mixing complementary colors also has the advantage of achieving a wider range of color temperature. Before the paper dries, pigment particles sink into the paper fibers and the tonal value becomes lighter...
A self-study, self-paced course where you can learn how to paint in watercolor by watching video lessons and doing assignments
One-time payment - Lifetime membership
$297 USD
One-to-one, unlimited and custom-tailored to your skills and needs Personal Tutoring by the Watercolor Academy teachers
One-time payment - Lifetime membership
$997 USD