A self-study, self-paced course where you can learn how to paint in watercolor by watching video lessons and doing assignments
$297 USD
ENROLL NOWA self-study, self-paced course where you can learn how to paint in watercolor by watching video lessons and doing assignments
$297 USD
ENROLL NOWOne-to-one, unlimited and custom-tailored to your skills and needs Personal Tutoring by the Watercolor Academy teachers
$997 USD
ENROLL NOWBy Anna Ivanova
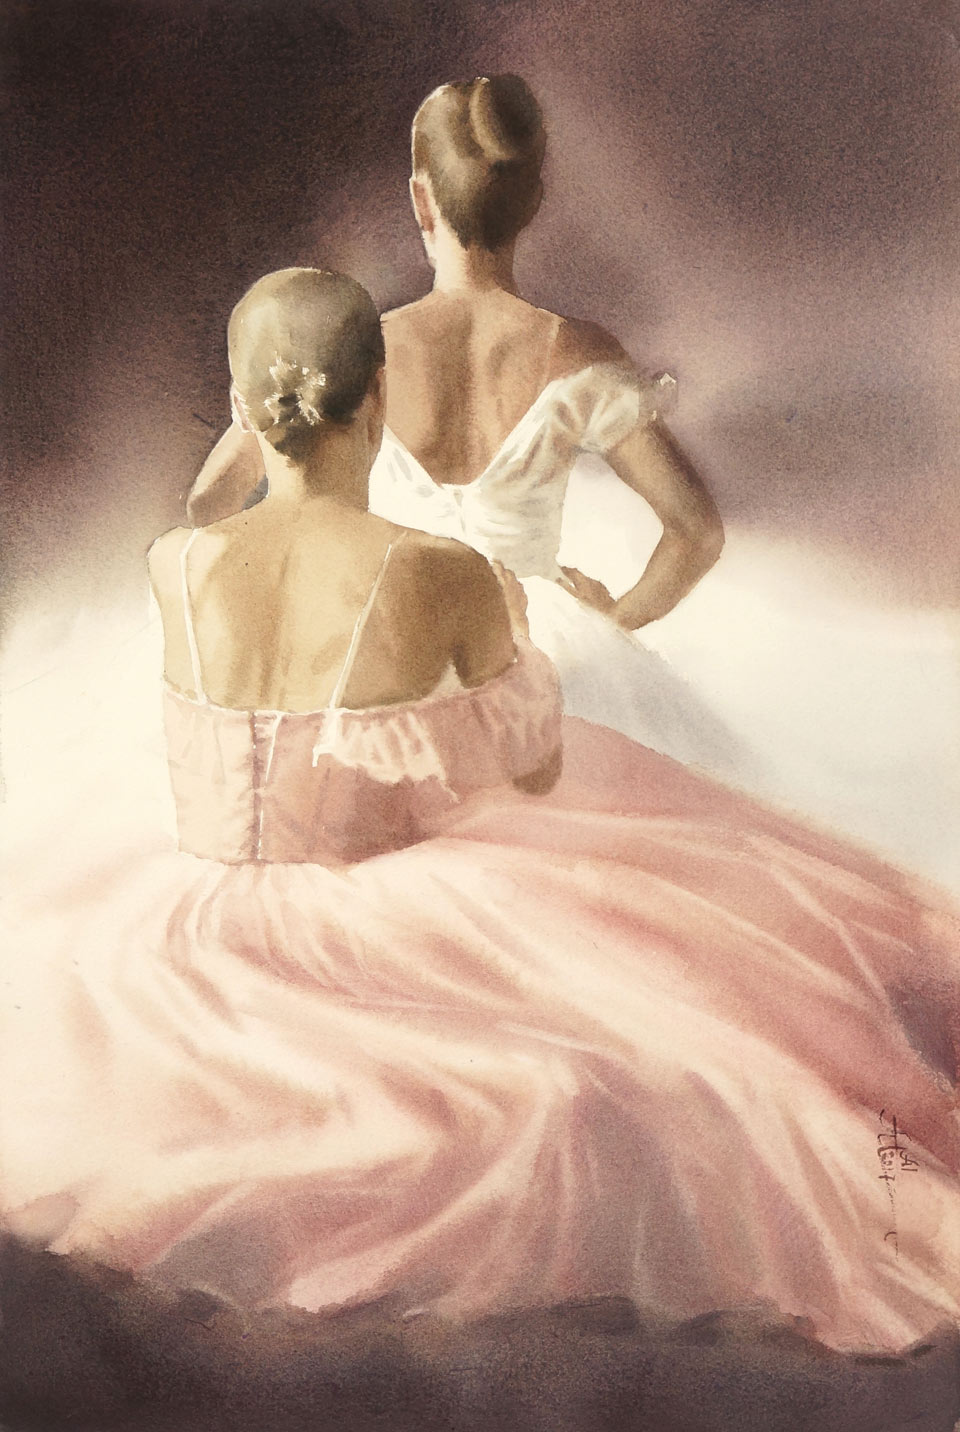
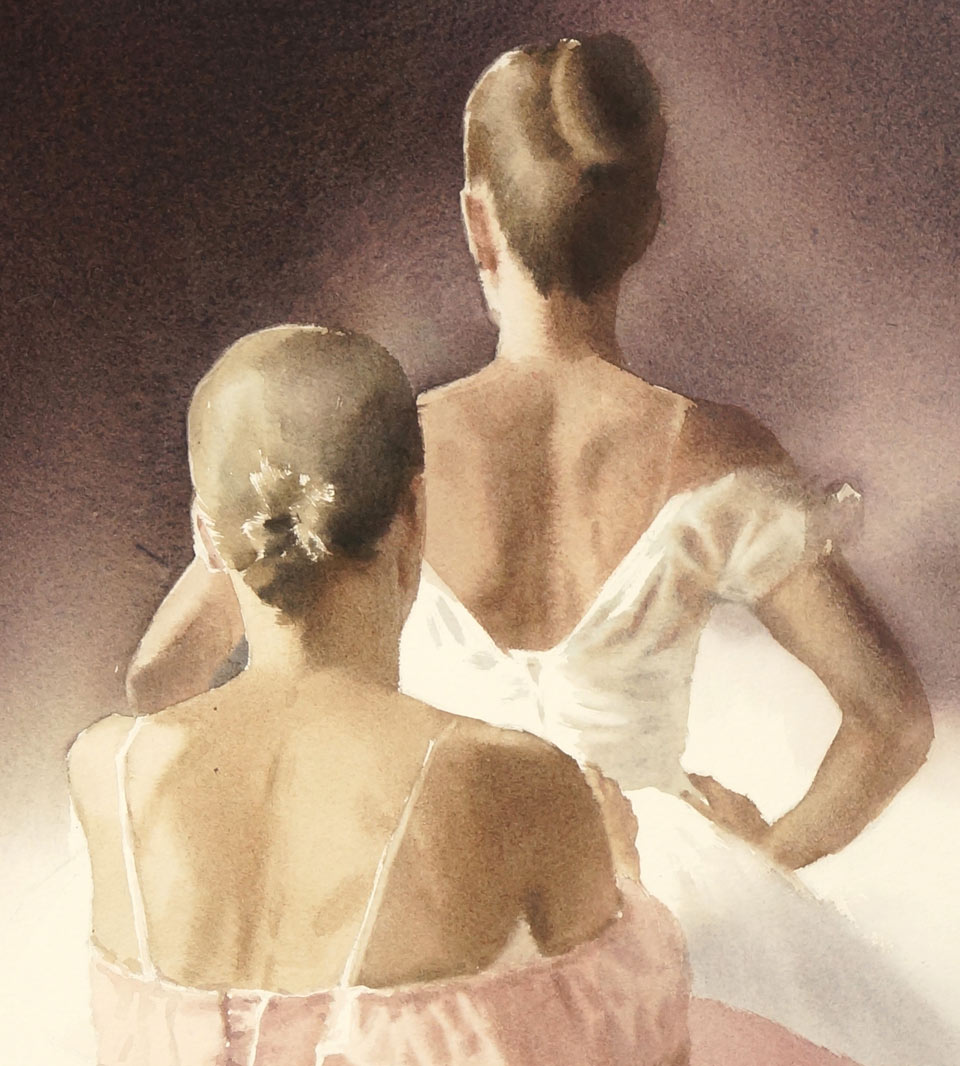
Today, we have ballet dancer subjects. There are two ballet dancers we see from the back. I will show you how to paint human figures, how to depict the clothes, and how to unite everything with a dark background. Here is the finished watercolor I will have created by the end of this video lesson.
I begin with wetting the paper on both sides, applying water with a flat, soft brush. 300 gsm watercolor paper is made of 100% pure cotton and is placed on a plastic board that is tilted about 15 degrees. I also place a paper napkin under my hand to protect the moist paper surface. For the color of the flesh, I have mixed raw sienna, orange and a bit of phthalo blue pigments. Painting in watercolor usually begins from light tones. Next to these tones, I am adding mid-tone colors which are mixed from the same pigments but less tinted and therefore appear darker. I have to say that shadow areas are more forgiving than light tones. I can build up shadows in several layers having more control over their colors and tonal values. There is no such luxury for the highlights. Their light color has to be applied correctly from the first attempt. This is even more important for staining pigments. Such pigments penetrate the fibers of the paper deeper and, therefore, sometimes it's not even possible to wash them out.
I will do the entire piece alla prima which means painting it in one session. I will be painting the human figures using the dry-brush-on-moist watercolor painting technique. Most of the background will be painted wet-into-wet. I will explain this technique when we come to it. But now, I would like to explain how the dry-brush-on-moist works. The most important part of this technique is to keep the correct balance between wetness of the paper and the brush. The paper must be moist, meaning it should not have a glossy layer of water on its surface but, rather, should be almost dry and feel cool to the touch. Moist paper has a degree of wetness somewhere between 'satin' and 'damp'. Damp is when the paper has very little water, just before it dries out completely; satin is when the paper surface is no longer glossy but appears matte and feels a bit wet to the touch. So, for the dry-brush-on-moist technique, the degree of paper wetness must be moist.
Moist paper means there is no water on its surface, but it is trapped in the paper fibers. Also, there is a very thin layer of water beneath the sheet of paper and the plastic board. This layer of water works as an adhesive; it keeps the paper firmly on the board. The weight of the paper I'm using is 300 gsm (grams per square meter). It is quite heavy paper and will hold water for a long time. Of course, the speed of drying will not only depend on how much water is on the paper and how heavy the paper is, but also on the humidity and the temperature in the studio. The paper I'm using will stay moist for a half-hour to one hour, depending on the working conditions, which gives plenty of time to paint before re-wetting the paper on its reverse side.
Paper is the most important ingredient of good watercolor painting. That is why I spend so much time talking about its quality and how wet it should be. To recap, this is 300 gsm, 100% cotton, cold-pressed watercolor paper. At the beginning, it was soaked with plenty of water on both sides, then placed on the plastic board, face side up, and dried for about 15 minutes to become moist. This is the ideal degree of wetness for the dry-brush-on-moist watercolor painting technique.
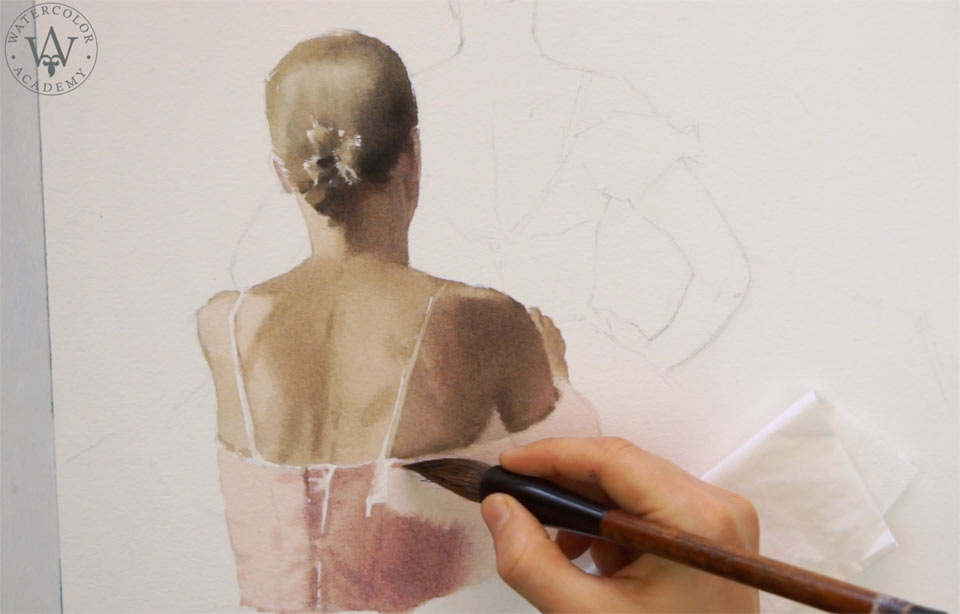
Another part of the equation is how much water is loaded on the brush. The brush should also be moist. This means that you cannot squeeze much water from it. I'm using a medium-sized, natural-hair, round watercolor brush with a fairly sizable belly and well-pointed tip. The mix of pigments is prepared on the palette in enough of a creamy consistency that it would not run down off the palette when I turn it on its side. This mix is only loaded on the brush tip; the belly has no liquid water, no pigment. This is what makes it "dry brush". Should you apply brushstrokes with this brush on the dry paper surface, such marks will look very dry and leave white voids within the brushstroke. However, because the paper is moist, its surface almost sucks the mixed paint from the brush tip. This is what I call thirsty paper.
Let's come back to what I'm doing now. With a wide, flat brush, I apply a very light tint, painting it wet-into-wet. This is no longer dry-brush-on-moist technique because the brush is loaded with more water and the brushstrokes come out with much softer edges. Nevertheless, I do not oversaturate the paper with water because I'm planning to increase the tonal values by painting in several layers. Every layer of paint will add more water to the paper surface. That is why it is quite important to control how wet it is. Once again, you may notice that I am following one of the main rules of watercolor painting: Start from light tones and continue to work from light to dark.
When it comes to the colors I'm using, this is probably the least important information in this lesson because it doesn't make any difference, for example, what shade this pink dress is. Its light pink color can be obtained from whatever paint you like; for example, opera rose or permanent magenta or permanent rose or even cobalt violet. All those colors will give pink tints.
After a while, the moist paper becomes drier, so I have to lift half of the sheet from the plastic board and apply water on the reverse side. This will give me another 20-30 minutes before needing to add more water. Here's, once again, how to paint flesh: First, I apply a light tint that serves the purpose of the skin highlights. Then, I paint the mid-tones. And when the middle tones are in place, I can deepen them up to build up tonal values as if I am sculpting a figure.
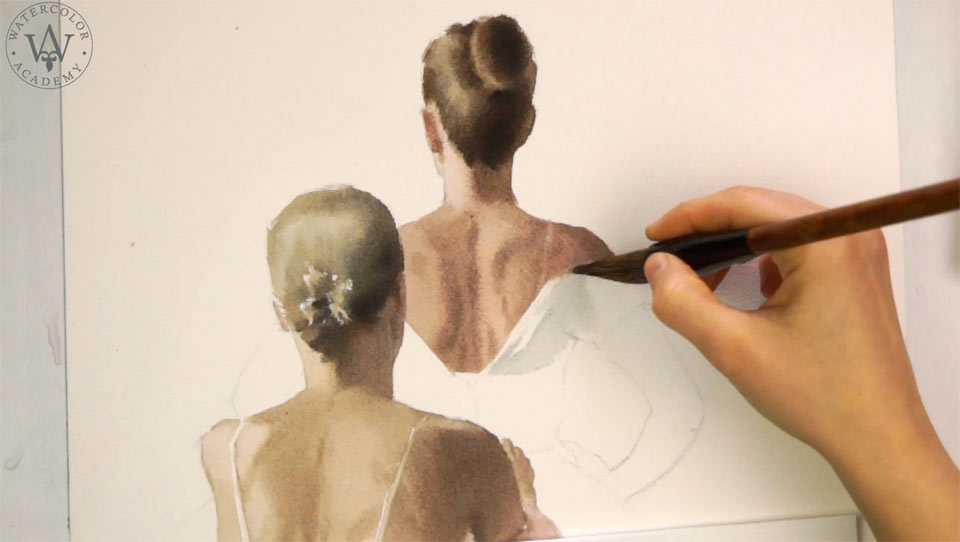
The choice of color pigments is very much secondary. It is not about the color of the hair but their tonal values. It is perfectly possible to achieve very similar colors by mixing different pigments. For example, for this ballet dancer's hair color, I can mix burnt umber with aquamarine, or, instead, I might mix burnt sienna and phthalo blue. The end result would be a bit different but it doesn't matter because this hair painted in one mix or another would still look like hair, provided I do believable tonal values. The choice of colors is the artist's choice. It's time to paint the dress of the second figure. Because this dress is made of semi-transparent fabric, to achieve the effect of transparency in this painting, I will first paint a cool imprimatura, or underpainting, and then will add flesh colors on top of this paint layer. When painting in several layers, I have to keep the brush even drier. This allows me to keep full control over the paint flow. You can see that I am painting the dancers' figures one part at a time from beginning to completion. This painting sequence is one of the limitations of the dry-brush-on-moist painting technique. Because watercolor paper dries quickly, I have a very limited time frame to paint while it's moist. So, it is easier to complete one part at a time and continue to another part than to do different areas of the piece simultaneously and get to the point when the paper is dry in one place and I can no longer continue painting in the dry-brush-on-moist technique.
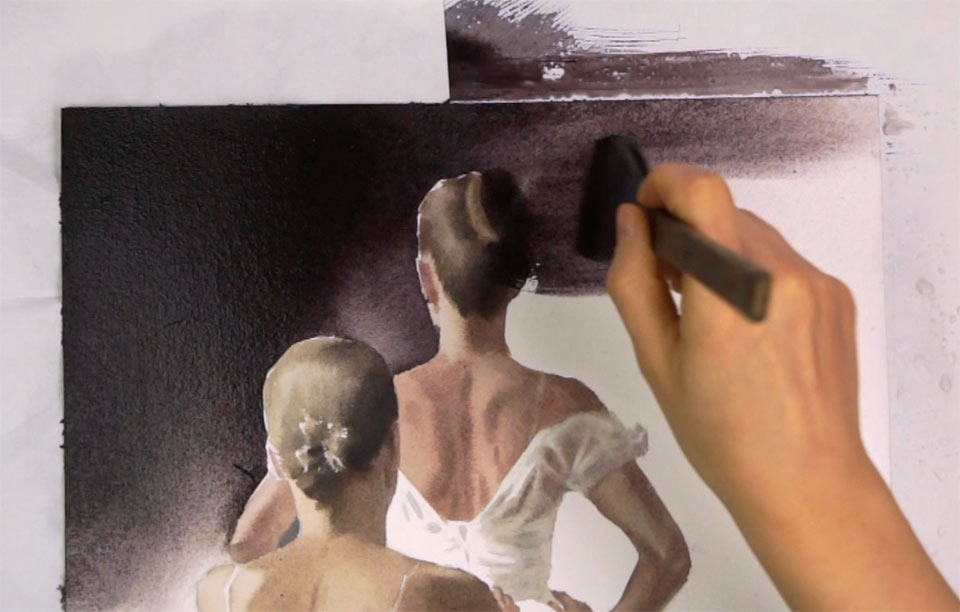
I apply the dark shade of the background with the wide, natural soft hair flat brush. I am painting the background wet-into-wet. You can see I come quite close to the dark hair but leave about a one millimeter gap unpainted. To achieve more precise brushstrokes, I change from a flat big brush to a smaller round one. You may also notice that I do not strive to achieve a uniform dark tone. Such a background would look artificial. Instead, I vary tonal values from dark to lighter tones which creates an illusion of an aerial perspective and makes the piece more interesting.
To make a softer gradation, I lift the board for gravity to do its job. Paint flows on the paper's surface and creates a smoother transition between dark and light. The left half of the background is done and I place a paper towel under the watercolor paper sheet. This holds the paint in place and prevents backruns.
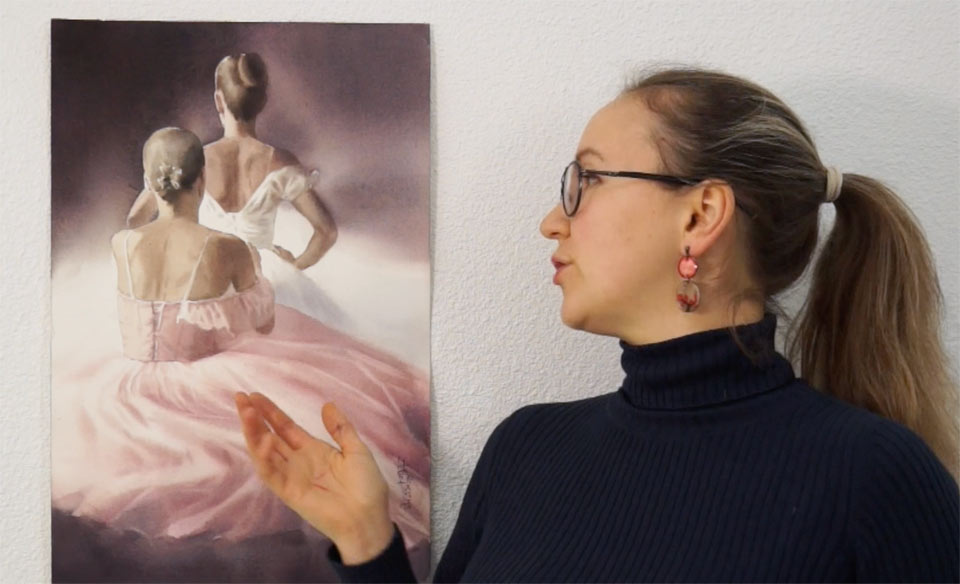
You may wonder what colors to use for the background. This really depends on your creative task. However, there is one piece of good advice: Do not use manufactured black paints for the background. It is always better to mix your own black from two or more complementary pigments. For example, for this artwork, I have chosen for the dark background to have a warm temperature. It can be mixed from three pigments, for example, sepia, ultramarine and some red pigment. The choice of paints is optional. You may find many other complementary pigments produce nice-looking grays and blacks...
A self-study, self-paced course where you can learn how to paint in watercolor by watching video lessons and doing assignments
One-time payment - Lifetime membership
$297 USD
One-to-one, unlimited and custom-tailored to your skills and needs Personal Tutoring by the Watercolor Academy teachers
One-time payment - Lifetime membership
$997 USD