Watercolor Academy Online Course
A self-study, self-paced course where you can learn how to paint in watercolor by watching video lessons and doing assignments
$297 USD
ENROLL NOWA self-study, self-paced course where you can learn how to paint in watercolor by watching video lessons and doing assignments
$297 USD
ENROLL NOWOne-to-one, unlimited and custom-tailored to your skills and needs Personal Tutoring by the Watercolor Academy teachers
$997 USD
ENROLL NOWVideo lesson by Vladimir London
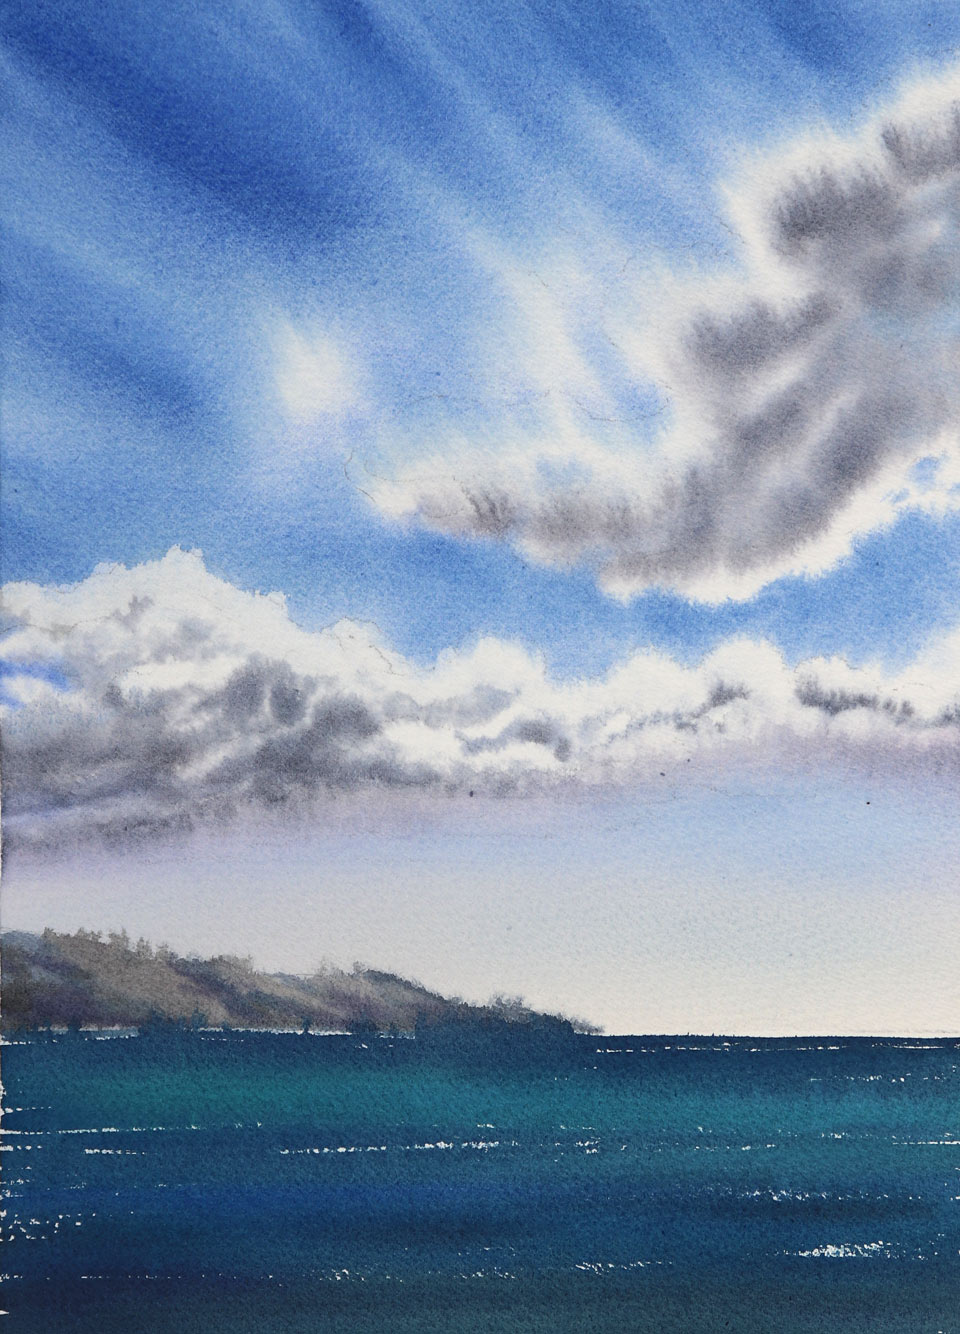
In this video, you will discover how to paint sky and water using the 'dry brush on moist' watercolor technique.
Here is the finished artwork I will get by the end of this video lesson.
To start, I will do a quick sketch in graphite pencil on watercolor paper. First, I would like to divide the height of the artwork according to the golden ratio. This way I can place the horizon line precisely according to the golden proportion. If you don't have golden mean calipers you don't have to buy them. A golden proportion can easily be calculated by multiplying or dividing any dimension by 1.62. However, art is not mathematics, so there is no need to calculate anything. You can just draw what pleases your eye. Nevertheless, just to demonstrate how the golden calipers can be used, I am measuring some key points of the composition in this artwork. There is no one strict rule on how to build a composition, this depends on what you would like to depict, and what you want the main talking point of your artwork to be.
In this picture, I have reserved the biggest place for the sky to have more space for the clouds. Their shape is also a part of this composition, which is why I am marking down the key points for clouds using the golden mean calipers. Once again, this is not something I would normally do when making an artwork. Instead, I might draw several sketches and locate details as I think necessary, drawing freehand without any calipers. Then, if in doubt, I might double check the proportions. To my surprise, I often find that the compositions which look better to my eyes are the ones with more golden proportions. Also, when painting landscapes, I do not usually draw clouds on the sky, because they are done freehand by brush during painting. However, because this video lesson is special, and will include the topic of how to paint clouds using the 'dry brush on moist' watercolor painting technique, I would like you to see what clouds I will be doing. This painting technique requires a bit more planning and precision, and therefore it will be helpful to have outlines of clouds in place.
I would like to keep a wide frame around the artwork unpainted, and will therefore protect the paper margins with a masking fluid. Before doing that, I applied a wet soap onto a cheap synthetic brush, which will make cleaning this brush easier. Unfortunately, I ran out of transparent masking fluid from Windsor & Newton and will use the tinted one. A tinted masking fluid is clearly visible on white paper and therefore it is easier to apply it. However, because it is tinted, it will conflict with the colors of the artwork. It is not my favorite, but until I buy a new one this will do.
When the masking fluid is fully dry, I will prepare the watercolor sheet for painting. Here is a muslin cloth that is bigger than the sheet. I will wet it in clean water, making sure it is fully soaked. Then, I will squeeze the water out, unfold the cloth, and place it on the plastic board. By the way, using the muslin cloth is totally optional. You can use the color painting technique I am about to demonstrate for you just as well without the cloth. The next step is to place the watercolor paper sheet face-side down and thoroughly wet its reverse side with a flat wide brush or a piece of natural or synthetic sponge. You may leave the sheet for several minutes to soak up water and then turn it over face-side up, placing it on the wet muslin cloth. If you do not use the cloth, just place it on the plastic board.
Now, the front side has to be moistened as well with clean water. I am using a flat wide brush to do so. I will leave paper to dry for ten or fifteen minutes, waiting for the moment when it will become moist. For painting, I will be using a natural hair flat brush from Escoda. This brush takes less water than a round brush of the same width. Now I need to prepare a mix for the clouds. Their color will be cold and gray, so I will mix a dark blue pigment with violet and raw sienna paints. I will not talk much about pigments, not only because this is a topic for color theory, but also because you may or may not have exactly the same paints as I do. This is not about what paints to use, but what colors to achieve. And the color that I am looking for is a chromatic gray that is quite cold and has a bluish shade.
There are many ways to mix such a color. If you don't know how to do it, the topic you may want to revisit is how to obtain neutral grays by mixing complementary colors. This is fully explained in the color theory video lessons of the Watercolor Academy course. I have loaded my brush with the gray mix, and absorbed excess water from the brush's belly with a paper napkin. The brush contains very little water, and the pigment is only loaded on its tip. I am applying this pigment on the paper surface in short brush strokes, smoothing the borders between strokes.
The name of this painting technique is 'dry brush on moist'. "Dry brush" doesn't literally mean an absolutely dry brush. In fact, the brush is somewhere between moist and damp. You can't squeeze a single drop of water from it, however, because the watercolor paint is semi-wet, it can be loaded onto the brush and applied on the paper surface. The paint doesn't flow from the brush to the paper under gravity. Instead, because the tip of the brush contains pigment, the painting process happens by rubbing this brush across the surface of paper and staining it this way. So, I have explained the first half of the technique's name - 'dry brush on moist'.
Now I have to explain the second part. 'Moist' paper is when the paper surface feels dry and cool to the touch, and there is no water on the paper surface. The water is trapped inside the paper fibers. There is also a very thin layer of water between the backside of the paper sheet and the plastic board. To make this gap slightly bigger, so it could hold a little bit more water, I placed the muslin cloth under the paper sheet. This cloth traps water between its threads. Nevertheless, because water evaporates, I have to moisten the front surface from time to time. When doing so, I have to be very careful not to touch the already painted area of the artwork. As I mentioned, the cloth is optional. However, without it you would have to re-wet the paper a bit more frequently.
After applying the water with a flat brush, I will have to wait for several minutes for the paper to absorb the water and become moist once again. Wet paper will be first glossy, reflecting light off of the water layer on the surface. The paper will become satin when the surface is not reflective any longer, but wet to the touch. After several more minutes, the paper will become moist. That is when its front surface is dry to the touch, but there is a layer of water under the paper sheet. You may see that I do not have much water on the palette - in fact, the paint is almost dry. If I pick up the palette and turn it on its side, not even a single drop of water will run down. However, the paint on the palette is not dry. It is easy to pick it up from the palette with the tip of the brush. And because the paper is moist, it will readily take the paint from the brush. This is an ideal setup for the 'dry brush on moist' technique.
There are many advantages of this painting technique. Above all, it gives full control over the paint flow. Paint simply doesn't flow, it stays just as you place it on the paper. At the same time, the technique gives brush strokes soft edges. This is what makes the technique so special: brush strokes are as soft as if you are painting on a wet surface, yet paint doesn't spread out as if you are painting on dry paper. That is why it is possible to paint very small and defined details with this technique, as well as to cover big areas in a very smooth gradation of tone - which I am doing right now for the sky close to the horizon. For this part of the sky I am using lighter and warmer tints to create an illusion of aerial perspective. Next to the horizon, I am adding a tiny amount of the Naples Yellow Deep paint to make a gradient from purple to yellow.
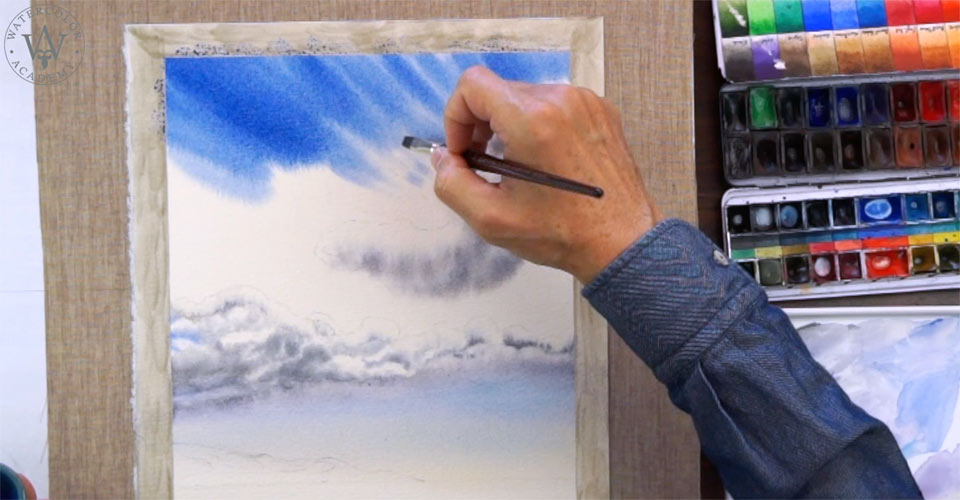
For the blue part of the sky, that is, without any clouds, I will change the technique and will paint it 'wet on moist'. For this purpose, I have premixed a blue color in the saucer, and now I am applying this mix with diagonal brush strokes in order to create an illusion of a wind that blows the white clouds across the sky. There is more water on the brush but the paper surface is moist, which is why the brush strokes have soft borders but the paint does not flow uncontrollably. The brush strokes stay in place and slowly diffuse, but the diffusion is predictable and within acceptable limits. I am painting the blue part of the sky 'alla prima' in both the full strength and the final color I would like to have.
When this paint dries, it will become slightly lighter but the rest of the sky, and therefore the balance of tonal values of the blue sky and clouds will remain in place. To paint such elaborate clouds would be very challenging in any other watercolor painting technique. I have chosen such an overcomplicated composition of the cloudy sky to demonstrate to you the advantage of this painting method. I also have to say that the 'wet on moist' watercolor painting technique is not the easiest one. It might take you several months to fully master it, so don't be disillusioned if you don't get a perfect result from the first try. The most challenging thing here is to keep the right balance of moisture both on paper and on the brush. A good understanding of the technique, which I would call the feeling of how wet both the paper and the brush should be, only comes with practice.
The lower part of paper is still moist, so it's the perfect time to add some hills on the background. I will do it with the moist brush following the same rules I explained earlier. A dark, cold color is used for the hills in combination with a slightly warmer shade that contains an earth pigment. Because the hills are painted over the sky, this area has a little bit more water and the edge might diffuse slightly. Now it's time to paint the sea. I have prepared a mix of dark blue color, and now I am applying it with a very dry brush. A bit more green is added into the mix to vary the color of the sea. You may notice that I am intentionally leaving some white gaps between brush strokes, to suggest the whiteness of the waves.
You can also see that I am applying the brush strokes with very fast movements. This way, it is easier to do the 'dry brush' technique. When the tip of the brush glides quickly across the paper surface, it touches the tips of the paper tooth but leaves the depressions of the tooth unpainted. This way the paper surface plays an integral part in this artwork. This is cold-pressed 300gsm cotton paper with a medium tooth, which is great for this size of picture. I am using various blue and green pigments to depict the sea.
A self-study, self-paced course where you can learn how to paint in watercolor by watching video lessons and doing assignments
One-time payment - Lifetime membership
$297 USD
One-to-one, unlimited and custom-tailored to your skills and needs Personal Tutoring by the Watercolor Academy teachers
One-time payment - Lifetime membership
$997 USD


