Watercolor Academy Online Course
A self-study, self-paced course where you can learn how to paint in watercolor by watching video lessons and doing assignments
$297 USD
ENROLL NOWA self-study, self-paced course where you can learn how to paint in watercolor by watching video lessons and doing assignments
$297 USD
ENROLL NOWOne-to-one, unlimited and custom-tailored to your skills and needs Personal Tutoring by the Watercolor Academy teachers
$997 USD
ENROLL NOWVideo lesson by Vladimir London
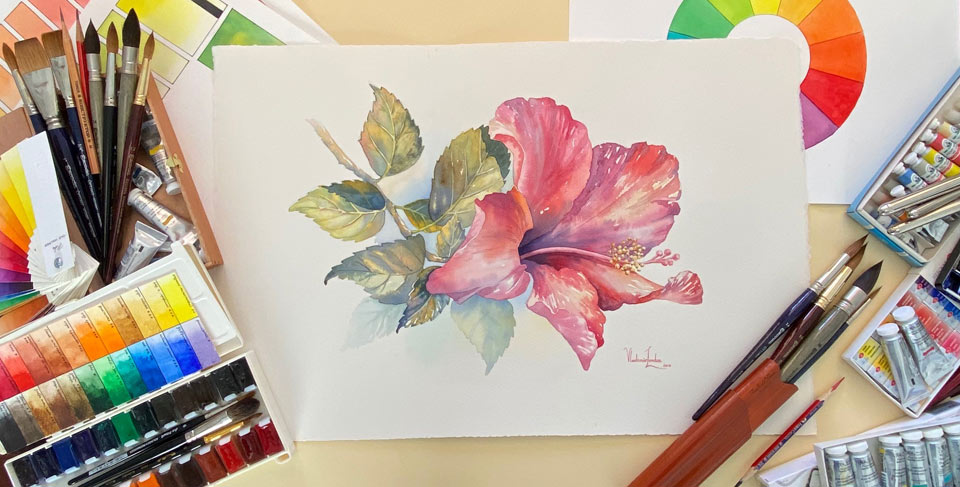
In this video lesson, you will discover how to paint a flower in watercolor.I will make an artwork of the hibiscus flower.
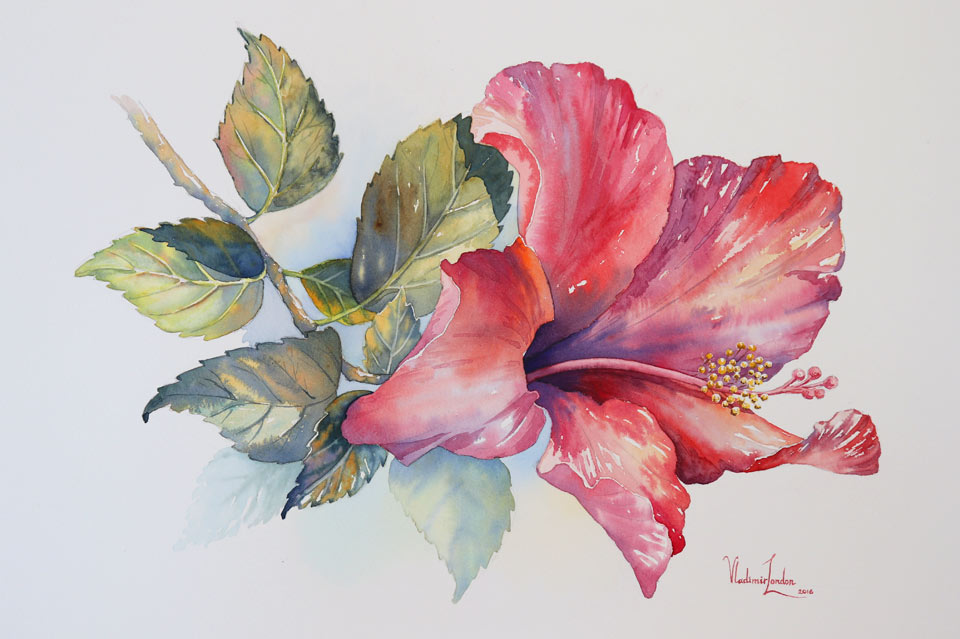
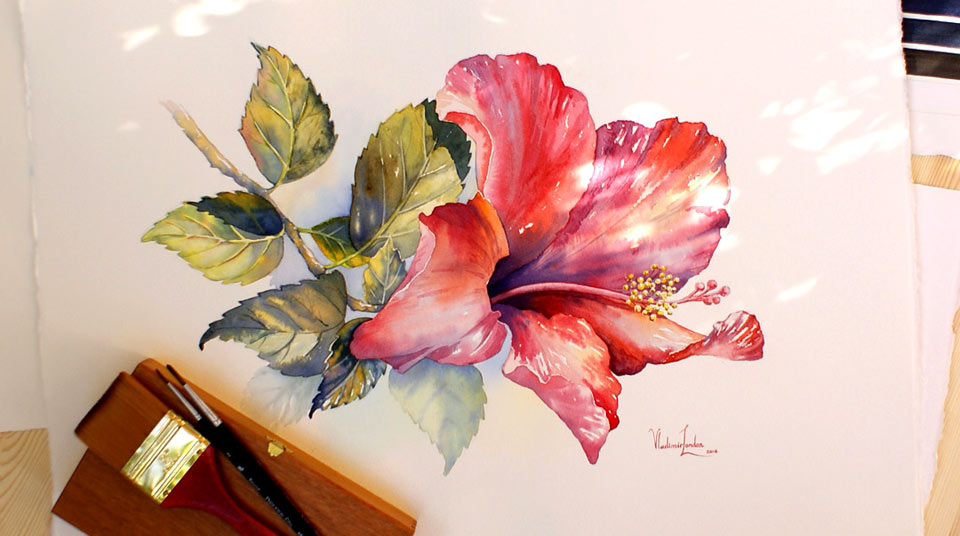
This is the artwork which I will achieve by the end of this lesson. It is produced on a half sheet of high quality watercolor paper. To begin this artwork, I make a drawing in thin graphite pencil directly onto the watercolor paper. The design of the hibiscus flower is quite simple. It comes in many different colors; however, mine is red, which I believe to be the most common case, although there are around 200 species of this plant. The flower I am drawing is shaped like a trumpet. It is quite large and around five inches long. The pistols of this flower protrude noticeably, and the flower also has a big stamen. Hibiscus plants typically grow in warm, tropical climates. Its flowers are beautiful and are used as decoration, as a food supplement, and also as a medicine. What I like about this plant is that it is blossoming for almost the entire year. Although one flower doesn't live long – for about one day – plenty of flowers pop up day after day; so, the plant always looks beautiful. The hibiscus flower represents feminine energy; it is also a symbol of beauty and charm. Red flowers symbolize passion, love and romance.
I will paint the flower one petal at a time, and in order to do this, I start with the alla prima wet-into-wet painting technique. To paint wet-into-wet, I first moisten the area of the paper surface on which I am about to paint, and I do this with a very light red tint. Whilst this tint is wet, I add more saturated red paint onto this area. The outline of the petal will have a sharp border; however, brush strokes inside will diffuse and spread out on the wet surface. You may notice that I do not fill the whole area in with paint, but leave some white gaps between brushstrokes to depict any texture and highlights of the petal. I add more and more red pigment onto the paper; this increases the color saturation of the petals, and increases the depth of the tonal values. For a much darker tone, I apply not red but dark blue color. This gives a nice light-dark contrast, as well as a temperature contrast. A little bit of blue paint is also added in some other areas, although this is much lighter and in smaller quantities. I will now dry the paper surface.
The next petal will be painted in the same style – wet-into-wet. I am applying different red pigments, together with the blue paint, to depict the texture and the colors of the flower. To save some time, I use masking fluid, adding a few small dots with the paint brush handle. This way, I don't have to paint around those dots. Also, it will be easy to clean the brush. Once again, the next petal will be painted wet-into-wet, hence why I applied a very light red tint to wet the area for this petal. Now I can add more saturated pigment with a smaller brush, leaving some unpainted gaps between the brushstrokes.
When it comes to choosing which red pigments to use, the short answer is whichever pigments you feel necessary. The secret here does not lie in some 'magic' red paint which you may or may not have, but in a combination of different pigments with warmer and colder colors, which may range from yellow to orange to red to purple. What is much more important than the name of each pigment is how you will make up tonal values. This is because it is perfectly possible to paint the entire red flower in any red pigment you have, which would produce a monochrome artwork. Should I paint a monochrome painting, the only way to make a flower believable and realistic is by depicting its correct tonal values. I have already demonstrated in the Watercolor Academy video lesson that it is possible to make a realistic artwork by using just one pigment. However, it is also perfectly possible to make a multicolor artwork using just two or three pigments. Therefore, if you have more than one red paint, that would be totally sufficient for painting a red flower.
You may see that, for solving the challenge of tonal values, I am not only painting in red pigments, but also introducing blue and violet colors. They are darker in tone and make the red colors stand out even more. I am now making some finishing touches, working with a small round brush to add smaller details. To keep the artwork fresh, it is important not to overwork it. I will leave this artwork to dry before taking the masking film off of the paper. And finally, I add some yellow spots with a small round brush to complete the flower.
With the red flower in place, I will now take care of the green leaves. When painting green foliage, there is one important secret: that it is better to mix your own green colors using various yellow and blue pigments, rather than to use manufactured green paints. There are many green paints sold by different manufacturers, and you will most likely have some green paints included with a watercolor paint box. Don't get me wrong, manufactured green paints are good, practical and useful, but not for painting green foliage, however strange it may sound.
You will find that mixing green and red paints will produce some beautiful brown colors. Also, green and blue paints are great for mixing colors to paint various objects and effects, such as sea water. There are many other combinations where green paint may add an interesting effect, such as when mixing it with orange or purple colors. Nevertheless, using green paints as they come from the tube seldom works well for painting greenery. That is why, when it comes to painting green leaves, you may find it better to use other pigments.
You can apply different paints on paper without mixing them on the palette, and the array of yellow and blue colors will visually mix into green. However, another method of producing green is to directly mix blue and yellow colors on the palette, which achieves any green hue of your choice. Following this latter method, you are quite likely to obtain not a pure green, but a tint or shade that looks greenish. This is much more desirable, because using an open green color in full saturation may blow your artwork out of color balance. Also, an open green color may look beautiful on the palette, but could easily turn your artwork into one made by a child, who uses paints as they come from pans.
To overcome this challenge, you have to learn how to paint green leaves without using green paint. This is especially important when you paint a flower, like I am doing right now. Should I go for highly saturated green colors, they will compete with the red flower, and the focal point of the artwork will be shifted from the flower to the secondary foliage. This is not what I would like to get, especially since the name of this artwork is 'red flower' and not 'green leaves'. Also, when painting greenery, you need to learn how to see all the other colors that are present there; green leaves are not just green – they have a very wide gamut of colors, from yellow to orange to blue and even violet. Even if you do not see such a color array in life, as an artist you have the full creative license to invent those colors and convey your vision to a viewer. As you may see, in just one green leaf, I am using yellow, blue, orange, red and anything in between, any color apart from open green color to paint this leaf.
Once again, this is not about which colors you use, but about how convincingly you describe tonal values, and the warm and cold contrast you have in the artwork. The contrast between light and dark values, and the contrast between warm and cool colors, most often have a very strong correlation between each other. So far, I have painted the greenery wet-on-dry in order to produce sharp leaf borders, but I am now changing the painting technique to wet-into-wet, which allows to achieve much softer borders between brush strokes. I add some background details, and in order to describe the proximity of leaves to a viewer, I use aerial perspective, which tells us that the leaves in the background are lighter and more diffused than the leaves in the foreground. I then paint another leaf that is much lighter than the others and comes with a softer contrast. This is a nice additional detail for this composition...
A self-study, self-paced course where you can learn how to paint in watercolor by watching video lessons and doing assignments
One-time payment - Lifetime membership
$297 USD
One-to-one, unlimited and custom-tailored to your skills and needs Personal Tutoring by the Watercolor Academy teachers
One-time payment - Lifetime membership
$997 USD


