Watercolor Academy Online Course
A self-study, self-paced course where you can learn how to paint in watercolor by watching video lessons and doing assignments
$297 USD
ENROLL NOWA self-study, self-paced course where you can learn how to paint in watercolor by watching video lessons and doing assignments
$297 USD
ENROLL NOWOne-to-one, unlimited and custom-tailored to your skills and needs Personal Tutoring by the Watercolor Academy teachers
$997 USD
ENROLL NOWVideo lesson by Vladimir London
In this video, you will discover how to paint sky and water, by applying transparent glazing layers of gradated washes.
Here is the artwork that I will achieve by the end of this video lesson.
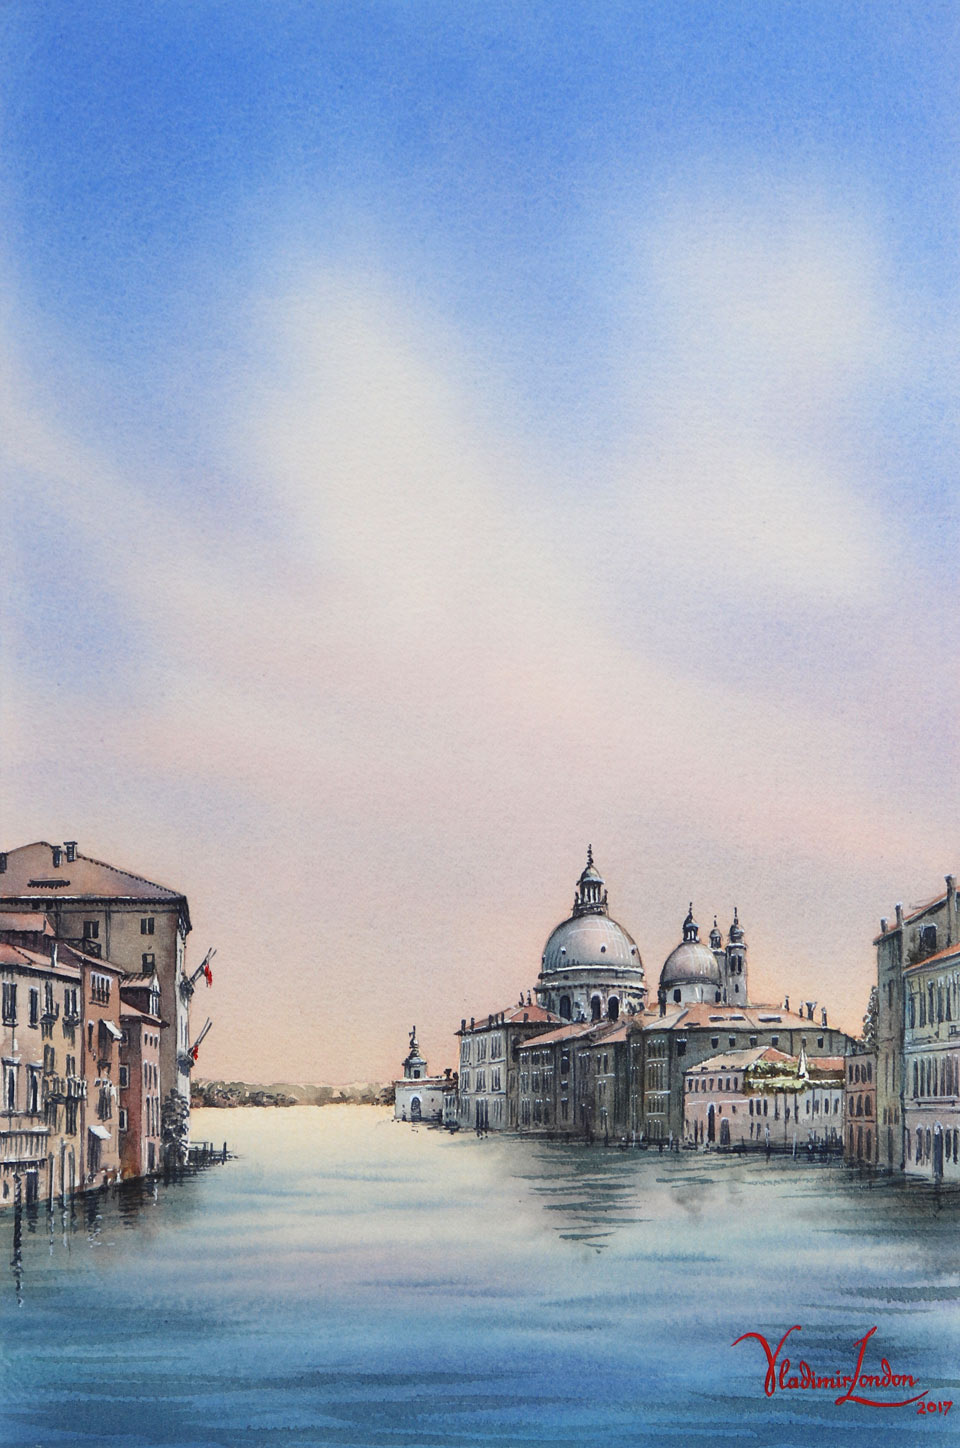
This artwork takes an inspiration from a beautiful view of the city of Venice. The sky is almost clear with a few almost-transparent clouds. It is a bright and sunny day, with sunshine flooding the Grand Canal and the architecture. I make a fast sketch with watercolors, using the outline-and-wash painting technique, not only to capture the feeling of the place, but to have a reference image when I am back in the studio, so that I can make a larger and more detailed watercolor painting.
This view is magnificent, and it will be very interesting to paint it in multiple glazing layers. In this sketch, I am not interested in every single detail and precise colors – it is just an impression of the place that will remind me of its beauty and composition.
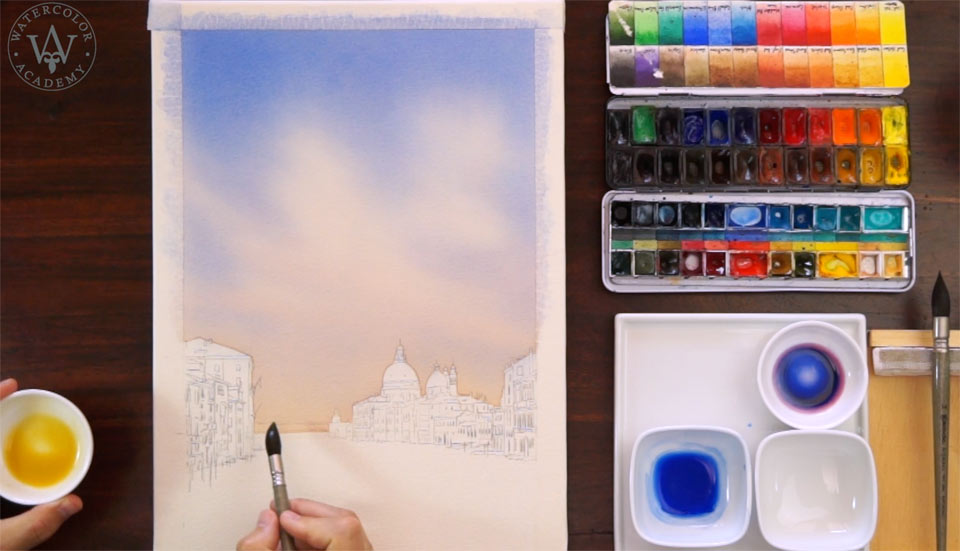
I am now back at the studio, where I have already made a drawing on the watercolor paper, and it is time to decide on the colors. I have already tested how different pigments mix and look together with each other, and now I can premix those pigments for the wash. The first paint I mix is yellow ochre from a Saint Petersburg manufacturer; and another paint that comes from Old Holland – it has a very long name and consists of three pigments. I have to say that you don't have to buy it, unless you have a very good reason to do so; it can be easily replaced by other transparent rose paints. I turn the board upside down and place it at a roughly 15-degree angle, so that the bottom end of this artwork is raised slightly higher than the top end. This tilt is essential for the wash. I did not mask the cityscape outline, and to preserve the white paper, I simply paint around the buildings. Because liquid paint flows down on the tilted board, there is no risk of paint running over the buildings on the background.
For the purpose of this lesson, in order to paint the sky and water, I will make multiple glazing layers of gradated washes. For the first layer, I am using a very light tint of natural Earth yellow paint, which is very transparent. I apply it wet-on-dry in multiple diagonal brushstrokes, in what I refer to as a 'saw' wash. Because this is a gradated wash, after each band of brushstrokes, I add clean water into the saucer, to make the mix slightly lighter. By adding more and more water into the saucer, I am not only diluting the paint, but also increasing the volume of the mix. That is why, in the beginning, I don't have to mix a sufficient quantity of paint to last for the entire wash, because by adding water during the process, I will never run out of the mix. In theory, should I do it indefinitely, adding more water, the tint will become as light as clear water. However, in practice, I will just end up this wash with a very light tone of yellow color. You can see a very soft gradation from light yellow at the top to a very pale and transparent color at the bottom. I finish this wash by absorbing the excess bead with a damp brush, and then leave the watercolor paper to fully dry. After the paper is dry, I make another gradated wash on top of the previous layer. For this wash, I use the same pigment; however, it is a bit darker than for the previous wash. Once again, I start from the horizon and the cityscape line, keeping the board upside down. You can see that the bottom of the painted area collects a nice and juicy bead. As long as I go with a constant speed of doing this wash, and the bead flows from one band of brushstrokes to another, the wash will be very smooth without any borders or visible brushstrokes. So far, I have applied two coats of light yellow tints. This yellow color gradates from slightly darker tones at the horizon to lighter tonal values at the top of the sky.
To make the color of the sky at the horizon even warmer, I will do one more gradated wash, this time applying the rose color. This is a very transparent paint, which is great because I would like the yellow color to show through. I am still keeping the board upside down, to protect the cityscape outline. Also, it is easier to do a gradated wash that starts dark at the top and ends lighter in value at the bottom, because adding an equal amount of water into the mix at the end of each band is quite straight-forward.
For the wash, I am using a soft natural-hair brush from Escoda. This mop brush takes a lot of water and releases it nicely onto the paper surface. You may wonder why you shouldn't paint the whole sky in alla prima, painting it in full strength. While this is totally possible, you will see at the end that an artwork painted in multiple glazing layers will look very different, compared to what can be achieved in alla prima. For the gradated wash, I will use a larger mop brush – as this wash is juicier, it therefore requires a larger brush size. For this wash, I will be using the blue Ultramarine paint, which contains pigment PB29. This paint comes from a Russian manufacturer and has a wonderful blue color; I test its tone on a piece of paper before using it. The board can now be turned the right way, and while the previous wash is wet, I will paint this blue mix wet-into-wet.
I load enough paint onto the brush; the understanding of what constitutes as 'enough' only comes with practice. I want this coat of blue paint to spread out softly on the paper surface, but to not run uncontrollably in streams. That is where the feeling of the right balance – of how much water is on the paper and on the brush – becomes very handy. I have quickly mixed an even lighter blue tint to continue this wash. By the way, this blue coat on its own technically is not a glazing layer, because it is mechanically mixed with the previous wash of the rose color. Nevertheless, together with the previous wash, it is a glazing layer. While this coat is wet, I pick up the board and tilt it at different angles; this allows the paint to flow in various directions and intermix better, forming a smoother gradation. After this gravitational mixing, I leave the paper to fully dry before continuing with the next glazing layer. Once the paper is dry, to make the next wash, which I am planning to do wet-into-wet, I turn the board upside down, so that its bottom end is slightly higher than the top one. Using a big mop brush, I can now apply clear water across the whole area of the sky. I do this if I am applying a plain wash. You can see that a nice bead forms at the bottom of the wet area, and I will be going this way until the very end. Because the mop brush is very soft, it does not remove pigments from the paper.
When the whole sky is wet, I once again rotate the board 180 degrees, and will now make another coat of blue Ultramarine, to increase the saturation of the blue sky and darken up its tonal values. I applied this blue pigment wet-into-wet with diagonal brushstrokes. Because the paint flows straight down under gravity, but the brushstrokes are diagonal, such a difference in directions helps to intermix the paint directly on the paper surface. This way, you can see that it is possible to achieve very soft gradations of tones and to intermix it even better, so I pick up the board and tilt it at different angles. This way, the gradient of the sky will become even smoother. After this step I will let the paper to fully dry. To demonstrate to you that the sky can be painted in glazing layers, I will do another coat wet-into-wet. For this purpose, I once again rotated the board upside down, so that I could wet the area of the sky with clean water. I do this as a plain wash with horizontal brushstrokes. Let's now rotate the board to as it should be: tilted at about 15 degrees, with the top end being higher than the bottom one. I am applying the blue Ultramarine mix with a fully loaded mop brush, enhancing the saturation of this blue color and deepening its tonal value. To depict some clouds closer to the horizon, I am applying a very light blue tint with diagonal brush strokes. The board can now be tilted at different angles once again. I will let the paper surface dry thoroughly before making another wash.
I will now make the final layer of blue paint to finalize the top half of the sky. To paint wet-into-wet, I will first apply clean water with a soft mop brush. Such a brush doesn't wash out any pigment particles. After rotating the board back to its normal position, I will make the final blue ultramarine coat. If you wonder how many coats should be applied, it depends upon your creative task. Ideally, you should aim to keep the number of layers sufficient, but not excessive. It is perfectly possible to paint the sky in just one layer; but to demonstrate this particular technique to you, I am applying gradated washes in several glazing layers. After tilting this board, to intermix blue paint, I will thoroughly dry the artwork before doing the final layer of the sky. For this last glazing, I mix the rose and blue paints to obtain a violet color. This color is needed to slightly mute down the yellow part of the sky. I then make a gradated wash on the board that is turned upside down, painting over the yellow part of the sky. This wash is applied wet-onto-dry, with a smaller mop brush from Escoda. The tint is very light and it does not change the sky color dramatically, but slightly reduces its saturation. One of the main rules when painting the sky is to keep it light and transparent, so all of the multiple layers I painted previously were very transparent.
To make a gradated wash, I add clean water into the mix after each horizontal brush stroke, which makes the next brush stroke slightly lighter than the previous one. I will let this wash fully dry before applying the next one. The next layer will be made in a pink color. I paint this on top of the yellow coat, to make it more similar to the sky color. This wash also gradates from dark to light tonal values. While the paper is wet, I add the violet color, applying it with a flat natural-hair brush that holds less water. Painting the violet mix wet-into-wet helps to achieve very soft brush stroke borders. After this step, I will leave the paper to fully dry. The paper is dry by now, and to apply the next layer wet-into-wet, I use a soft mop brush to moisten the surface with clean water. I can now add a light tint of blue paint, making horizontal strokes with a smaller mop brush. It is important not to overload the paper with water, so that paint won't run down in streams. When the paper is fully dry, I can rotate the board upside down to make another gradated layer of blue color. Because the area for this wash is rather small, I am not making a bead, but I only use enough water to create a gradient from dark to light tones.
In order to paint dark waves in a colder blue color with soft horizontal brushstrokes, I have to rotate the board back to its normal position. These waves are added wet-into-wet. In order to create an illusion of linear and aerial perspective, I am painting the waves bigger and darker on the foreground, and smaller and lighter on the background. This artwork is progressing nicely. I will now paint the Venice skyline, depicting its iconic architecture. Whilst I am doing this, let me recap the topic of this lesson. Both the sky and the water can be painted in multiple glazing layers of different colors. Such transparent layers can be applied using the gradated wash watercolor painting technique. This technique is very different from alla prima, where an artwork is made in one go. When painting in glazing layers, every previous layer has to be fully dry before applying the next one. When I was painting the sky and water, I pointed out every instance where the paper must be dry before painting on top. This method of painting is called 'indirect painting', because pigments of various colors are not mixed directly on the palette or on paper. Instead, every color of each separate layer optically mixes with other layers and contributes to the overall appearance of the artwork. Such an effect is called 'optical mixing'; because by its nature, the watercolor medium is transparent, every colored layer shows through and plays its role in the artwork. This is what you can see in this painting: the warmer yellow color of the sky clearly shows through transparent layers of blue paint. The same applies to water as well.
From the color theory, you know that by mixing blue and yellow paints, you may obtain a green color. I am not sure about you, but I definitely don't want to have a green sky. As you can see, there is nothing green about this sky, despite the blue and yellow pigments overlapping each other. This is the magic of optical mixing: when the color looks different, should the same pigments be used for direct painting.
A self-study, self-paced course where you can learn how to paint in watercolor by watching video lessons and doing assignments
One-time payment - Lifetime membership
$297 USD
One-to-one, unlimited and custom-tailored to your skills and needs Personal Tutoring by the Watercolor Academy teachers
One-time payment - Lifetime membership
$997 USD


