Watercolor Academy Online Course
A self-study, self-paced course where you can learn how to paint in watercolor by watching video lessons and doing assignments
$297 USD
ENROLL NOWA self-study, self-paced course where you can learn how to paint in watercolor by watching video lessons and doing assignments
$297 USD
ENROLL NOWOne-to-one, unlimited and custom-tailored to your skills and needs Personal Tutoring by the Watercolor Academy teachers
$997 USD
ENROLL NOWVideo lesson by Vladimir London
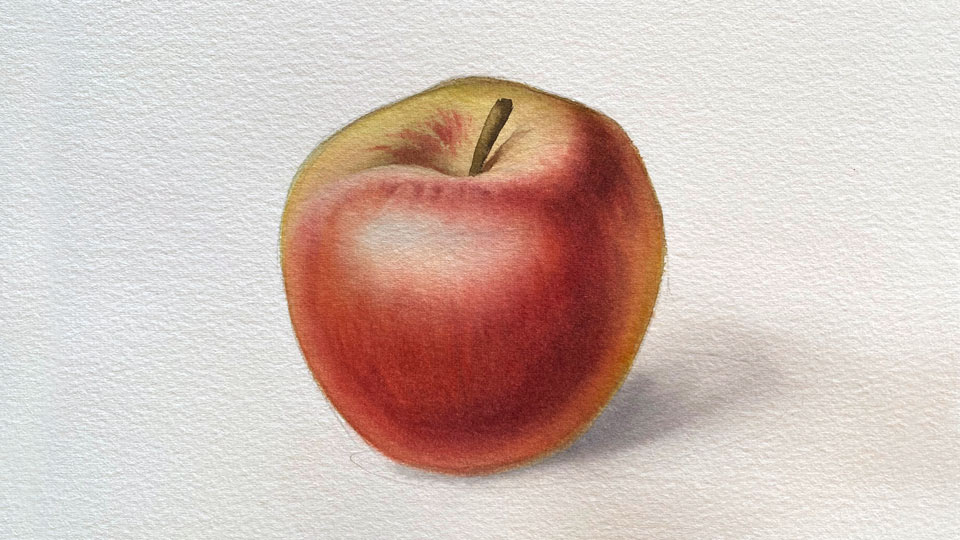
In this video lesson, you will discover how to paint in watercolor using the 'wet-on-wet glazing' technique.
In order to explain and demonstrate the wet-on-wet glazing technique, I will use the same object as in the previous lesson – an apple. I will make a quick sketch on watercolor paper with graphite pencil, but as I mentioned in the previous lesson, you do not have to use an apple – it can be any object you like. It is not about what you paint, but how you do it.
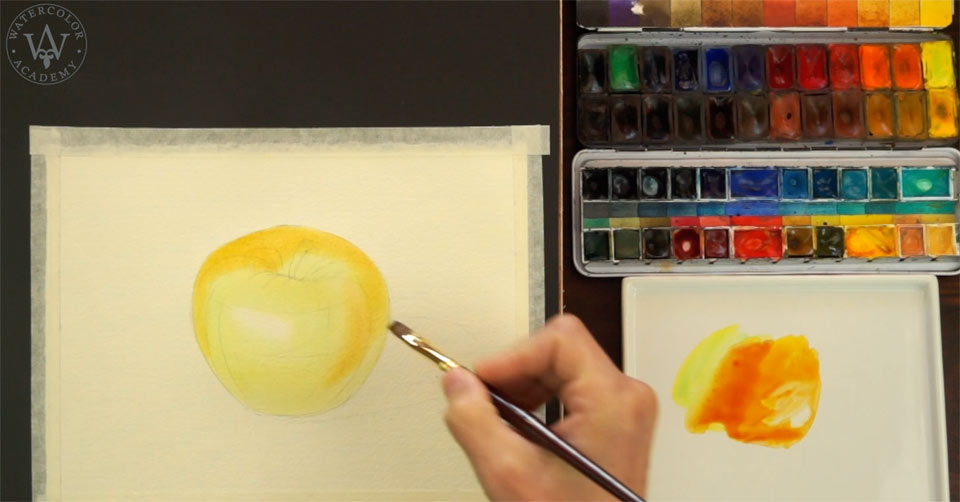
First, I will prepare a mix of colors for the first layer, mixing a couple of pigments on the palette. As the name of this painting technique suggests, it has to be done wet-on-wet. That is why, to prepare watercolor paper for the first glazing layer, I apply clean water over the apple drawing with a soft natural hair watercolor brush. This high-quality brush comes from Escoda. Now, with another flat brush from Escoda, I take the pre-prepared mix of paints and apply it onto the wet paper surface. The degree of paper wetness is somewhere between satin and moist, and the paintbrush is also moist. That is why the paint does not flow uncontrollably, but the borders of the brush strokes are quite soft. You can see that I preserved a portion of the white paper, to suggest a highlight, by painting around it. Now, I have to thoroughly dry this first layer.
The next glazing layer will be warmer and more saturated, so I add a couple of more pigments into the mix on the palette. Before using this mix, I have to wet the paper surface once again with clean water. This should be done quite carefully without washing out the paint layer.
Now, the warmer layer can be applied on top of the previous one. It is painted onto the wet paper surface, but as a separate glazing layer, because the previous layer was fully dried and stays in place as an underpainting. You can see that I do not cover the entire area of an apple with a second layer. There are some places left where the first glazing layer is uncovered, and its color is unchanged by this warmer mix. I am using a hairdryer to thoroughly dry the paper surface to prepare it for the next glazing. For this step, I first prepare the paint mix, and then wet the surface with clean water. I am applying very light pressure on the brush, not to dilute paint layers that are already in place. Now I add, on top of the underlayers, a new glazing layer which is warmer in color and darker in tone. Because it is painted onto a wet surface, the borders of the brush strokes are soft and diffused. In a way, this painting technique is very similar to the 'wet-on-dry glazing' watercolor painting technique, which I explained in the previous video lesson. The only difference is that, before adding every next glazing layer, I prepared the paper surface by wetting it with clean water after fully drying the previous underlayer.
By painting wet-into-wet, it is much easier to make softer borders of brushstrokes. This can be very handy, for example, when you make watercolor portraits with smooth gradations of colors and tones. You may wonder, why to dry every previous layer, if the paper surface has to wet again before adding the next glazing. Such sequnce is very fundamental for this painting technique. It is perfectly possible to paint wet-into-wet without waiting for paint to dry, but it will no longer be a wet-on-wet glazing painting technique. Instead, it will be wet-into-wet alla prima, which is very different from what I am doing in this video.
Alla prima, or painting from the first attempt, is a direct painting method, meaning that the pigments are mixed directly with each other on the palette or on the paper surface. Such a mechanical mix produces a very different appearance to the optical mixing. Optical mixing means that different colors of separate layers contribute to the visual appearance of the artwork. The light goes through all of the layers and reflects back from the white surface of watercolor paper – on its way to the paper and back, it is filtered by the differently colored pigments in each layer. Should all of those pigments be mechanically mixed together in one layer, a different look will be created.
There are several rules which you need to keep in mind and follow in order to achieve good results when glazing wet-on-wet: painting in watercolor should go from light to dark tonal values; every glazing layer has to be totally dry before applying clean water to prepare the painting surface for the next layer; and every glazing layer has to be very transparent. Finely grinded pigments and dyes should be used for underlayers, and paints with heavy and large pigment particles should go on top. If possible, the colder color layers should be applied on top of warm colors.
It is better to make every next layer more saturated and slightly darker in tone than the previous one. The number of glazing layers should be sufficient but not excessive. If an artwork starts losing transparency, then there are either too many layers or they are very opaque. Do not worry if you have not managed to memorize all of those rules the first time around. Rules are just a theory – what is much more important is practice. I would advise to take a simple object, not necessarily an apple but whatever you like, and paint it using the watercolor technique that you have learnt in this video. Also, it does not matter which colors you use because the 'wet-on-wet glazing' painting technique is universal – it does not depend on colors.
A self-study, self-paced course where you can learn how to paint in watercolor by watching video lessons and doing assignments
One-time payment - Lifetime membership
$297 USD
One-to-one, unlimited and custom-tailored to your skills and needs Personal Tutoring by the Watercolor Academy teachers
One-time payment - Lifetime membership
$997 USD


