A self-study, self-paced course where you can learn how to paint in watercolor by watching video lessons and doing assignments
$297 USD
ENROLL NOWA self-study, self-paced course where you can learn how to paint in watercolor by watching video lessons and doing assignments
$297 USD
ENROLL NOWOne-to-one, unlimited and custom-tailored to your skills and needs Personal Tutoring by the Watercolor Academy teachers
$997 USD
ENROLL NOWby Anna Ivanova
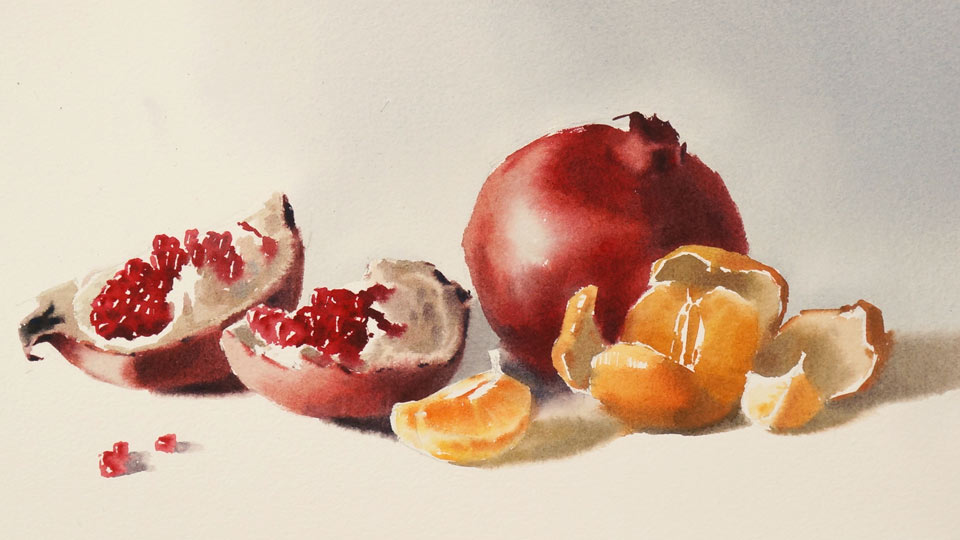
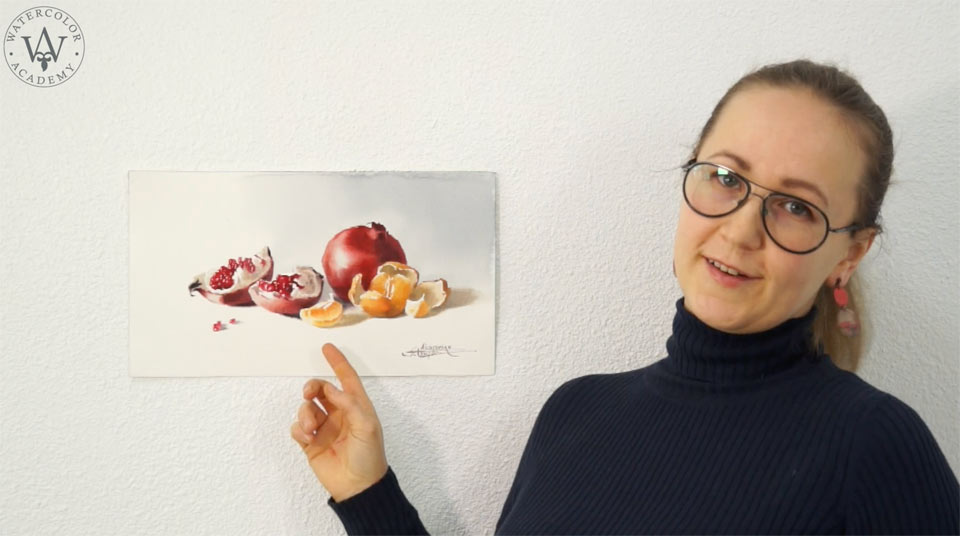
The subject of today's video lesson is a still life, which consists of bright, colorful fruits. You will learn how to make a background wash, as well as how to paint small details in full color. Here is the finished watercolor piece I will paint in today's video lesson.
I begin by preparing the watercolor paper for painting. I wet the reverse side with a soft, natural-hair brush and, when this side is saturated with water, I turn it over. The front side already has a still life sketch done in soft, graphite pencil, and I wet this side with a flat brush as well, making sure I don't leave any gaps. After the paper absorbs the water for several minutes, I blot it with a paper towel to absorb the excess water. Now I can wet the background area with a soft brush once again.
A mix of ultramarine and sepia is prepared on the palette. I use a big flat brush for this purpose. With the same brush, I paint this mix on the paper. When a background is dark, I usually start a piece by painting the still life objects. However, in this video lesson, the background will be quite light. So, I will do it first before continuing to the objects. The mix of two complementary colors, ultramarine and sepia, give a neutral, silvery-gray color. After applying it with a big flat brush, I can now fine-tune the objects' outlines with a smaller brush. You may notice that in shadowy areas, I overlap the background on top of the pomegranate. With the background in place, I can now continue painting the fruits.
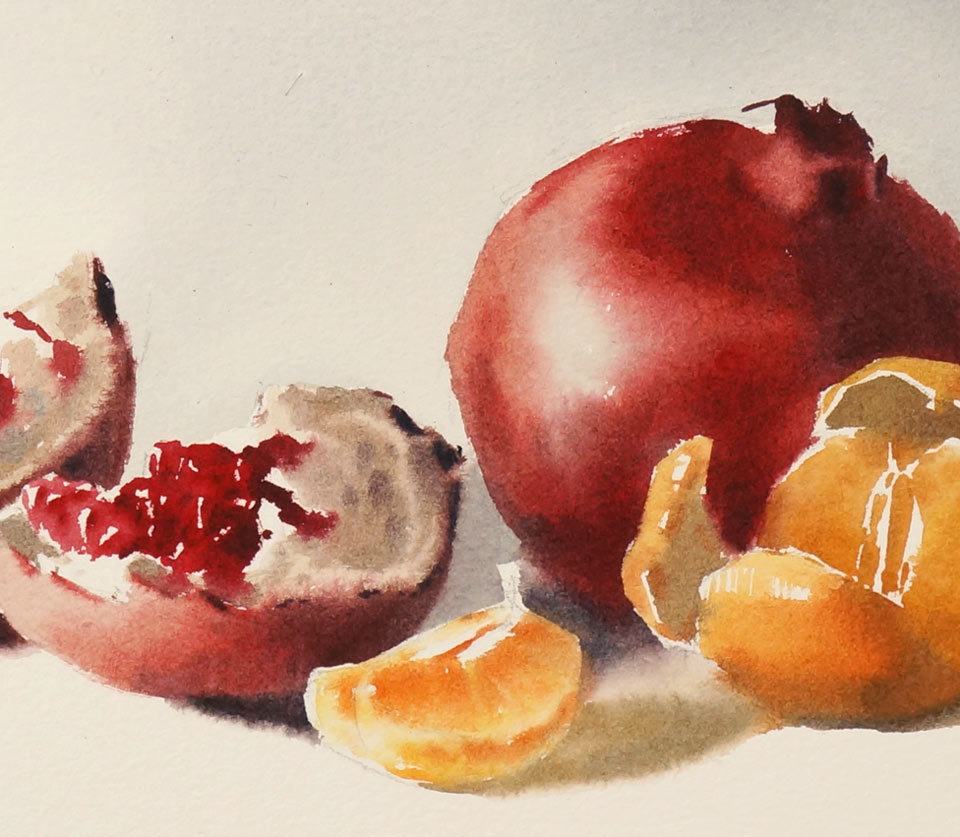
For the dark color, I'm using burnt umber, sepia, and ultramarine. The watercolor paper is moist. There is no water on its surface, but it feels cool because the moisture trapped between the fibers of the paper evaporates. And, because the paper is moist, I load very little water on the brush. However, the brush contains enough pigment to give dark, saturated brush strokes. This painting technique is called "dry brush on moist".
You may also notice that I'm keeping a paper napkin under my hand. This protects the white paper from grease and stains that can accidentally ruin it. Because I paint watercolor in alla prima, which means "in one session", I usually start it from the top left corner so my right hand can rest on unpainted paper. In most cases, I'm striving to achieve full color from the first attempt. Judging tonal values when the object is on white paper can be quite challenging and requires some practice. For example, the white membrane of the pomegranate is not white in this watercolor and, to give a bigger contrast between this membrane and the pomegranate skin, I have to make the red color even darker. There is a limit how dark a pure red color can be. To deepen up its tonal value, I may have to add another pigment, blue or violet, for example.
The pomegranate skin is done. Now it's time to paint its seeds. You may have noticed I'm using the same brush for big and small details. This brush has a pointed tip which is loaded with a lot of pigment and very little water. And because the paper is moist, it takes the pigment readily, keeping the edges of the brush strokes sharp. This allows me to cover big areas, little by little, applying paint with small brush strokes. Small amounts of water on the paper and brush also prevents pigments from sinking into the fibers of the paper too much. This prevents a big drying shift when a pigment gets a lighter tonal value and also might change its color after drying. This is one of the advantages of the dry-brush-on-moist watercolor painting technique. The pomegranate is split open into several pieces and, after completing the piece on the left, I'll move on to the next one. Once again, I'm starting with its white membrane. This follows one of the main rules of painting in watercolor, which says that painting should progress from light tones to darker values.
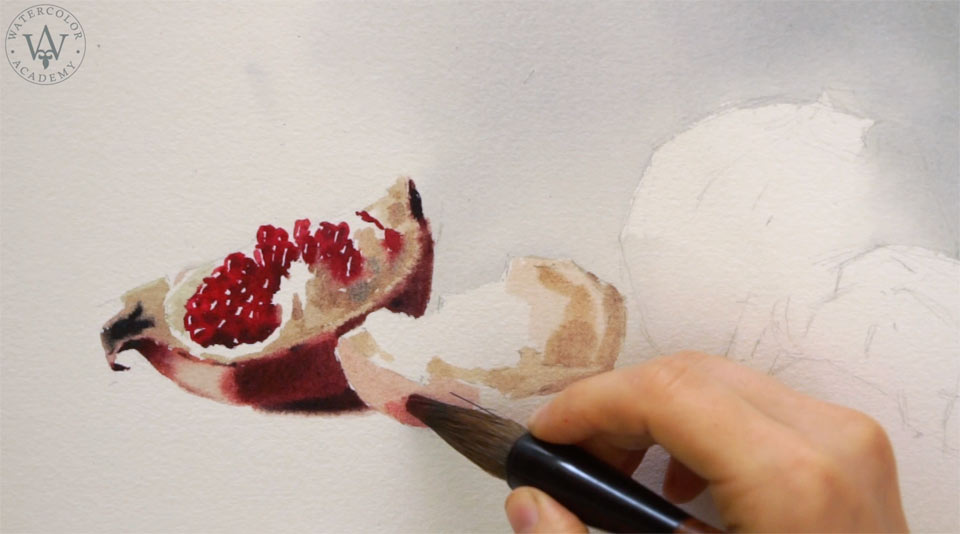
You may see that I don't fill in all the area of the white membrane. Instead, I leave some white gaps unpainted. These spots of white paper are left intentionally. For now, they work as the brightest highlights. Later on, I might tone down these highlights or may leave them unpainted. This will depend on the overall tonal composition of the piece. The skin of this pomegranate is also painted from light to dark. This way, it's easier to control tonal values but, even more importantly, it makes the colors of the artwork brighter and more saturated. The red color of pomegranate's skin ranges from very pale burnt sienna in the light areas to a very dark mix of red and ultramarine in the shadows. The pomegranate seeds are painted in only two pigments: red and ultramarine. I also leave a white unpainted highlight for every seed. This makes the seeds appear glossy and juicy. With the dark color of the pomegranate seeds in place, I can now come back to the white membrane and deepen up its tonal value to be in tune with the rest of the fruit.
There is one more unopened pomegranate in this still life. I paint its highlights with a light gray color. This color suggests that the light is cold, which usually happens when a still life is located indoors. This gives cool lights and warm shadows. You may see the cast shadows under the two pieces of the split-open pomegranate are warm. I used a mix of sepia and red pigments with a small addition of ultramarine to darken it up for these cast shadows. You may also notice that the borders of those cast shadows are a little bit fuzzy. This diffusion happens because the paper is moist and, with time, the pigment spreads a little bit. That is why, when working in the dry-brush-on-moist painting technique, it's very important to keep moisture on the brush to a minimum if you want to make sharp edges that will stay well-defined until the paper dries.
Coming back to the round pomegranate, you may see that I used a little bit more water in the middle and kept the brush very dry to outline the pomegranate's edges. I also have to say that tonal values in watercolor artwork are much more important than colors. For example, you can paint this pomegranate in any red color you like and it will look like a pomegranate as long as you depict correct tonal values.
A few pomegranate seeds are lying on the table. They are painted in the same manner as drops of water, which is a round shape painted in one color and the highlight preserved as white paper. The core shadow is marked in the middle of the drop and the dark cast shadow is painted next to it. With two pomegranates completed, it's time to take care of the mandarin. Its color is mixed from vermillion, yellow, and raw sienna. Once again, exact colors are less important than tonal values. It doesn't matter if you use lemon yellow or cadmium yellow. It will look like a mandarin if you do the necessary light-dark contrast. Of course, different colors will look a little bit different but, whatever the color is, it will be perceived as the artist's choice. However, if you do the tonal values wrong, it will appear as the artist's mistake. I painted the shadow cast by the mandarin in a different color than the pomegranate shadows. It's not so different in real life, but I would like to create an illusion that this mandarin is so juicy that it is almost transparent.
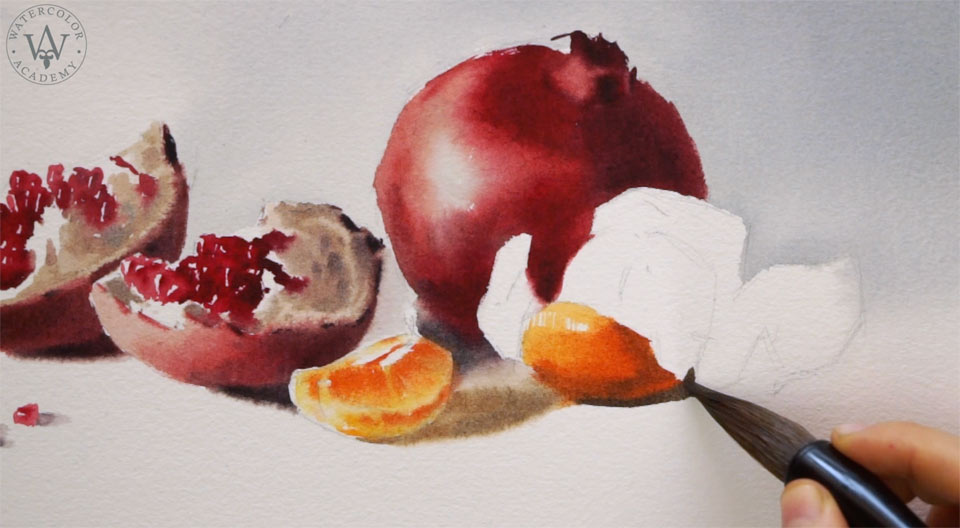
Because this is a small sized watercolor, the progress is quite fast and the paper is still moist. So far, it was not necessary to wet it again. This is also because the temperature in the studio is not too high and the humidity is not too low. This allows the paper to dry more slowly. If your painting conditions are different and the paper dries quickly, you may need to lift one side of the paper off the board and wet the reverse side with a flat brush. Then, carefully place the paper back and lift the other half to wet it from the back side as well. Repeating this exercise from time to time will keep the paper moist for as long as you need it. However, you need to finish the piece in one session. It would not work well if you leave the dried paper overnight and would try to wet it again the next morning.
Also, you may wonder how to load the brush with just a little water. To begin with, do not use a lot of water to mix the pigments on the palette. The mix should be thick enough to stay on the palette without running down when you hold the palette vertically. Also, before loading this mix on the brush, you may want to blot the brush on a paper towel. Take only the necessary amount of pigment on the brush's tip. Use a bigger brush than you think you need. This way, the belly of the brush will absorb excess water from the mix and leave a drier pigment on its tip. This is what the term "dry brush" means.
The feeling of how wet the paper should be and how much water should be on the brush only comes with practice. I have been painting with watercolors for many years but it took me about six months to master the dry-brush-on-moist painting technique. So, don't get upset if you, for some reason, cannot do a perfect still life piece your first try. It simply takes time and many wasted artworks to get to the point where you have full control over the paint flow and the picturesque effects you'd like to achieve...
A self-study, self-paced course where you can learn how to paint in watercolor by watching video lessons and doing assignments
One-time payment - Lifetime membership
$297 USD
One-to-one, unlimited and custom-tailored to your skills and needs Personal Tutoring by the Watercolor Academy teachers
One-time payment - Lifetime membership
$997 USD