Watercolor Academy Online Course
A self-study, self-paced course where you can learn how to paint in watercolor by watching video lessons and doing assignments
$297 USD
ENROLL NOWA self-study, self-paced course where you can learn how to paint in watercolor by watching video lessons and doing assignments
$297 USD
ENROLL NOWOne-to-one, unlimited and custom-tailored to your skills and needs Personal Tutoring by the Watercolor Academy teachers
$997 USD
ENROLL NOWVideo lesson by Vladimir London
In this video lesson, you will discover how to use the wash-and-outline technique for painting a cityscape.
This is the artwork I will achieve by the end of this video lesson.
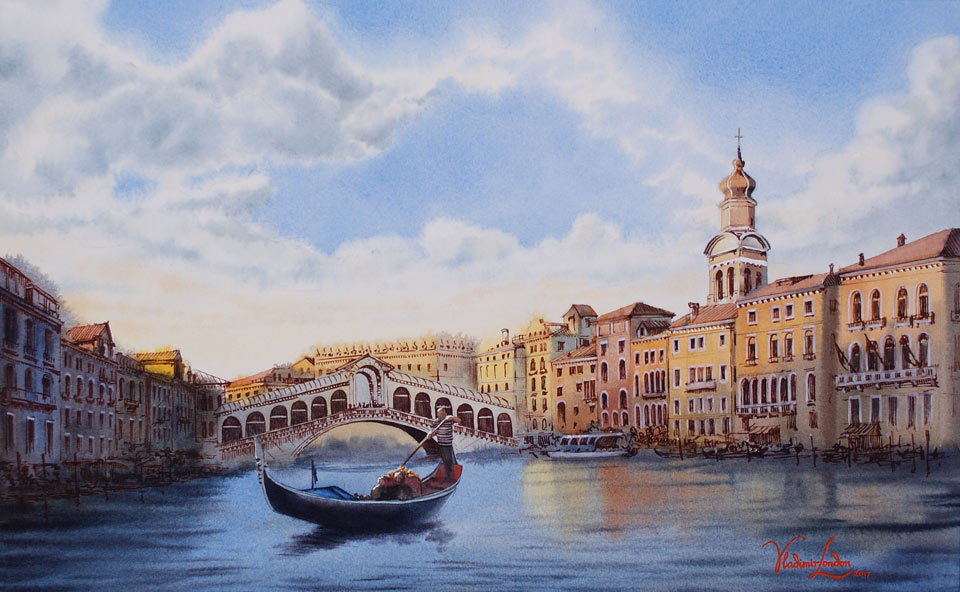
The subject for this painting was inspired by a beautiful city – Venice. The view of the Grand Canal is magnificent, the sun is setting and some buildings are lit with a warm light while others are in dark, cold shadows. I will make a watercolor painting of the view of Rialto Bridge. I will do this by applying cold and warm color washes, after which I will then make a linear drawing on top of the watercolor artwork, depicting numerous details of the bridge and surrounding architecture.
I start by making an under-drawing in graphite pencil directly on the watercolor paper sheet. This is high quality watercolor paper, which has 300gsm weight and a cold-pressed surface. Although 100% cotton paper can withstand some erasing without any problems, if you have any doubts in your drawing skills, or would like to make a fairly complicated composition, it is better to make a preliminary drawing on a separate sheet of paper and then transfer it. This way, you can work on the composition without worrying about spoiling an expensive watercolor paper sheet. To me, the composition I am making is quite straightforward and simple enough to draw directly onto the watercolor paper. Just in case, I am applying a very light pressure on the pencil, and should anything go wrong, it would be easy to erase and fix a mistake.
If you want to learn how to draw whatever you see or imagine, you can take the Drawing Academy online video course. In this course, you will discover how to use constructive drawing principles, including linear perspective, proportions, alignments, how to depict tonal values using professional rendering techniques, and so on. This drawing course also comes with very valuable personal support.
With the composition in place, I will now use masking fluid to create a white protective frame around the artwork. First, I wet a cheap synthetic brush in a liquid soap and wipe it with a paper towel. After such treatment, it is easier to clean up the brush after using it for masking. After the masking is in place, I will thoroughly dry it for at least one hour. For the next step, I use muslin cloth and a wide synthetic brush. First, I prepare the cloth by unwrapping it and placing it on the plastic board. Afterwards, with a flat, wide, synthetic brush, I wet this cloth with clean water. When this cloth is thoroughly soaked in water, I place the watercolor paper sheet face down. I thoroughly wet the reverse side of the sheet with clean water, using the same brush. A natural or synthetic sponge can also be used for that purpose. Alternatively, you can place the entire sheet into the bath for a couple of minutes. When the paper absorbs water, I lift it and turn it face-side up and accurately place it on the muslin cloth. Now, the front side of the watercolor paper sheet has to be moistened as well. It will take about 10-15 minutes for the paper to absorb water and become moist. When the paper is moist, I can begin painting in watercolor. For the blue color of the clear sky, I will use Cobalt blue from Windsor & Newton.
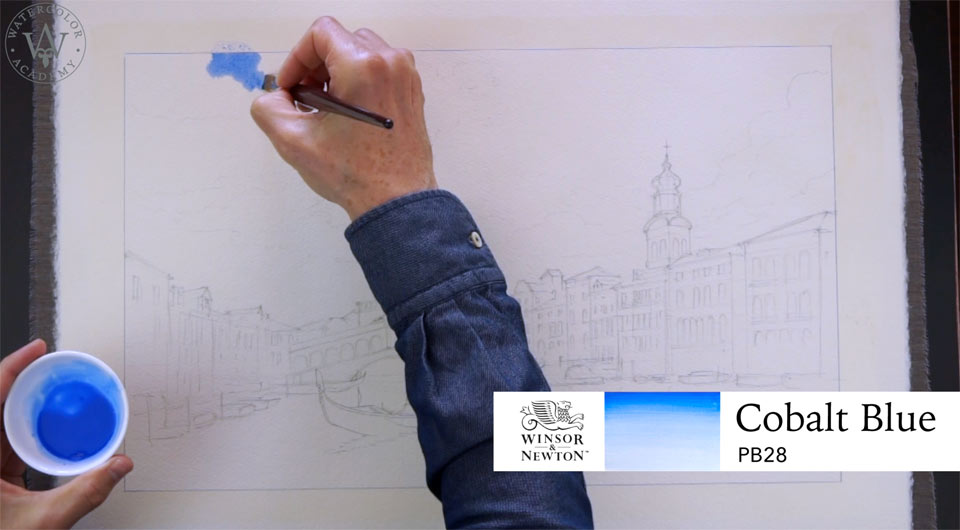
This blue paint is semi-transparent and consists of a single pigment (PB28). With this paint, it is easy to achieve smooth gradation, however, the pigment is quite heavy and therefore can granulate. I am applying the mix of pure Cobalt blue with a natural hair flat paintbrush. Because the paper is moist, it takes the paint readily. At the same time, I do not overload the paint brush with liquid, for the brushstrokes to stay in place and to not diffuse too widely. There should be a very fine balance between paper wetness and the amount of water on the brush. Because water evaporates quickly, I wet the muslin cloth with a flat brush, as well as apply clean water on the reverse side of the watercolor paper sheet. This way, I can keep the paper constantly moist and can continue painting wet-into-wet. The watercolor paper can also be moistened on its front surface; however, it has to be done only in areas which have not been painted yet.
I can now carry on painting the clouds with a darker blue color, which contains Indigo and Cobalt blue paints. For this task, I am also using a flat brush which holds less water, because the paper surface is already wet and I do not want to oversoak it. Because the paper surface dries fast, I am moistening it from time to time. I am painting the clouds with a semi-dry brush on the satin paper surface. The word 'satin' here means that the paper is no longer glossy but matte, because water is absorbed by the paper fibers. Such a balance of wetness allows me to make brushstrokes with soft borders that do not diffuse too much. I now lift another half of the sheet, to add clean water onto its reverse side. I moisten the muslin cloth as well. This will help to keep the paper sheet wet for a longer time. Today, there is very low humidity in my studio, hence why the paper dries so fast. I turn the board 180 degrees, so that the bottom part of an artwork is now raised slightly higher than the other end. In an upside-down position, it is easier to paint the sky next to the buildings, and preserve white paper of the skyline, because paint flows downward under the gravity. This is especially handy, as I do not want to use masking fluid to protect the skyline. Now, I turn the board back to its normal position, so I can make the finishing touches for the sky, and fine tune the shapes, tonal values and colors of the clouds. I am quite pleased with the sky; it was done in alla prima, in one go, painting wet-into-wet. By now, I am sure that you know that this is not the only way to paint the sky, as I have demonstrated in multiple lessons, there are various watercolor painting techniques that can also be used.
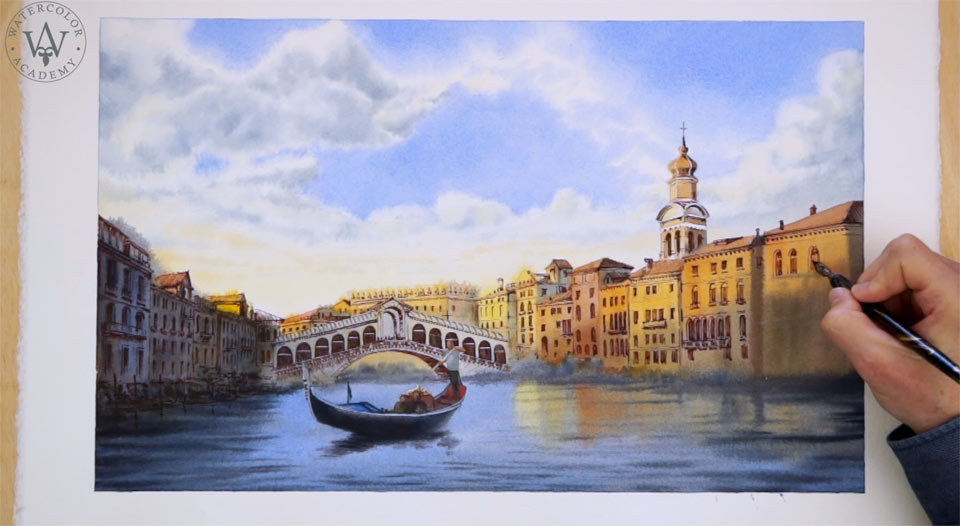
With the sky in place, I can now continue this artwork by painting the architecture. I begin with light colors of the buildings. The walls that are facing the setting Sun are covered in warm yellow, orange and red colors. I am applying those colors with a flat, natural-hair paintbrush, which works very well for two reasons. Firstly, it is easy to paint rectangular shapes with, but more importantly, this type of brush takes less water. This is exactly what I need at this step, because the paper is wet and I would like to keep the right balance of water on both the paper and the brush. After painting the warm light colors of light areas, I am now adding the dark and cold shadow colors. At this time, I am not interested in the small details of the architecture, but only the colors and tonal values of big shapes. Such shapes will become buildings later on. You can see that the brushstrokes are bold and the colors are strong. This gives a necessary contrast between the architecture and the sky. These strong colors will become up to 30% lighter when the paper is dry. But for now, I just have to guess how the color and tone will change, because I will keep this paper wet for quite some time, in order to complete this painting dry-brush-on-moist.
The dry-brush-on-moist watercolor painting technique has many advantages, but above all, it allows us to paint alla prima with soft borders of brush strokes, while at the same time keeping full control of the paint flow. However, it is not the easiest technique to use. The wetness of the paper changes constantly, because water is evaporating and more moisture is added with each brush stroke, so maintaining the right balance requires some practice. What you can see in this artwork so far doesn't resemble too much a well-defined cityscape. The buildings are colorful but diffused. On the left-hand side, they don't even look like buildings, and this is the beauty of the wash-and-outline technique. While painting in colors, I don't have to pay too much attention to the details of this composition. This gives me more time and freedom to concentrate on what is more important for this step – colors and tonal values. I can apply freely-flowing brushstrokes to depict big masses and totally ignore small details because they will be added later, not in watercolor, but in the drawing medium.
While the paper surface is still wet, I can wipe off light reflections of the buildings. Then I add yellow and orange colors to make those reflections more realistic. The paper surface will become dry soon, but I still have some time left to add smaller details, like this boat for example, dry-brush-on-moist. I will also mark few windows on the left-hand side. The sky is dry by now; that is why I paint the tower on the right-hand side wet-on-dry. Making this type of drawing using a brush is quite precise, and it creates a very appealing contrast between this tower and the rest of the buildings. I also add some rooftops and small boat details. This artwork is almost ready for the second part, which is outlining the drawing on top of the watercolor underpainting.
The watercolor underpainting is fully dry now, and I will outline the drawing with a pen and ink. The sepia ink I am using has a pleasant brown color, and I draw with this ink using a metal nib. What I like about the wash-and-outline technique, is that it is possible to use any drawing medium to outline the design. An ink doesn't have to be waterproof or water-resistant – any ink will do. Apart from using ink, you may use a ball pen, a marker, colored or black pencils or any other drawing medium that is suited for the creative task you have in mind.
It is your choice as to the amount of details you draw. An artwork can be generic or detailed, depending on the idea that you have in mind. You will find that wash-and-outline technique works very well for both monochrome and full-color artworks. Of course, when you make a multicolored picture, you have to consider how colors of paint and colors of the drawing medium will look together. When you make a monochrome artwork, it is often better to use similar colors for the underpainting and the outlines. The drawing doesn't have to always be darker than the underpainting. For example, you may produce very dark washes in watercolor, and then draw on top in white chalks, pencils or gouache.
I will now demonstrate this. Here is a white gouache which I have diluted with clean water. I use a dip pen with a metal nib to apply this white paint on paper. Of course, the white drawing stands out more when it is placed on the dark background. For this artwork, I only want to highlight certain areas of the architecture, because when white paint is overused, it may look artificial on the watercolor underpainting. This piece is now no longer a pure watercolor painting – it is instead a mixed-media artwork. It is a great way of making multicolored pictures, not only with a brush, but with a pen.
A self-study, self-paced course where you can learn how to paint in watercolor by watching video lessons and doing assignments
One-time payment - Lifetime membership
$297 USD
One-to-one, unlimited and custom-tailored to your skills and needs Personal Tutoring by the Watercolor Academy teachers
One-time payment - Lifetime membership
$997 USD


