Watercolor Academy Online Course
A self-study, self-paced course where you can learn how to paint in watercolor by watching video lessons and doing assignments
$297 USD
ENROLL NOWA self-study, self-paced course where you can learn how to paint in watercolor by watching video lessons and doing assignments
$297 USD
ENROLL NOWOne-to-one, unlimited and custom-tailored to your skills and needs Personal Tutoring by the Watercolor Academy teachers
$997 USD
ENROLL NOWVideo lesson by Vladimir London
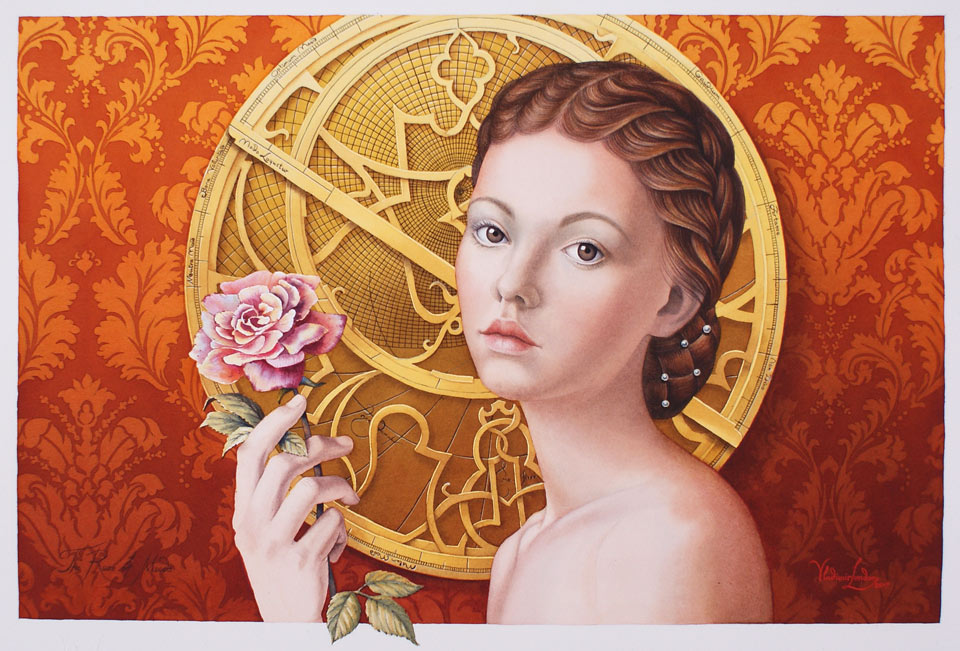
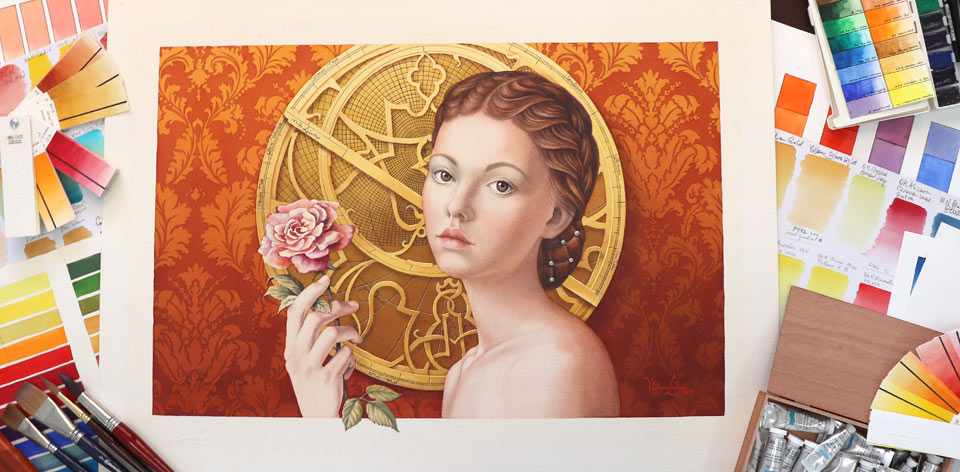
In this video lesson, you will discover how to create a watercolour portrait using the multilayer painting technique.
This artwork was exhibited at the International Watercolour Exhibition in Spain and is also featured in the printed exhibition catalog.
I will do this illustration on Saunders Waterford high-quality watercolour paper. The embossed watermark helps distinguish between the front and back sides of this paper. First, I wet the front side of this paper with a sponge and, when it's fully wet, I turn it over and place it on the clean wooden board, face-side down. Then, I thoroughly wet the reverse side of this sheet and let it absorb the water for several minutes. When the paper expands, I place the wooden board on top of the paper and will use a staple gun to affix the paper sheet to the board. I start stretching the paper by stapling it in the middle of the long sides. Then, I do the same for the short sides. When this sheet is secured in place, I work my way along all sides towards the corners and, at the end, do all four corners. Then, I can flip the board over and let it dry, face-up, for several hours. When the paper is fully dry, it is perfectly stretched and I can transfer the drawing onto it. To begin with, I'll outline in thin graphite pencil a white frame which will be a part of this design. I do it in thin lines using a ruler. With the frame marked down, I can now stick the tracing paper to the board on one side, using masking tape. The reason I do it on one side is to be able to flip up the tracing paper to see how the design is transferring. I use a black pen to clearly see which graphite lines are done and which remain. Also, from time to time, I check the progress of this step. To make the job easier, I will mask the white frame around this artwork with masking fluid. First, I wet a cheap, synthetic brush with liquid soap and then dip it in the masking fluid bottle. I will carefully go along the frame line, masking it freehand.
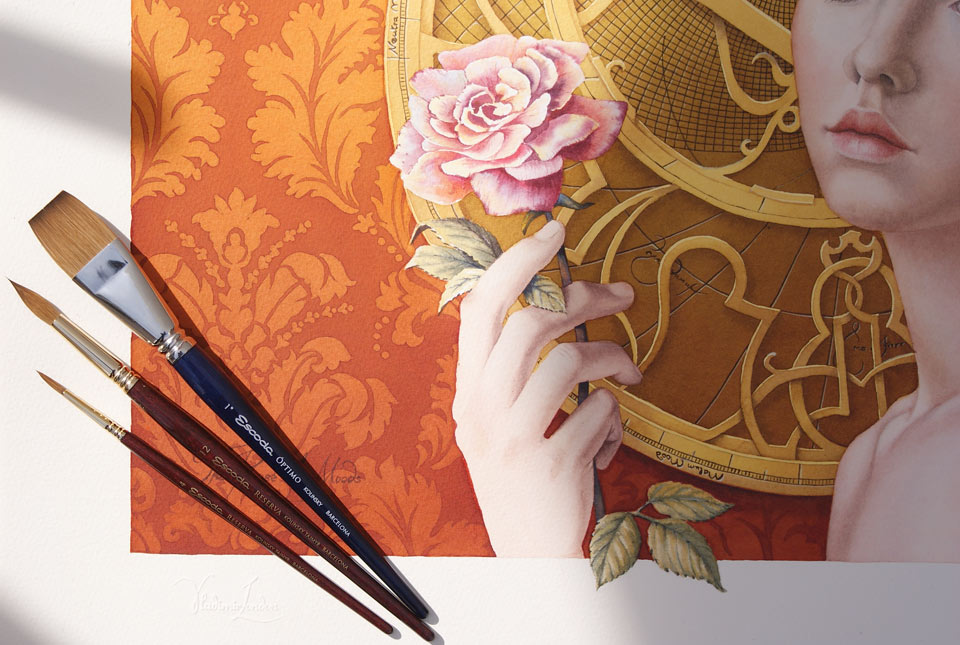
For the first wash, I'll use a natural-hair, round mop brush from Escoda. I premixed three colors, from yellow to orange, to make a gradated wash, which I will do wet-on-dry, starting with the yellow color. The masked frame makes it easier to keep a very straight line of the margin but I will paint around the circle freehand, without any masking.
After painting with only yellow color at the top, I'm now adding the orange pigment and blending it smoothly with the wet paint on paper. Although I started this wash as wet-on-dry, I can continue it as wet-into-wet. The pigments I'm using are from the St. Petersburg watercolour paints range. These are the cadmium yellow and golden pigments. I will do another variegated wash using the same pigments on the left-hand side of this composition.
I have to say that names of paints can be deceptive as different manufacturers may use the same name for different pigment paints. For example, the cadmium yellow from the St. Petersburg manufacturer contains a single yellow pigment, PY35. A paint with the identical name from Winsor & Newton consists of two pigments: orange and yellow, PO20 and PY35. I will now make a plain wash for the circle of the astrolabe. For this, I'll use pure Cadmium Yellow Lemon, which has a bright saturated yellow color. I'm carefully preserving white paper by painting around the head, the rose, and the hand. There is no masking fluid here. With the underpainting in place, I will now work on saturations and tones of the background. To give the orange background a deeper tone and higher saturation, I'm applying another gradated wash with golden pigment from the Russian manufacturer. A bit of scarlet pigment is also added to make this mix warmer and darker. So far, the background is very bright. To slightly mute it, I will do two more gradated washes using less saturated mixes of pigments.
You may notice that I apply the paint using the "saw wash" painting method, making a series of diagonally-slanted brush strokes that overlap each neighboring brush stroke without any gaps. Because the board is not horizontal, but tilted at about 15 degrees, the liquid paint flows down from one stripe of the paint to another, making a smooth wash without any visible brush stroke borders. When the paper is fully dry, I can now apply the masking fluid to preserve the Baroque design pattern. When the masking is fully dry, I can prepare the mix for the next layer which I will do with Alizarin Crimson Lake Extra from Old Holland. Technically, it's not the best idea to apply a very transparent watercolour paint on top of opaque and semi-opaque pigments. It might affect the texture of the painting layer, making it a bit velvety and duller. However, this is exactly what I would like to achieve in this case to make a difference between the Baroque pattern, which is painted in golden colors, and the darker background of this decoration. It is okay to bend the watercolour painting rules, as long as you know what you are doing and how it will affect your artwork. When painting in multiple glazing layers, you have to make sure that every previous layer is fully dry before applying the next one. This way, the color of each layer will play its role in the overall color of the artwork. Because watercolour is a transparent medium, the color of every layer shows through, contributing to the optical mixing of hues.
Before making this illustration, I have done a preliminary sketch in oil paints, featuring the same model and the Baroque style background but a different composition to get an idea what I would like to achieve from this watercolour illustration. By now, the background is fully dry and I can remove the masking film. I'm happy with the background but might come back to it to give another wash if I find it necessary after painting the astrolabe and the portrait.
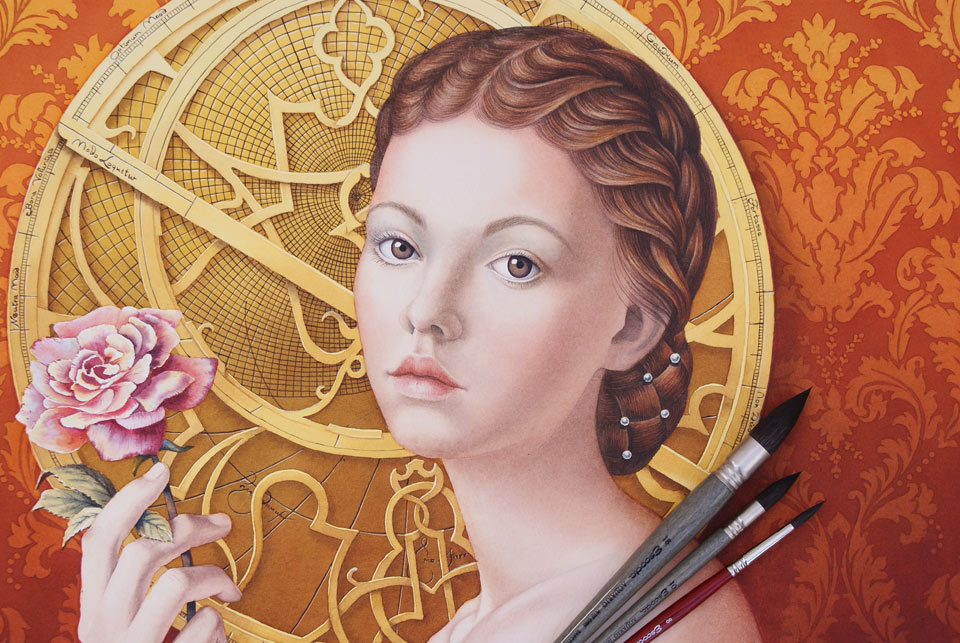
The astrolabe is made of brass and I will paint it in different shades of yellow pigments. First, I will try to paint around the astrolabe parts, preserving their colors, but the process is quite slow hat is why I will use a masking fluid which enables me to apply a variegated wash without worrying too much about the astrolabe design. For this, I mixed several orange and yellow colors. So, I will do the wash using a soft, round mop brush from Escoda, randomly applying those premixed colors. I will do these coats in several layers. Each layer must be totally dry before I apply the next one on top. Working in layers gives great control over tonal values. But this is not the only reason why I'm painting in multiple layers. Above all, this technique creates an optical mixing of colors when the hue of each layer shows through and contributes to the overall color of this astrolabe. Layer by layer, the tonal values of this astrolabe become darker and the color is more saturated. I achieved the color I wanted and now, the masking film can be removed from the paper's surface.
With a small, round brush made of high-quality Kolinsky Sable, I will do the delicate details of this astrolabe. These devices were used in the past, for observation and navigation purposes, to calculate the position of the sun and prominent stars. The first evidence of these devices goes back to the 6th Century and, by the middle of the 15th Century, seafaring sailors and travelers were using different types of astrolabes in celestial navigation.
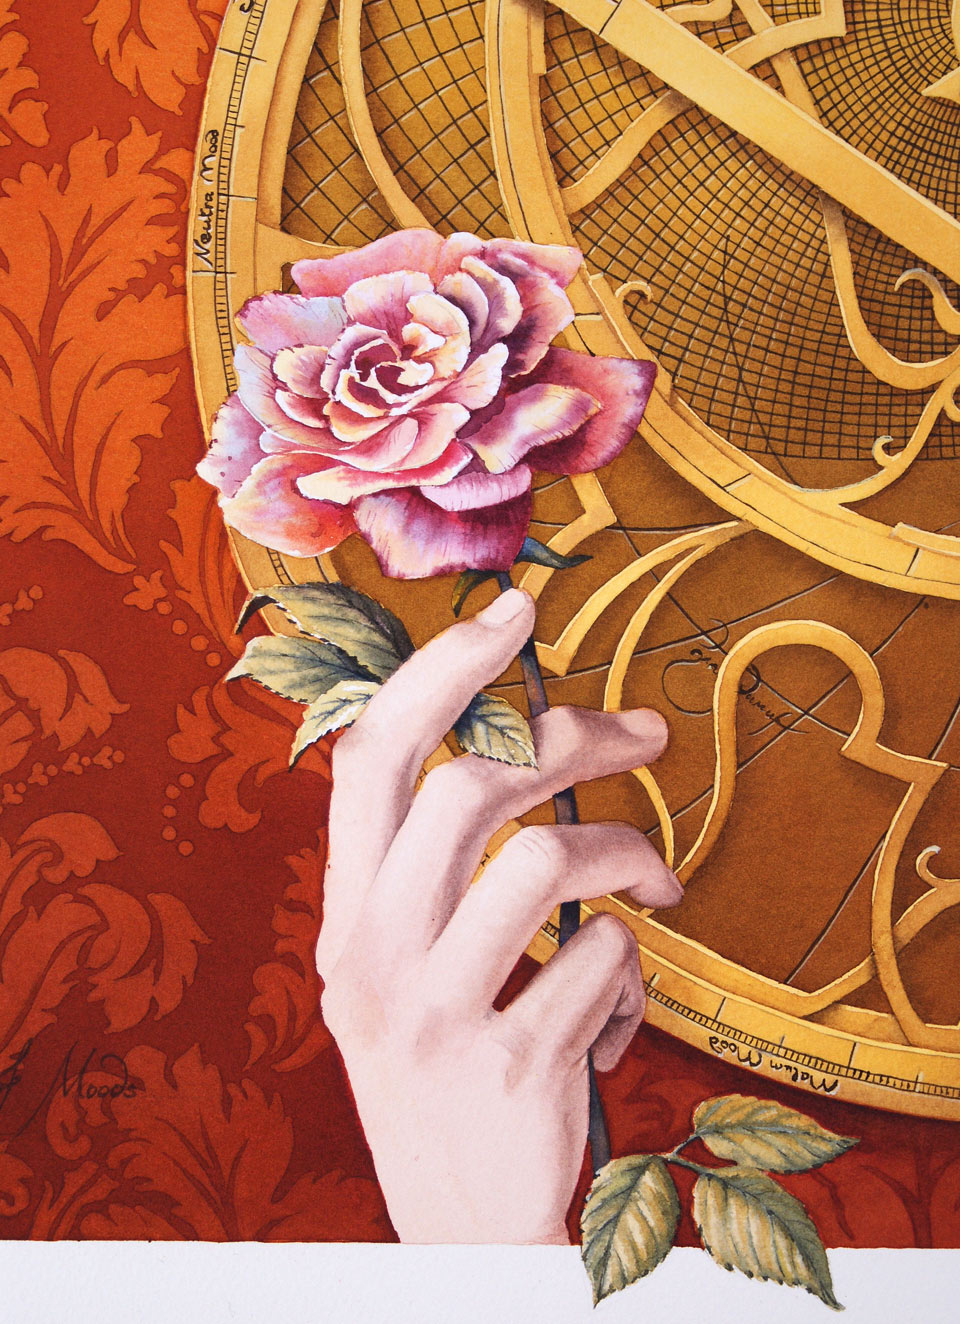
It's time to paint the portrait. I premixed several warm colors and will use a natural-hair, Kolinsky sable round brush from Escoda. I'll do this portrait in the multi-layer watercolour painting technique. The first layer is applied as a plain wash, wet-on-dry. I'm painting with a very light tint, covering the entire area of the skin - the face, neck, and shoulders, as well as using the same tint for the hand. When the first layer is fully dry, I will do the next one, wet-into-wet. To do this, I'll moisten the paper's surface with a flat, natural-hair, high quality brush from Escoda. With it, I apply clean water over the entire face. When this area of the painting is wet, I can swap this brush for the round one and add the orange pigment, spreading it softly without any sharp brush stroke borders. I will do the same for the neck and shoulders: first, moistening these areas of the portrait with clean water, using a soft, flat brush; and then adding orange pigment, wet-into-wet; and letting this layer fully dry as well.
I can now apply clean water again over the dry paper surface, to prepare it for the next layer, which I would also like to do wet-into-wet. This sequence of wetting the paper's surface, applying the pigments, then waiting until it's fully dry, will be repeated several times to gradually build tonal values and increase saturations of the skin color. To speed up this slow process, I'm using a hair dryer to prepare the paper's surface for each next layer. With a natural-hair round brush from Escoda, I will introduce light blue tints into the warm skin color. I apply this cold color on top of the warm underpainting because, if I were to do it in reverse order - painting warm colors on top of cool ones - the end result would look different.
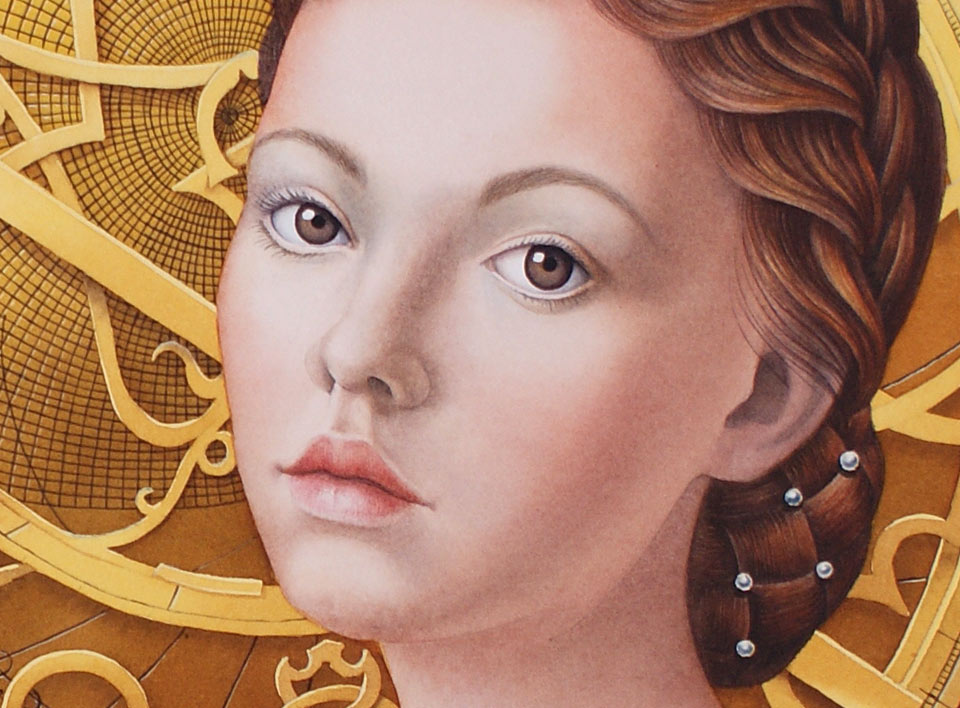
It's time to take care of the facial features. When it comes to depicting eyelashes, there is a good rule that comes from the Old Masters, who didn't paint separate eyelashes but united them into one bold and thick, dark line. I might, however, break this rule just to demonstrate to you that separate eyelashes can be painted as well, so you can decide which style you like better. Also, whichever style you decide to use, painting eyelashes in one line or in many brushstrokes, there is one rule you definitely need to follow: Upper eyelashes are longer and thicker, so their line must be bolder and darker; and there are not as many eyelashes on the lower eyelid, so they can be depicted with a slimmer and lighter line. When the light comes from above, there will always be a cast shadow under the upper eyelid. Another thing you have to remember is that the eye is essentially a ball and, as such, its tonal values - from light to shadows - must be depicted to make it three-dimensional. When painting the eyebrows, there is also a temptation to paint multiple brush strokes for the hairs, but you should remember that this is just a decoration and the actual shape of the eyebrow ridge is defined by the bones of the skull.
Painting eyelashes in female portraits might work well but you definitely have to think twice before doing it in male portraits. The eyes are now painted completely and I can see that the shadow on the face has to be deeper. Once again, I paint it wet-into-wet and soften its borders by absorbing excess paint with a damp brush. I'm thoroughly drying the paper's surface between layers. Each next layer I do wet-into-wet is darker and more saturated. From time to time, I get the same question about how many glazing layers it's best to apply when painting a portrait. This really depends on your creative task. It's perfectly possible to paint a portrait alla prima in just one layer of paint. However, if you would like to paint in multiple layers to achieve optical mixing of colors, in theory, there is no limit on how many layers you can do. However, in practice, it depends on your painting style, the quality of paper, pigments you use, and how light and transparent those layers are. It might take anywhere from three to 15 or even more layers, but there is one good rule you should always keep in mind: Regardless of how many layers you do, always keep an eye on having the painting surface vibrant and all layers of paint transparent. If the piece becomes dull, and paint layers non-transparent so you can't see white paper underneath, it is a definite sign that you went over the limit.
I also often get more general questions, like, how to paint a good portrait in watercolour? This depends on many things but, above all, on good drawing skills. A good portrait painting is always well-drawn and, to draw good portraits, an artist has to know the anatomy of the human head.
If Anatomy for Artists is not your strongest subject, you can learn it in a fast and easy way in the Anatomy Master Class, an online video course, which was created for artists like you who don't have a lot of time for learning. This is a great course, which comes with 25 video lessons on all you need to know about the anatomy of a human body, head, and face. For a one-time payment, it offers a lifetime membership and comes with unlimited, personal support from course tutors, and includes critiques of your figurative artworks at no extra charge.
However, the knowledge of anatomy is only part of what is required to become a professional portrait and figure artist. There are many other things - like constructive drawing principles, proportions and alignments of a human body, and special know-how of drawing portraits and figures. All this knowledge is presented in the Life Drawing Academy course. This course has 52 video lessons, which you can watch at your own pace in the comfort of your home and also benefit from the personal support of the academy's teachers.
If you would prefer the ultimate option of Academy tutors personally teaching you a step at a time, you might consider the Life Drawing Academy Correspondence Course. This one-on-one personal tutoring will include up to 100 drawing tasks that will bring your figurative drawing skills to an advanced level. The Life Drawing Academy tutors will create a special curriculum just for you, which will be custom tailored to your level of skills, taking into account your educational goals. If you take the Life Drawing Academy correspondence course and follow the guidance from the Academy teachers, task by task, this is a sure way to success. This correspondence course is unique. There is simply no other place where you can learn these traditional figure and portrait drawing techniques under personal guidance of professional fine artists and art teachers who will guide you, a step at a time, through all 100 drawing tasks until you achieve an advanced level of drawing skills, and be able to draw realistic and well-proportioned human portraits and figures from life, memory, and imagination.
You might already have good drawing skills and what you want to do is to learn how to paint in oils, using traditional and time-proven techniques. If this is your goal, you will find the following online course really helpful. Old Masters Academy is an online course where Natalie Richy, talented and professional fine artist and art teacher, explains and demonstrates in 60 video lessons how to paint in oil like the Old Masters, using modern materials. This online academy was founded to provide high quality art education based on the rich heritage of the art of traditional oil painting. The information presented in this course comes from extensive research of oil painting methods used during the Renaissance and Baroque periods, gathered from art museums around the world, from analysis of restoration work, from art bulletins, and many years of study and practice by the course's tutor. In the Old Masters Academy course, you will find out all you need to know about oil painting materials, the color theory and oil paint pigments. You will discover how to paint in smooth and impasto textures, and also will find a very comprehensive analysis of Titian's and Rembrandt's styles. In this course, you will learn how to paint like the Old Masters using such painting steps as imprimatura, under drawing, underpainting, grisaille, dead colors, scumbling, velaturas, and glazing. This course curriculum is designed as a complete step-by-step system of both theoretical and practical knowledge, from art vocabulary and art materials to how to paint like the Old Masters using modern materials. The Old Masters Academy course is comprehensive, but totally beginner-friendly.Even if you haven't spent a single day in an art school, you will be able to understand and follow the course curriculum. All you need to do is watch the video lessons one by one and use what you have learned in your creative projects. At the same time, even artists will find the Old Masters Academy course very useful because it teaches painting techniques that are not available from contemporary art schools and universities. This is the best oil painting learning experience you can have without leaving your home. All information is delivered online, including personal support by the course's tutor, Natalie Richy.
A self-study, self-paced course where you can learn how to paint in watercolor by watching video lessons and doing assignments
One-time payment - Lifetime membership
$297 USD
One-to-one, unlimited and custom-tailored to your skills and needs Personal Tutoring by the Watercolor Academy teachers
One-time payment - Lifetime membership
$997 USD


